Table of Contents
Advertisement
Quick Links
Advertisement
Table of Contents

Summary of Contents for Klutch 48520
- Page 1 Digital Display Air Pressure Gauge Owner’s Manual WARNING: Read carefully and understand all ASSEMBLY AND OPERATION INSTRUCTIONS before operating. Failure to follow the safety rules and other basic safety precautions may result in serious personal injury. Item #48520...
- Page 2 Thank you very much for choosing a Klutch™ product! For future reference, please complete the owner’s record below: Serial Number/Lot Date Code: ________________________________ Purchase Date: ____________________________________________ Save the receipt, warranty, and this manual. It is important that you read the entire manual to become familiar with this product before you begin using it.
-
Page 3: Table Of Contents
Table of Contents Intended Use ............................4 Technical Specifications ........................4 Important Safety Information ....................... 5 Specific Operation Warnings ....................... 6 Main Parts of Product ........................... 6 Assembly Instructions .......................... 7 Operating Instructions .......................... 8 Maintenance ............................8 Troubleshooting ............................ 9 Parts Diagram ............................ -
Page 4: Intended Use
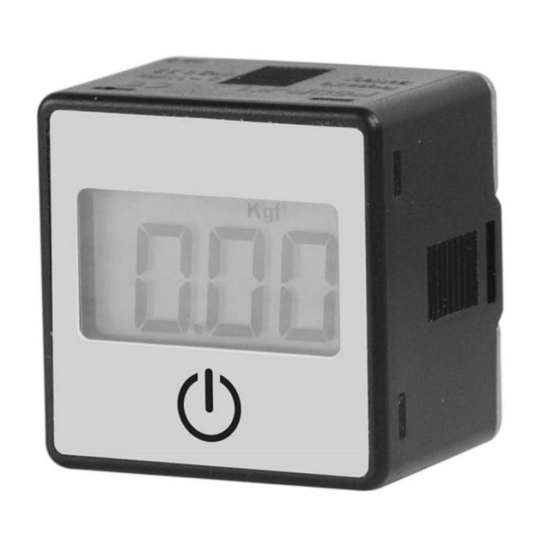
Intended Use The Klutch Digital Display Air Pressure Gauge is for use with air regulators for setting air output pressure of filtered air and incombustible and non-corrosive gases. The digital readout displays air pressure in a choice of four units: PSI, BAR, MpA, and Kg/Cm . -
Page 5: Important Safety Information
Important Safety Information ⚠WARNING Read and understand all instructions. Failure to follow all instructions may result in serious injury or property damage. The warnings, cautions, and instructions in this manual cannot cover all possible conditions or situations that could occur. Exercise common sense and caution when using this pressure gauge. Always be aware of the environment and ensure that the tool is used in a safe and responsible manner. -
Page 6: Specific Operation Warnings
goggles (not safety glasses) with side shields, or when needed, a face shield. Use a dust mask in dusty work conditions. Also use non-skid safety shoes, hardhat, gloves, dust collection systems, and hearing protection when appropriate. This applies to all persons in the work area. ... -
Page 7: Assembly Instructions
Panel Description Dimensions Assembly Instructions 1. Unscrew the pressure gauge port bolt on regulator or filter & regulator combination. " 2. Replace the bolt with the digital pressure gauge corresponding to the size of the port (1/8 3. The pressure gauge can be installed on either of the two pressure gauge ports on the regulator. Page 7 of 12... -
Page 8: Operating Instructions
Operating Instructions Power Saver Mode 1. The pressure gauge will enter the power saving mode if the button is not pressed for 60 sec. 2. In the measure mode, press the button to extend the display for 120 sec. Pressure Unit Setting Mode Zero Point Reset Maintenance Dust and Splash Environment... -
Page 9: Troubleshooting
Battery Replacement Follow these steps: 1. Using a flat screwdriver (size 1.4 ~ 3.0 mm) insert into the back of the pressure gauge as pictured. See figure 2. 2. Turn the screwdriver horizontally 90° to separate the case and the base. Repeat the process again for the other side. -
Page 10: Parts Diagram
Parts Diagram Meter Body Parts List Reference Part Number Quantity Front Protective Lid Panel Adapter Meter Body Replacement Parts For replacement parts and technical questions, please call Customer Service at 1-800-222-5381. Not all product components are available for replacement. The illustrations provided are a convenient reference to the location and position of parts in the assembly sequence. -
Page 11: Limited Warranty
Northern Tool and Equipment Company, Inc. ("We'' or "Us'') warrants to the original purchaser only ("You'' or "Your") that the Klutch product purchased will be free from material defects in both materials and workmanship, normal wear and tear excepted, for a period of one year from date of purchase. The foregoing warranty is valid only if the installation and use of the product is strictly in accordance with product instructions. - Page 12 Distributed by: Northern Tool & Equipment Company, Inc. Burnsville, Minnesota 55306 www.northerntool.com Made in India Page 12 of 12...