Advertisement
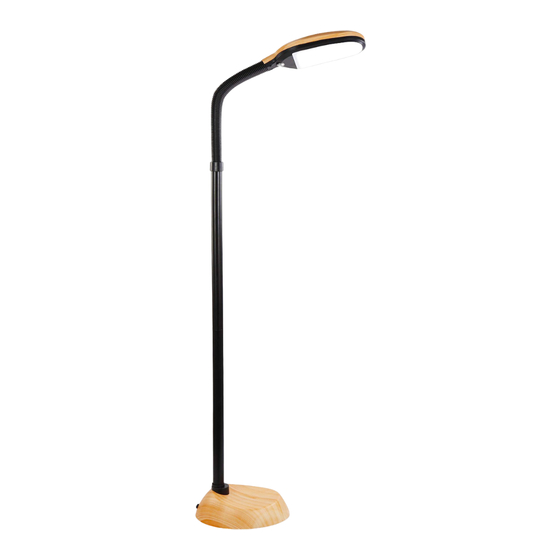
Litespan LED Floor Lamp
1- Thread the power cord extending from the gooseneck head (A) through
upper pole (B), middle pole (C), and lower pole (D). Screw the pole pieces
clockwise into place, taking care not to pinch the wires in the threading.
2- Connect the power cord to the cord end extending from the base (G). The
white lock connectors (E) should click together into place. DO NOT CUT OR
SHORTEN excess power cord, this must be fed into the pole as you connect
it to the base.
3- Screw the assembled pole onto collar (F), making sure the threading of
the pole lines up properly with the threading on the collar. If you feel
resistance or find it difficult to tighten, please disassemble the pieces and try
again.
4- Connect power supply adapter (H) to the lamp first, then outlet, then
power on.
Operations and Features:
Built-in LED bulb - 12 watts
Lumens – 850 Lumens
Color Temperature – 6000 Kelvin
The Litespan is controlled by a push button located on the lamp head. It acts
as both the on/off switch and the dimmer button. To turn the lamp on or off,
give it a firm but quick press, just for a second. Holding it down any longer
than that will direct the lamp to dim. If you do want to dim, just hold down the
button and the light will begin moving down through the different brightness
levels, then back up when it reaches the bottom. Once you reach the desired
level, release the button.
Advertisement
Table of Contents

Summary of Contents for BRIGHTECH Litespan
- Page 1 Lumens – 850 Lumens Color Temperature – 6000 Kelvin The Litespan is controlled by a push button located on the lamp head. It acts as both the on/off switch and the dimmer button. To turn the lamp on or off, give it a firm but quick press, just for a second.
- Page 2 Do not use this product outside of its intended and advertised use. Brightech is not responsible for modifications to this product or any of its electrical components, or for use with externally purchased parts not manufactured to come with this product.
Need help?
Do you have a question about the Litespan and is the answer not in the manual?
Questions and answers
How do I fit the disassembled led floor lamp back in its shipping box?