Table of Contents
Advertisement
Quick Links
Advertisement
Table of Contents

Related Manuals for Rogers NetComm LIBERTY Series


Summary of Contents for Rogers NetComm LIBERTY Series
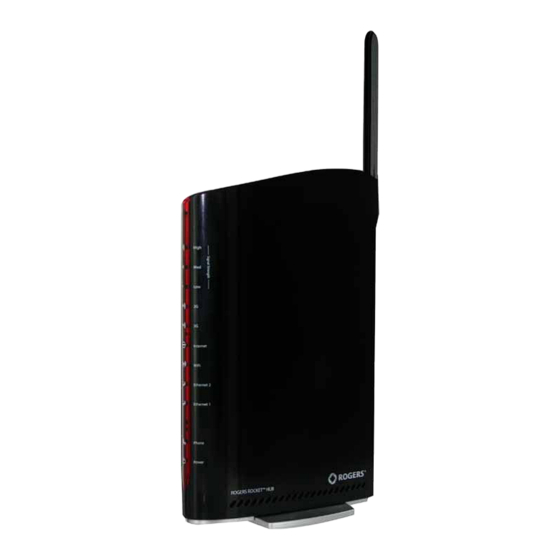
- Page 1 RogeRs Rocket™ Hub NetComm LIBeRtY SeRIeS...
- Page 2 • the antennas must be connected to this product prior to connecting the telephone cord. • the telephone cord must be disconnected prior to disconnecting the antennas. RogeRS RoCket HuB™ user guide YmL10WVR2 www.netcommlimited.com...
-
Page 3: Table Of Contents
8.7 Dynamic Host Configuration Protocol (DHCP) ..............................52 8.8 PING............................................52 Appendix A: Print Server ��������������������������������������������������������������������������������������������������������������������������������������������������������������������� 54 For Windows Vista/7 ........................................54 For MAC OSX ..........................................56 Appendix B: USB Storage ������������������������������������������������������������������������������������������������������������������������������������������������������������������� 58 For Windows Vista/7 ........................................58 For MAC OSX ..........................................58 Legal & Regulatory Information ���������������������������������������������������������������������������������������������������������������������������������������������������������� 59 YmL10WVR2 RogeRS RoCket HuB™ user guide www.netcommlimited.com... - Page 4 IntRoductIon...
-
Page 5: Introduction
Your package contains the following: • 3g10WVR2 – HSPA WiFi Router with Voice • Printed Quick Start guide • ethernet Cable • Wireless Security Card • 1 x 3g Antenna • Power Supply • Support CD YmL10WVR2 RogeRS RoCket HuB™ user guide www.netcommlimited.com... -
Page 6: Led Indicators
LeDs on the right side of the front panel display (Internet, 3g, 2g, Low, med, High) will cycle on and off if PIN code protection is activated. In this case, you should consult section 4.2.1 PIN Code Protection for further instructions. RogeRS RoCket HuB™ user guide YmL10WVR2 www.netcommlimited.com... -
Page 7: Rear Panel
Power jack for DC power input (12VDC / 1.5A) Power button uSIm card slot Aux 3g Antenna (internal) uSB Port (For connecting a uSB Printer or uSB Storage Device) Reset button Phone Port (for Circuit-Switched Voice Call) 2 RJ-45 ethernet Ports YmL10WVR2 RogeRS RoCket HuB™ user guide www.netcommlimited.com... - Page 8 QuIck setup...
-
Page 9: Quick Setup
Chapters 3 through 8 explain how to setup and use the WuI 9. Save the router configuration and reboot (see section 6.4). Laptop 3G Tower Smart Phone Printer USB Storage Telephone Computer Computer YmL10WVR2 RogeRS RoCket HuB™ user guide www.netcommlimited.com... - Page 10 Web useR InteRface...
-
Page 11: Web User Interface
PC for DHCP mode, check the Internet Protocol properties of your Local Area Connection. You can set your PC to DHCP mode by selecting obtain an IP address automatically in the dialog box shown below. YmL10WVR2 RogeRS RoCket HuB™ user guide www.netcommlimited.com... - Page 12 IP address of the router is 192.168.1.1 (default), so the PC must be set with a different IP. In the case below, the PC’s IP address is set as 192.168.1.2 3. Click ok to submit the settings. RogeRS RoCket HuB™ user guide YmL10WVR2...
- Page 13 IP address of the router is 192.168.1.1 (default), so the computer must be set with a different IP to the router. In the case below, the PC’s IP address is set as 192.168.1.2 5. Click Apply to submit the settings. YmL10WVR2 RogeRS RoCket HuB™ user guide www.netcommlimited.com...
-
Page 14: Login Procedure
H e lp Click t h is I co n fo r on l i n e use r guid e RogeRS RoCket HuB™ user guide YmL10WVR2 www.netcommlimited.com... - Page 15 3g settIngs...
-
Page 16: Settings
If the LeDs light in an on/off pattern moving from left to right this indicates that your SIm is PIN Locked, please lee PIN Lock off on page 17 for instruction on how to fix this RogeRS RoCket HuB™ user guide YmL10WVR2 www.netcommlimited.com... -
Page 17: Pin Configuration
PIN code every time when the router turns on. After you do so, the following dialog box should appear. You can now return your SIm card to your cellular phone or other mobile device. YmL10WVR2 RogeRS RoCket HuB™ user guide www.netcommlimited.com... - Page 18 If you forget to change the PIN Code without first turning on PIN lock protection, you will see this dialog box as a helpful reminder. Note: If your PIN Code change request was successful the following dialog box will display. RogeRS RoCket HuB™ user guide YmL10WVR2 www.netcommlimited.com...
- Page 19 WIReless...
-
Page 20: Wireless
Cl ie nts I s o latio n Pre vent w ire l e ss c l i ent s f ro m co mm unicati ng wit h ea ch other Note: wireless hosts cannot scan guest SSIDs. RogeRS RoCket HuB™ user guide YmL10WVR2 www.netcommlimited.com... -
Page 21: Security
R A D IuS S er ver I P ad d ress, Por t and k ey fi eld s. WeP en cr y ptio n w i l l a l so b e e n a b l e d. YmL10WVR2 RogeRS RoCket HuB™ user guide www.netcommlimited.com... -
Page 22: Configuration
Set the wake-up interval for clients in power-save mode • Set the beacon interval for the access point • Set Xpress mode • Program short or long preambles Click Save/Apply to set the advanced wireless configuration. RogeRS RoCket HuB™ user guide YmL10WVR2 www.netcommlimited.com... - Page 23 Lo n g p reambl e wo r k s w i t h t h e cu r re nt 1 a nd 2 mbi t /s D SS S specif icat i on as d escr ibed in Ie ee Std 802.11- 19 99 trans m it Power S et th e p ower o u t pu t ( by p ercent a g e ) a s d esi re d. YmL10WVR2 RogeRS RoCket HuB™ user guide www.netcommlimited.com...
-
Page 24: Mac Filter
: x x : x x : x x : x x : x x : x x where x x are hex a d ec i ma l num be rs. A ma x im um of 60 mAC a dd re sse s c a n b e a d d ed. enter the mAC address on the screen below and click Save/Apply. RogeRS RoCket HuB™ user guide YmL10WVR2 www.netcommlimited.com... -
Page 25: Wireless Bridge
Auth o r ize d List s th o se dev i ces w i t h a u t h o r i ze d access. YmL10WVR2 RogeRS RoCket HuB™ user guide www.netcommlimited.com... - Page 26 ManageMent...
-
Page 27: Management
By clicking on the Browse button, you can locate a previously saved filename as the configuration backup file. Click on the update settings to load it. YmL10WVR2 RogeRS RoCket HuB™ user guide www.netcommlimited.com... - Page 28 2 minutes to complete. the Router will reboot and the browser window will refresh to the default screen upon successful installation. It is recommended that you compare the Software Version at the top of the Basic screen (WuI homepage) with the firmware version installed, to confirm the installation was successful. RogeRS RoCket HuB™ user guide YmL10WVR2 www.netcommlimited.com...
-
Page 29: Configure Snmp Agent On 3G10Wvr2
2. the login username and password by default is admin/admin. 3. go to management> SNmP 4. enable SNmP agent and set up all options according to the description form below. 5. Press Save/Apply to activate setting. YmL10WVR2 RogeRS RoCket HuB™ user guide www.netcommlimited.com... -
Page 30: Simple Network Time Protocol (Sntp)
Select second timeserver, if required. time zone offset: Select the local time zone. Configure these options and then click Save/Apply to activate. Note: SNtP must be activated to use Parental Control (section 7.3.2). RogeRS RoCket HuB™ user guide YmL10WVR2 www.netcommlimited.com... -
Page 31: Access Control
Service Control List (SCL) allows you to enable or disable your Wide Area Network (WAN) services by ticking the checkbox as illustrated below. these access services are available: FtP, HttP, ICmP, SNmP, SSH, teLNet, and tFtP. Click Save/Apply to continue. YmL10WVR2 RogeRS RoCket HuB™ user guide www.netcommlimited.com... - Page 32 Static IP settings. Note2: If you lose all access to your web user interface, simply press the reset button on the rear panel for 5-7 seconds to restore default settings. RogeRS RoCket HuB™ user guide YmL10WVR2 www.netcommlimited.com...
- Page 33 advanced setup...
-
Page 34: Advanced Setup
Advanced Setup this chapter explains advanced setup for your Router: 7.1 Local Area Network (LAN) this screen allows you to configure the Local Area Network (LAN) interface on your Router. RogeRS RoCket HuB™ user guide YmL10WVR2 www.netcommlimited.com... - Page 35 Save button saves new settings to allow continued configuration, while the Save/Reboot button not only saves new settings but also reboots the device to apply the new configuration (i.e. all new settings). YmL10WVR2 RogeRS RoCket HuB™ user guide www.netcommlimited.com...
-
Page 36: Network Address Translation (Nat)
(when you se lec t Custom S er ver ). Whe n a ser vi ce i s se l e c te d t h e p o r t ra nges a re automati c ally confi gure d. RogeRS RoCket HuB™ user guide YmL10WVR2... - Page 37 Virtual Servers table to the DmZ host computer. enter the computer’s IP address and click Apply to activate the DmZ host. Clear the IP address field and click Apply to deactivate the DmZ host. YmL10WVR2 RogeRS RoCket HuB™ user guide www.netcommlimited.com...
-
Page 38: Security
Incoming IP Filter the default setting for all Incoming traffic is BLoCkeD. under this condition only those incoming IP packets that match the filter rules will be ACCePteD. RogeRS RoCket HuB™ user guide YmL10WVR2 www.netcommlimited.com... - Page 39 B lo ck in g time th e t i m e t h e re st r i c t i ons end. YmL10WVR2 RogeRS RoCket HuB™ user guide www.netcommlimited.com...
-
Page 40: Routing
RIP version and operation, followed by placing a check in the enabled checkbox for that interface. Click Save/Apply to save the configuration and to start or stop dynamic routing. RogeRS RoCket HuB™ user guide YmL10WVR2... - Page 41 DNS server. Interface Select the interface from the list. username enter the username for the dynamic DNS server. Password enter the password for the dynamic DNS server. YmL10WVR2 RogeRS RoCket HuB™ user guide www.netcommlimited.com...
- Page 42 voIce...
-
Page 43: Voice
R o cket H ub will f u n c ti o n a l o n l y i n Ca n a d a , an d o n ly o n th e R o g e rs Wirel e ss Ne t wor k YmL10WVR2 RogeRS RoCket HuB™ user guide www.netcommlimited.com... - Page 44 status...
-
Page 45: Status
I nter net, th e re i s n o n e ed to t ro ub l eshoot t hi s i ssue. YmL10WVR2 RogeRS RoCket HuB™ user guide www.netcommlimited.com... -
Page 46: System Log
Wh e n ei t h e r R emote m od e or B ot h mod e is conf i gured, t he WeB uI will p ro mp t t h e yo u to enter t h e S er ver IP a d dres s a nd S er ver uD P por t. RogeRS RoCket HuB™ user guide YmL10WVR2... - Page 47 RogeRS RoCket™ HuB NetComm LIBeRtY SeRIeS 3. Click View System Log. the results are displayed as follows. YmL10WVR2 RogeRS RoCket HuB™ user guide www.netcommlimited.com...
-
Page 48: Network
8.3 3g Network Select this option for detailed status information on your Routers 3g connection. RogeRS RoCket HuB™ user guide YmL10WVR2 www.netcommlimited.com... - Page 49 R e ce ive d S ign al Co d e Power ( R SC P) th e R S C P o f t h e a c t ive se t ’s three st rongest cells YmL10WVR2 RogeRS RoCket HuB™ user guide www.netcommlimited.com...
-
Page 50: Statistics
RogeRS RoCket HuB™ user guide YmL10WVR2 www.netcommlimited.com... -
Page 51: Route
I ncomple te Pe r m anent Publish HW Ad dre s s S hows the mAC ad d ress of host pc D ev ice S hows the connec t ion i nter face YmL10WVR2 RogeRS RoCket HuB™ user guide www.netcommlimited.com... -
Page 52: Dynamic Host Configuration Protocol (Dhcp)
S h ows h ow m u ch ti m e is le f t for ea ch DH C P Lease 8.8 PINg the PINg menu provides feedback of connection test to an IP address or a host name. Input an IP address or a host name, e.g www.google.com and press Submit. RogeRS RoCket HuB™ user guide YmL10WVR2 www.netcommlimited.com... - Page 53 appendIces...
-
Page 54: Appendix A: Print Server
1. go to the control panel, and select ‘Printers’ if you are using Windows Vista or select “Devices and Printers” if you are using Windows7. once in the ‘Printers’ page, click the ‘Add a printer’ button as shown below. Select ‘Add a network, wireless or bluetooth printer’ . RogeRS RoCket HuB™ user guide YmL10WVR2 www.netcommlimited.com... - Page 55 Choose whether you want this printer to be the default printer, and then click ‘Next’ . 4. Click ‘Finish’ . Your device is now configured and ready for use. YmL10WVR2 RogeRS RoCket HuB™ user guide www.netcommlimited.com...
-
Page 56: For Mac Osx
Protocol drop down list and select Internet Printing Protocol – IPP. Input the Address field with “192.168.1.1:631” and the Queue with “/printers/PrinterName” Note: the PrinterName must be the same as the printer name entered into the Printer section of 3g10WVR2. RogeRS RoCket HuB™ user guide YmL10WVR2 www.netcommlimited.com... - Page 57 RogeRS RoCket™ HuB NetComm LIBeRtY SeRIeS From Print using drop down list and select your corresponding printer driver. Click Add and check the printer status. YmL10WVR2 RogeRS RoCket HuB™ user guide www.netcommlimited.com...
-
Page 58: Appendix B: Usb Storage
Choose Connect to Server from the go menu. In the address field of the Connect to Server dialog, type in the uRL Smb://“NetbiosName”/“DirectoryName” (eg smb://Rocket Hub/ uSB-Storage) Select Connect to connect your uSB storage. RogeRS RoCket HuB™ user guide YmL10WVR2 www.netcommlimited.com... -
Page 59: Legal & Regulatory Information
(1) this device may not cause interference, and (2) this device must accept any interference, including interference that may cause undesired operation of the device. YmL10WVR2 RogeRS RoCket HuB™ user guide www.netcommlimited.com... - Page 60 (1) this device may not cause interference, and (2) this device must accept any interference, including interference that may cause undesired operation of the device. RogeRS RoCket HuB™ user guide YmL10WVR2 www.netcommlimited.com...
- Page 61 W: www.netcommlimited.com 2010 Rogers Wireless. Rogers, le ruban de Möbius, Parlez à la carte et c@montour sont des marques de commerce, ou utilisées sous licence, de Rogers Communications inc. ou d’une société de son groupe. NetComm et le logo NetComm sont des marques de commerce de NetComm Limité © 2010 Rogers Sans-fil.
Need help?
Do you have a question about the NetComm LIBERTY Series and is the answer not in the manual?
Questions and answers