
Subscribe to Our Youtube Channel
Related Manuals for My Robot Time 34 Empregado robo

Summary of Contents for My Robot Time 34 Empregado robo
- Page 1 34 Empregado robô Peças Bloco 5x5 (1) Bloco 11x17 (2) Bloco 1x5 (4) S-shaft Bloco de união 1 (2) Eixo S (2) Bloco de união 2 (2) Bloco 1x11 (3) Borracha de eixo vermelha (4) Anilha (6) MY ROBOT TI M E ROBOTICA 31-35_PT.indd 30 03/08/2022 12:49:30...
- Page 2 PASSO 1 Bloco N 2x11 (2) Bloco olho (2) Bloco 45 º (2) Bloco 90 º (4) Adaptador L (2) Engrenagem L (2) Bloco 5x11(3) LED G (1) LED Y (1) Suporte de motor (3) Roda M (2) Cabo de conexão (3) Extensor de cabo (2) Motor 2 (2) Sensor R/C (1)
- Page 3 Nota: o triângulo vermelho assinala a posição. MY ROBOT TI M E \ ROBOTICA 31-35_PT.indd 32 03/08/2022 12:49:35...
- Page 4 PASSO 1 MRT Gui d e book seri e s ROBOTICA 31-35_PT.indd 33 03/08/2022 12:49:38...
- Page 5 MY ROBOT TI M E \ ROBOTICA 31-35_PT.indd 34 03/08/2022 12:49:41...
- Page 6 PASSO 1 MRT Gui d e book seri e s ROBOTICA 31-35_PT.indd 35 03/08/2022 12:49:43...
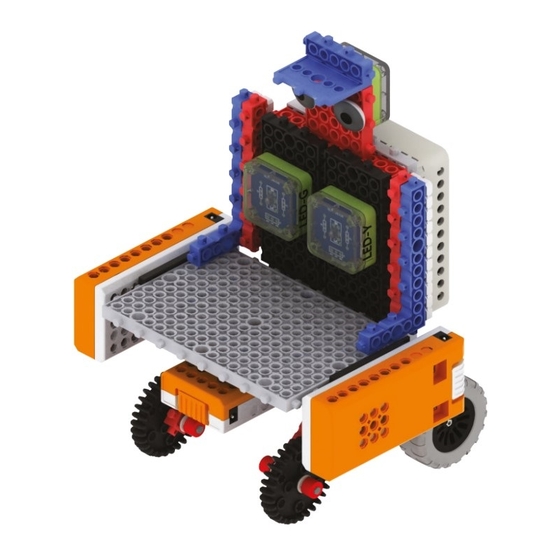
- Page 7 Como fazer a ligação? LED Y Leitor de cartões LED G Motor 2 Faz com que o corresponda conector do cabo do leitor de cartões Porta-pilhas MY ROBOT TI M E ROBOTICA 31-35_PT.indd 36 03/08/2022 12:49:45...
- Page 8 PASSO 1 Press the key Press the key Key off Press the key Press the key Press the key F1 Press the key F2 Press the key F3 Stop Turn right Forward Backward Programação: 1. Cycle start (all time) 2. Press the key 3.
Need help?
Do you have a question about the 34 Empregado robo and is the answer not in the manual?
Questions and answers