Subscribe to Our Youtube Channel
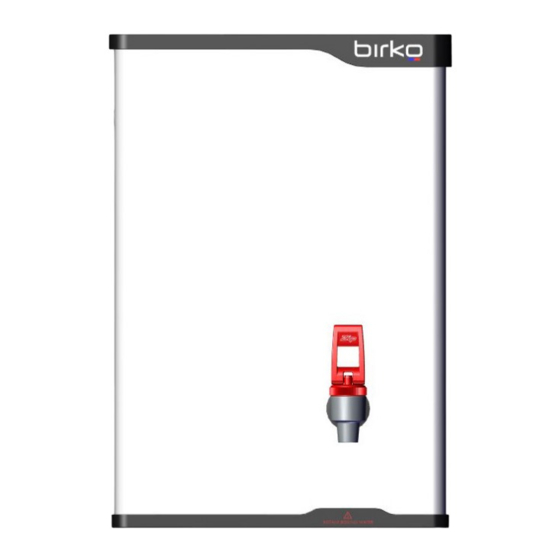
Summary of Contents for Birko TempoTronic 3L
- Page 1 Installation instructions TempoTronic Models: TempoTronic: 3L, 5L, 7.5L, 15L, 25L TempoTronic + Timer: 3L, 5L 6001100 v1.00 04.21 Birko TempoTronic...
-
Page 2: Table Of Contents
Step 1 – Positioning Step 2 – Fastening Step 3 – Plumbing connection Step 4 – Electrical connection Step 5 – Assembly Step 6 – Commissioning Tap operation Timer operation Troubleshooting Spare parts Cleaning End of life disposal 6001100 v1.00 04.21 Birko TempoTronic... -
Page 3: Warnings & Precautions
If the appliance is located where ambient air temperature could fall below 5ºC when the appliance is not in use, do not turn it off electrically. This safeguard does not offer the same protection to the connecting pipework and fittings. 6001100 v1.00 04.21 Birko TempoTronic... - Page 4 14. Due to the process of continuous improvement, Birko reserves the right to change details mentioned in this manual, without notice. Visit birko.com to ensure you have the latest copy of this document.
-
Page 5: Technical Specification
500 kPa (5.0 bar) • The appliance must be placed upright with its base in a horizontal position. IMPORTANT! Do not proceed with the installation if these requirements are not met. 6001100 v1.00 04.21 Birko TempoTronic... -
Page 6: Step 1 - Positioning
Mark corners of the appliance on the wall. 15L, 25L: ≥ 150mm Place supplied paper template on the wall. Drill holes as shown. Cold water supply OPTION: Drill holes for concealed plumbing (water inlet, vent outlet) and electrical. 6001100 v1.00 04.21 Birko TempoTronic... -
Page 7: Step 2 - Fastening
Use supplied wall screws to mount the appliance to the wall. 3 - 7.5 litre models Escutcheon Tap nut Terminal block Concealed access Strain relief bush (cable gland) 10 - 25 litre models Terminal block Concealed access Strain relief bush (cable gland) 6001100 v1.00 04.21 Birko TempoTronic... -
Page 8: Step 3 - Plumbing Connection
Hydroboil directly to the 12.7mm (½” BSP) compression fittings with nuts and olives supplied. dish install a visible tundish and plumb to trapped waste. ory) Ensure access for filter replacement is not obstructed. External tundish COLD WATER SUPPLY 6001100 v1.00 04.21 Birko TempoTronic... -
Page 9: Step 4 - Electrical Connection
15L, 25L, 40L models: 150 Connect the cable plug to a 220-240V AC power outlet. Do not turn power ON until the TempoTronic tlet can dispense water from the tap outlet. Tundish l accessory) 6001100 v1.00 04.21 Birko TempoTronic... -
Page 10: Step 5 - Assembly
Step 5 – Assembly Refit cover. Fix with Apply thread tape to screws, top and bottom. thread. Turn tap until it touches Use spanner (supplied) to the lock nut and is upright. tighten the lock nut. 6001100 v1.00 04.21 Birko TempoTronic... -
Page 11: Step 6 - Commissioning
Once water is available from the tap, close the tap to stop water flow. Turn ON electrical power Boiling Calibration will commence. The tank will fill and heat. Allow 15-30 minutes for the water to reach boiling set temperature. 6001100 v1.00 04.21 Birko TempoTronic... -
Page 12: Tap Operation
The TempoTronic is fitted with a two-way, cool-touch tap. Boiling water will be dispensed Press lever to dispense boiling water. Push to lock for continuous flow. If lever does not lock, rotate it 180° before dispensing. 6001100 v1.00 04.21 Birko TempoTronic... -
Page 13: Timer Operation
Set hour: Press and hold the CLOCK button and then press HOUR button until the correct hour is displayed. Set minute: Press and hold the CLOCK button and then press MIN button until the correct minute is displayed. 6001100 v1.00 04.21 Birko TempoTronic... - Page 14 --:-- --:-- --:-- --:-- --:-- --:-- --:-- --:-- --:-- --:-- --:-- --:-- --:-- --:-- --:-- --:-- --:-- --:-- --:-- --:-- --:-- --:-- --:-- --:-- --:-- --:-- --:-- --:-- --:-- --:-- --:-- --:-- --:-- --:-- --:-- 6001100 v1.00 04.21 Birko TempoTronic...
- Page 15 15 Sa Su second period. PROG To review the set program, press the TIMER button and the settings will be displayed on the screen. Fig.d 1st ON time 6001100 v1.00 04.21 Birko TempoTronic...
- Page 16 At the end of the override period the program will revert back to the preset program mode. NB: To cancel the override mode, press either the “SEL” or “OVERRIDE” button anytime during the override period. * This feature complies with the BCA (Building Code of Australia), Section J6. 6001100 v1.00 04.21 Birko TempoTronic...
-
Page 17: Troubleshooting
Troubleshooting In the event of a fault or failure, isolate power and water. Do not use the appliance. Contact a Birko authorised service agent for assistance, service, spare parts or enquiries. Symptom Possible cause Solution Water isolating valve turned off. -
Page 18: Spare Parts
Birko Tap assy TT 1311059 Tap Insert Assy Birko 1312222 Escutcheon Black TT 1312223 Tap Lock Nut (w/ Flats) 1312224 Timer Loom Birko TT 5l 1312225 Thermostat EA3513R 88º+/-1.5 1312226 Thermostat EA3513A 85º+/-1.5 1312227 Inlet assy 3l 1312228 Inlet assy 5l 1312229 Inlet assy 7.5l... -
Page 19: Cleaning
End of life disposal In order to help preserve our environment we ask that you dispose of this product correctly. Please contact your local city council for collection centre details. 6001100 v1.00 04.21 Birko TempoTronic... - Page 20 Images in this booklet have been modified and may not be true representations of the finished goods. The term “Birko” is a registered trade mark of Birko Heaters Australia Pty Ltd. © 2020 Birko Heaters (Aust) Pty. Ltd.


Need help?
Do you have a question about the TempoTronic 3L and is the answer not in the manual?
Questions and answers