Table of Contents
Advertisement
Quick Links
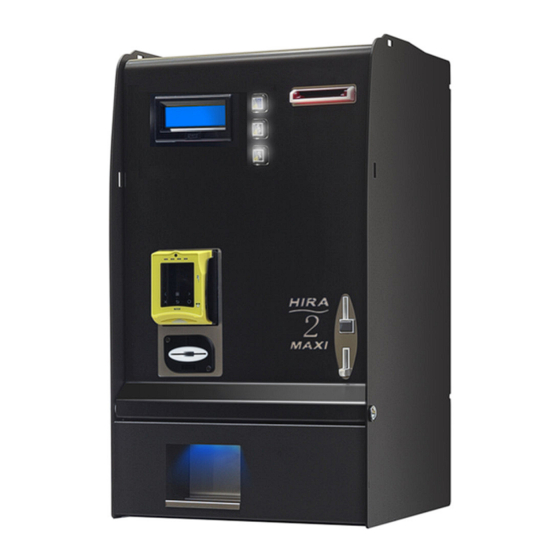
Hira 2
ARM
Operator's Manual
Rev. 2.02 EN
POS
Mini, Midi, Maxi,
HIRA 2
Operator's Manual
Progettazione e produzione di sistemi di pagamento e accessori per macchine Gaming, Vending e Car-Wash Design
and manufacture of payment systems and accessories for the Industries of Gaming, Vending and CarWash
standard display
POS
ARM
1
Advertisement
Table of Contents

Related Manuals for Alberici HIRA 2 ARM POS

Summary of Contents for Alberici HIRA 2 ARM POS
- Page 1 Hira 2 Mini, Midi, Maxi, standard display Operator’s Manual Rev. 2.02 EN HIRA 2 Operator’s Manual Progettazione e produzione di sistemi di pagamento e accessori per macchine Gaming, Vending e Car-Wash Design and manufacture of payment systems and accessories for the Industries of Gaming, Vending and CarWash...
- Page 2 Alberici S.p.A. reserves the right to modify, without prior notice and in any way, any part of this manual and the technical specifications of this product, as part of the continuous pursuit of...
-
Page 3: Table Of Contents
CONTENTS Package content: .......................... 4 Components description ....................... 4 Product description ........................5 Warning ............................5 Installation ............................ 6 Operation ............................9 System configuration….……………………………………………………………………….12 Messages……………………………………………………………………………………….28 Cleaning the Note Validator ....................... 30 11. Disposal of the product ....................... 31 12. Terms of Guarantee ........................31 13. -
Page 4: Package Content
Please read carefully this handbook, to obtain the most from your machine. 1. Package content The package contains: 1. the Alberici HIRA 2 / Hira 2 Maxi Change machine 2. 1 pair of keys 3. the power cable (see inside of money box) 4. -
Page 5: Product Description
Notice: Euro is the preset currency. Different currencies can be set by using the Alberici Babbel software. (*) The system requires that the B-to-B Alberici SIM card is inserted into the Hermes module SIM slot, and that a subscription is entered into the ARGO Portal, in order to control the machine via the Internet. -
Page 6: Installation
5. Installation PAY ATTENTION: IT IS ESSENTIAL TO FASTEN THE MACHINE TO A SOLID WALL BY USING RELIABLE EXPANSION BOLTS. IT IS RECOMMENDED THAT YOU MAKE USE OF THE WALL-MOUNT SLAB (ref. HRP-021A-V06 for HIRA 2 Mini, HRM-AM15-V06 for HIRA 2 Midi, HRS-015A-V06 for HIRA 2 Maxi) . - Page 7 MOUNT SLABS HRS-015A-V06 for HIRA 2 Maxi Prepare the tunnel for the power cable in the wall (corresponding to “Y” Hole in the slab) Fasten the slab to the wall by sturdy 12 expansion bolts, through the 6 “X” ( 12 mm) holes Connect the cable to its socket behind the machine, and hang the latter on the 4 “W”...
- Page 8 HRP-021A-V06 HIRA 2 M Prepare the tunnel for the power cable in the wall (corresponding to “Y” Hole in the slab). Fasten the slab to the wall by sturdy expansion bolts, through the 6 “X” ( 12 mm) holes. Connect the cable to its socket behind the machine, and hang the latter on the 4 “W”...
-
Page 9: Operation
User to get display messages in his preferred language: default languages are Italian, English, German, French, Dutch; other languages can be loaded by using the Alberici Babbel software. The machine offers two modes of operation: AUTOMATIC MODE or MANUAL MODE. - Page 10 6.2.2 POS: POS payments shall only allow to obtain tokens. If the machine is set for dispensing coins, POS operation will be automatically disabled. POS will be available only if the machine is equipped with single-coin Hopper; in machines equipped with multi-coin Hopper Discriminator, the configuration menu shall make the POS option unavailable.
- Page 11 Insert Press greenlit Insert NITIALIZE Master or Service CCOUNTS Master or Service Card/Key pushbutton Card/Key Press greenlit Press greenlit OK pushbutton OK pushbutton Totals In: (*) If Card/Key is not 0,00 € compatible (i.e. its PIN is INITIALIZED! different from the PIN of the ACS reader), the Remove Master or Press greenlit...
-
Page 12: System Configuration
7. System configuration 7.1 Default configuration The HIRA 2 Maxi is preset by default as follows (unless requested for different setup): Control Board Parameters Pay-out mode = AUTOMATIC Bonus = DISABLED Level sensors = DISABLED Hopper S11 Parameters Hoppers no. 1 / 2 (*) = € 2.00 = ENABLED BillyOne/OryOne Validator [ccTalk] Parameters €... - Page 13 7.2.2 M MP1 P ODELS WITH OWER ODULE AND INTEGRATED UB PCB HUB PCB FOR CONNECTION OF THE “ Full “ CHANGEONE CMS PCB PERIPHERAL UNITS “ Pin 1 = green wire PWR IN/CCT = from the Hub pcb Pin 2 = yellow wire (in the MP1 Power Module): Pin 3 = black wire +24V / +12V / GND / CCTALK...
- Page 14 7.2.3 I POS T NSTALLING THE ERMINAL Depending on the type of POS that the machine has been requested, the relevant interface with cable is provided among the accessories (find it inside the cashbox): IF for VPOS Touch Nayax IF for WORLDLINE VALINA IF for PAYTER Connect the 4p end of the POS Interface cable to the TTL1 socket of the main pcb.
- Page 15 Menu functions 7.2.1 S URFING THE To enter the menu and to navigate it, keep continuously pressed the 3 buttons (“OK”, “+” / “-“) behind the display for 5 seconds. “OK” confirm selection “+” / “-“ navigate menu UP and DOWN; or, modify figures and letters MENU MAIN STRUCTURE CHANGEONE Promo...
- Page 16 7.2.2 S ERIPHERAL NITS This menu allows to check the state of the , for instance: PERIPHERAL UNITS HOPPER 1 NOTE VALIDATOR OIN ACCEPTOR EMPTY CONNECTED DISCONNECTED 7.2.3 S HOW ACCOUNTS This menu allows to check the total and the partial values of cashed and paid amounts. SHOW RESET ACCOUNTS...
- Page 17 7.2.5 ETTING UP THE PERIPHERAL UNITS AND THE This menu allows to set up the denominations accepted by the note validator and by the coin acceptor, as well as the value of the coins/tokens dispensed. It also permits to set the change mode as either automatic or manual, and to enable/disable the full/void sensors of the hoppers.
- Page 18 7.2.5.A N ALIDATOR SETUP All the programmed note values get automatically enabled at power-on. To modify acceptance, press OK to get to the first option (ex. 5 €) and highlight it, then press UP or DOWN to reverse state. Press OK to shift to the next option (ex. 10 €). Set up <5 >...
- Page 19 NOTICE: monitoring of level sensors is disabled by default. This means that the board does not know when the hopper is empty, so it will send the pay-out command even if there are no coins available. When the hopper runs out of coins during dispensing or at the end of payment, no warning will be displayed.
- Page 20 LEVEL 4: By “OK”, confirm LEV5. By “+”, set Level 4 to 2,00€ and confirm. HP1 will automatically set to 2 pieces (2 x 1€). You can set the pay-out table so as dispense any of the following combinations: (A) 2x1€ coins, or (B) 1x1€...
- Page 21 Please notice the following: Master and Manager Cards can only be created using Chip Cards CH-2N01. User Cards can only be created from Standard Cards CH-2N02 or CH-2N03. Any type of Keys can only be created using Alberici branded keys: CH-1C11 - CH-1C16.
- Page 22 Insert the Master Card/Key in the initialized ACS RFID Reader: the machine 4-digit pin code (see section 9.3.13) will be requested; enter it to get the Master Card/Key initialized. Do not remove the Card/Key during the initialization process, until the Card/Key initialized! confirmation that the Card / Key has been initialized gets displayed.
- Page 23 7.2.5.E S GSM/GPRS When the GSM/GPRS kit is installed, it gets detected during self-configuration, and its parameters must be set up for operation. SMS functions will not be working on Hermes GPS/GSM module; remote control will then be managed only through the Argo Portal or through the Argo App. Insert Name: Insert name: Name of Machine...
- Page 24 (**) This function is available only in old GSM modules. By buttons + and - , locate the number you want to write, and press OK to confirm it; the cursor will automatically move to the next character. Once confirming the last digit, also confirm the whole number entered: it is proposed to enter the second number, and finally the third.
- Page 26 The language thus entered shall therefore appear among those selectable by default and among those of courtesy. In this regard, check the Babbel Software Manual available on the www.alberici.net website. 7.2.10 ROMO It is possible to preset an advertisement on the display.
- Page 27 7.2.12 ANUAL EFILL Carrying out the Manual Refill allows the Accounts records to keep track of the actual amounts available in the dispensers. It allows as well to warn when such amount becomes less than the reserve threshold level; in such event, the OK button starts flashing yellow until the hopper gets refilled. Refill can be made when the unit is empty or still containing more than the preset reserve amount.
-
Page 28: Messages
Messages Display contrast Should the contrast between the characters and the background be not convenient, adjust it as follows: a. disconnect the cable from socket POWER IN/CCT of the pcb, and power up the machine; b. hold down the “+” and “-“ buttons of the pcb at the same time, and plug the cable into socket POWER IN/CCT;... - Page 29 Messages from the Note validator 8.2.1 BillyOne / OryOne Validator During operation, the amount of consecutive red flashes produced by the entry slot indicates the possible malfunctions (see chart below): no of red flashes Description Validator is open Jammed banknote Fraud attempt detected Adjust optic sensors Stacker full (OryOne Only)
-
Page 30: Cleaning The Note Validator
Cleaning the Note Validator WARNING! Do switch power off before opening the machine! Manual cleaning The ability of acceptance may decrease due to the accumulation of dust and cellulose dust released by banknotes during transit, or because of residues or sprays, which may spread on the detecting sensors and on transmission parts. -
Page 31: Disposal Of The Product
- detailed report of the problem found and the circumstances in which it occurs. Before sending the product, please get in touch with your Dealer or with Alberici S.p.a. (+39 051 944300); very malfunctions can be fixed via a simple phone call, saving you costs and time. - Page 32 ATTACHMENT: Spare parts List HIRA 2 Maxi...
- Page 34 HIRA 2 Midi...
- Page 36 HIRA 2 Mini...
- Page 39 IRETTIVA IRETTIVA La ditta Alberici S.p.A., avente sede in via Ca’ Bianca, 421, 40024 Castel San Pietro Terme (BO) – Italia, D I C H I A R A Che il sistema classificato nella famiglia di prodotto apparecchio elettrico d’uso domestico e similare –...
- Page 43 NOTICE Alberici S.p.A. reserves the right to make changes to the equipment described and to its technical specifications at any time and without notice, in pursuit of the continual improvement of its products.
Need help?
Do you have a question about the HIRA 2 ARM POS and is the answer not in the manual?
Questions and answers