Table of Contents
Advertisement
Quick Links
Advertisement
Table of Contents

Summary of Contents for Omegawave OMEGAFLO FLO-C1
- Page 1 OA4D9012 Laser Tissue Blood Flowmeter OMEGAFLO FLO-C1 USER’S MANUAL...
-
Page 2: Table Of Contents
CONTENTS page CAUTION 1. Summary 2. Part names and Function 3. Connection to Recorder and Operation 4. Examples of Measurement 5. Theory 6. Handling and Cautions 7. Specifications 8. Guarantee... -
Page 3: Caution
CAUTION 1. Turn the laser switch on after the probe was connected. 2. Do not see the laser light through a lens or an optical instrument. -
Page 4: Summary
1. Summary This laser tissue blood flowmeter, OMEGAFLO FLO-C1, is useful instrument for measuring tissue blood flow in skin, brain, internal organs, etc. for animals. FLO-C1 can measure blood flow continuously and non-invasively, compared to H2 and Xe clearance method , and is used widely from in fundamental research to in clinical applications. -
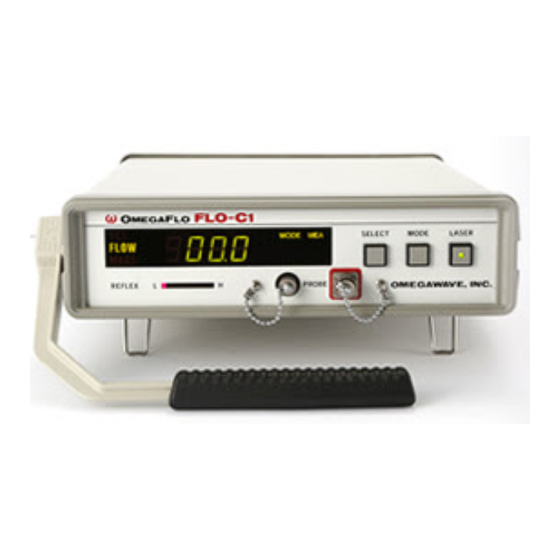
Page 5: Part Names And Function
2. Part names and Functions 1) Part names Front Panel ○ Parameter selection switch ○ Indicator ○ Mose switch ○ Laser switch ○ Optical connectors ○ Handle ○ REFLEX Red : Laser output Black : Receiving Rear Panel ○ Output 1 ○... - Page 6 2) Part Functions ① Indicator This LED indicator shows the measurement value of one of tissue blood flow parameters selected by "Parameter selection switch ②". Also, it shows the output mode selected by Mode switch ③. FLO-C1 measures three blood flow parameters, FLOW, MASS and VEL. FLOW, MASS and VEL.
- Page 7 ④ Laser switch Laser power is operated by this switch. Press this switch for ON and the red light glows. ! Optical connectors Optical connectors to connect a probe for FLO-C1. The plugs of standard probes are not specified by RED and BLACK. The plugs of a special probe are specified by RED and BLACK.
- Page 8 ⑦ Handle Use this handle for carrying FLO-C1. ⑧ Time constant switch The time-constant of output can be selected by this switch. FLO-C1 has three states of the time-constant, 0.1(sec), 1(sec) and 3(sec). ⑨ Output 1 The output of three parameters. The voltage of the three parameters is 0-10(V).
-
Page 9: Connection To Recorder And Operation
3. Connection to Recorder and Operation 1)Connection to a recorder (1) Insert the plugs of a probe into the optical connectors of FLO-C1 and screw the coupling of the plugs to the right by one hand holding the black rubber boots not to turn by the other. - Page 10 When contact type probe is used, make REFLEX level⑥ being about center of the LED bar graph using this adjusting ring. Incidence connector Adjusting ring (2) Turn "LASER" switch on. The red lamp is lighted. (3)Calibration ① Set the full scale of a recorder at 10 (V) using the range dial of the recorder. ②...
- Page 11 ⑤ Run the chart paper and make the calibration form showed below operating ① to ④ again. (4) Fix the probe on a tissue, and press "MODE" switch to set at "MEA" . Measurement starts. (5) Raise the gain of the recorder if the measuring wave is too small. (6) Chose the time-constant switch on the rear panel.
-
Page 12: Examples Of Measurement
4. Example of Measurement 1) Probe set up (1) Prepare FLO-C1 and the recorder following "3. Connection to Recorder and Operation". (page 6-8) (2) Set the time-constant switch on the rear panel at 0.1 sec . (3) Fix a probe on tissue under study like the figure below. Confirm "REFLEX"... -
Page 14: Theory
5. Theory 1) Laser tissue blood flowmetry As laser light illuminates a tissue containing erythrocytes (red blood cells), the light is diffused by the tissue. Generally, the volume fraction of the erythrocytes in the tissue is small ; therefore, most of the photons are only scattered by static tissue elements and, in the case of short optical path length, a small number of photons are scattered by the erythrocytes once, or at most a few times, during the scattering process. -
Page 15: Handling And Cautions
6. Handling and Cautions 1) Pay attention to the next matters. (1) Keep FLO-C1 out of water. (2) Set FLO-C1 on the place where air pressure, temperature, humidity, wind, sunlight, dust, and air containing salt and sulfur do not cause bad condition. (3) Pay attention to inclination, vibration and shock. - Page 16 Pay attention to the next matters for probes. ① Do not scrub the tip of probes. ② Do not bend into a circle of under 10 mm radius. ③ Do not step on probes. ④ Keep the tip and plugs clean. ⑤...
- Page 17 ② Set FLO-C1 on the place where air pressure, temperature, humidity, wind, sunlight, dust, and air containing salt and sulfur do not cause bad condition. ③ Pay attention to inclination, vibration and shock. ④ Keep FLO-C1 out of a storeroom of chemicals and the place where gas generates.
-
Page 18: Specifications
7. Specifications Environmental range for use and keeping Temperature range 10 〜 35℃ Humidity 30 〜 90% (non-condensing) Temperature for keeping -20 〜 60℃ Humidity for keeping 10 〜 90% (non-condensing) Atmospheric pressure 500 〜 1060 hPa Laser Semiconductor laser、Wavelength : 780nm Under 2mW at the probe end Class 1 : IEC60825 Sampling Volume... -
Page 19: Guarantee
6 months under 50% of the purchase price within one year under 70% of the purchase price after one year not provided OMEGAWAVE, INC 2-20-3 KATAMACHI FUCHU, TOKYO, JAPAN OMEGAWAVE, INC.
Need help?
Do you have a question about the OMEGAFLO FLO-C1 and is the answer not in the manual?
Questions and answers