Table of Contents
Advertisement
Quick Links
OUTDOOR
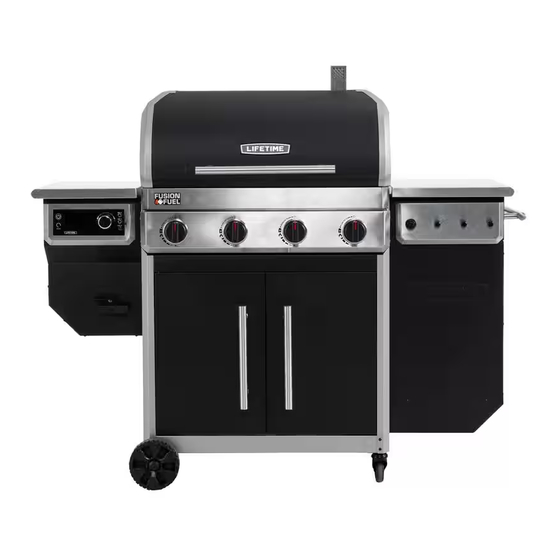
GAS GRILL & PELLET SMOKER
MODEL 91025
PLEASE READ THIS ENTIRE MANUAL AND THE USER'S GUIDE BEFORE THE INSTALLATION AND USE OF THIS GRILL
AND PELLET FUEL-BURNING APPLIANCE. CONTACT LOCAL BUILDING OR FIRE OFFICIALS ABOUT RESTRICTIONS
AND INSTALLATION INSPECTION REQUIREMENTS IN YOUR AREA. FAILURE TO FOLLOW THESE INSTRUCTIONS COULD
RESULT IN PROPERTY DAMAGE, BODILY INJURY OR EVEN DEATH. SAVE THESE INSTRUCTIONS.
A MAJOR CAUSE OF FIRES IS FAILURE TO MAINTAIN REQUIRED
CLEARANCES (AIR SPACES) TO COMBUSTIBLE MATERIALS. IT IS
OF UTMOST IMPORTANCE THAT THIS PRODUCT BE INSTALLED
ONLY IN ACCORDANCE WITH THESE INSTRUCTIONS.
TOOLS REQUIRED (NOT INCLUDED)
#2 (Phillips)
QUESTIONS?
Dial 1-800-225-3865
7:00 am-5:00 pm (Monday-Friday) MST
and 9:00 am-1:00 pm Saturday MST
(English, Français, Español)
#3 (Phillips)
CONTACT LIFETIME
CUSTOMER SERVICE:
®
Live Chat: www.lifetime.com/customerservice
(click on "LIVE CHAT" tab)
ASSEMBLY INSTRUCTIONS
MODEL# AND PRODUCT ID
Model Number: 91025
Product ID:
TABLE OF CONTENTS
Cautions.............................................2
Helpful Hints........................................4
Gas Grill Cabinet Assembly...................5
Grill and Storage Box Assembly...........10
Grill and Smoker Parts View................32
Grill Cabinet Parts View......................33
Propane Compartment Parts View......34
Registration......................................38
Warranty...........................................39
(you will need both when contacting us)
Advertisement
Table of Contents

Related Manuals for Lifetime 91025

Summary of Contents for Lifetime 91025
-
Page 1: Table Of Contents
Live Chat: www.lifetime.com/customerservice MODEL# AND PRODUCT ID Dial 1-800-225-3865 (you will need both when contacting us) (click on “LIVE CHAT” tab) Model Number: 91025 7:00 am–5:00 pm (Monday–Friday) MST Product ID: and 9:00 am–1:00 pm Saturday MST (English, Français, Español) -
Page 2: Safety-Dangers, Warnings And
SAFETY—DANGERS, WARNINGS AND CAUTIONS DANGERS (CONTINUED) READ AND FOLLOW ALL WARNINGS AND INSTRUCTIONS WARNING—For outdoor use only. Installation of the grill and BEFORE ASSEMBLING AND USING THIS APPLIANCE. These pellet smoker must be located so gases, including DANGER—DO NOT use this appliance indoors! This grill and smoke, do not enter any building. -
Page 3: Cautions
DO NOT unplug the smoker before the shutdown procedure ends. The pellets WARNINGS—ELECTRICAL remaining in the burn pot need to burn off. The WARNING—Your Lifetime grill & pellet smoker is supplied with surfaces will still be too hot to the touch. ®... -
Page 4: Helpful Hints
HELPFUL HINTS • At least three people are required for assembly. • Assemble this appliance outdoors on a flat, level and soft surface. • To help keep parts looking new, ONLY unpack parts as needed during the assembly process. • DO NOT use power tools for assembly. •... -
Page 5: Gas Grill Cabinet Assembly
GAS GRILL CABINET ASSEMBLY GRILL CABINET ASSEMBLY PARTS Cabinet Floor Rear Cabinet Panel Left Cabinet Panel Right Cabinet Panel Cabinet Cross Brace Caster Wheel SECTION 1 BLISTER PACK HARDWARE (HAC) GVP (x2) (Not to scale) GVE (x8) Wheel Axle Large Washer #8-32 x 1/2"... - Page 6 u SECTION 1 (CONTINUED) TOOLS AND HARDWARE REQUIRED GZS (x9) GVF (x9) GVE (x2) GZT (x9) • Attach the left panel (GVQ) to the cabinet floor • Secure the rear panel (GVS) to the cabinet floor (GVI) using the hardware indicated. Do not completely using the hardware indicated.
- Page 7 u SECTION 1 (CONTINUED) TOOLS AND HARDWARE REQUIRED GZS (x5) GVE (x6) GVF (x5) GZT (x5) • Secure the right panel (GVR) to the cabinet floor using • Secure the right panel to the rear panel using the hardware indicated at the locations shown. Do the hardware indicated.
- Page 8 u SECTION 1 (CONTINUED) TOOLS AND HARDWARE REQUIRED GVO (x4) GVP (x2) (Not to scale) GVN (x2) GWO (x2) GVK (x2) 1.10 • Lock the casters by pressing down on the tabs. Carefully • Slide an axle (GVP) through each wheel (AMU), a flip the cabinet over.
- Page 9 u SECTION 1 (CONTINUED) TOOLS AND HARDWARE REQUIRED GZW (x2) GWL (x1) 1.13 • With the casters still locked, flip the cabinet upright. Secure the doorstop (GWL) to the floor using two (2) screws (GZW) shown.
-
Page 10: Grill And Storage Box Assembly
GRILL AND STORAGE BOX ASSEMBLY PROPANE/STORAGE BOX ASSEMBLY PARTS Front Storage Panel Storage Base Storage Box Right Propane Cover Panel Rear Propane Cover Panel Ignitor Cover Panel Ignitor Box Cover Storage Box Lid Storage Box Handle GRILL & DOOR ASSEMBLY PARTS Grill Chimney Stack Hopper Lid... - Page 11 GRILL AND STORAGE BOX ASSEMBLY SECTION 2 BLISTER PACK HARDWARE (HAE) GVE (x39) GVF (x19) GVG (x2) #8-32 x 1/2" Truss Screw GZS (x19) 1/4"-20 x 1/2" Truss Screw 1/4"-20 x .8" Truss Screw M6 x 1 mm x 10 mm Shoulder Bolt Hinge Pin Cotter Key GZT (x19) Hinge Pin...
- Page 12 u SECTION 2 (CONTINUED) TOOLS AND HARDWARE REQUIRED GVE (x15) • Attach the rear panel (GWJ) to the propane • Attach the front panel (GVW) to the base using compartment base (GWF) using three (3) screws (GVE). three (3) screws (GVE). •...
- Page 13 u SECTION 2 (CONTINUED) TOOLS AND HARDWARE REQUIRED GVF (x4) GVE (x2) GVX (x1) GZS (x4) GZT (x4) • Secure the storage box (GWI) to the assembly using the hardware indicated. • Gently set the grill/hopper assembly (GVZ) on the hopper end as shown. It should be on a non-abrasive surface.
- Page 14 u SECTION 2 (CONTINUED) TOOLS AND HARDWARE REQUIRED • While one adult holds the grill/hopper assembly upright, have two other adults, one on each side of the cabinet assembly, gently slide the cabinet into the grill/hopper assembly as shown. Ensure the propane hose and igniter cables are on the outside of the cabinet.
- Page 15 u SECTION 2 (CONTINUED) TOOLS AND HARDWARE REQUIRED GZS (x4) GVE (x2) GVF (x6) GZT (x4) • Adjust the regulator hose so the holes in • Secure the cabinet to the grill with hardware the bracket align with those in the cabinet. indicated.
- Page 16 u SECTION 2 (CONTINUED) TOOLS AND HARDWARE REQUIRED GZS (x2) GVF (x2) GZT (x2) 2.11 2.12 • Slide the propane compartment towards the • Set the keyslots over the four screws indicated. wheels to help lock it in place. Secure with the hardware indicated.
- Page 17 u SECTION 2 (CONTINUED) TOOLS AND HARDWARE REQUIRED GYQ (x1) GVF (x3) GZT (x3) GZS (x3) Washer Screw 2.13 2.14 • Secure the front panel to the cabinet using the • Remove the small screw and washer from the hardware indicated. wing bolt (GYQ).
- Page 18 u SECTION 2 (CONTINUED) TOOLS AND HARDWARE REQUIRED GWS (x2) 2.15 • With the casters still locked, set the assembly back on its wheels. Secure the storage box to the grill using two (2) shoulder bolts (GWS) near each end of the box. Tighten the two upper screws also. Tighten these two screws also.
- Page 19 u SECTION 2 (CONTINUED) TOOLS AND HARDWARE REQUIRED GVE (x3) GVF (x4) GZS (x4) GZT (x4) 2.16 • Secure the left side of the cabinet to the grill using the hardware indicated. 2.17 2.18 • Secure the igniter cover plate (GWD) to the box •...
- Page 20 u SECTION 2 (CONTINUED) TOOLS AND HARDWARE REQUIRED GVE (x1) 2.19 2.20 • Thread the igniter cables up through the hole • Slide the tabs on the side of the igniter box cover in the storage box. Attach the cables to the (GWC) into the slots in the storage box.
- Page 21 u SECTION 2 (CONTINUED) TOOLS AND HARDWARE REQUIRED GVU (x2) GZS (x2) GWP (x1) GZT (x2) GVG (x2) GVE (x6) GWQ (x1) 2.21 2.22 • Secure the storage box handle (GXV) to the • Secure an upper hinge (GWP) to the storage box lid storage box using two (2) handle bezels (GVU) and (GWH) using three (3) screws (GVE).
- Page 22 u SECTION 2 (CONTINUED) TOOLS AND HARDWARE REQUIRED GWP (x1) GVE (x6) GWM (x1) GWQ (x1) GWA (x1) 2.25 2.26 • Insert one (1) cotter key (GWM) through the hinge • Insert a hinge pin (GWA) through the hinge as ping to secure the lid to the storage box.
- Page 23 u SECTION 2 (CONTINUED) TOOLS AND HARDWARE REQUIRED GWM (x1) GWS (x4) GWA (x1) GVU (x4) 2.29 2.30 • Insert a hinge pin (GWA) through the hinge as • Set the upper hinge down around the outside shown. Insert a cotter pin (GWM) through the hinge of the lower hinge and align the holes.
- Page 24 u SECTION 2 (CONTINUED) TOOLS AND HARDWARE REQUIRED 2.33 2.34 • Attach the right door in a similar manner. • Insert the bottom hinge pin of the left door into the hole in the bottom left corner of the cabinet. Push down the top hinge pin and push in the door to allow the pin to pop up into the hole in the top right corner of the cabinet.
- Page 25 u SECTION 2 (CONTINUED) TOOLS AND HARDWARE REQUIRED GVU (x2) GVE (x4) GWS (x2) 2.35 2.36 • Secure the chimney stack (GVV) to the lid using four • Open the grill lid and secure a lid handle (GXV) to (4) screws (GVE) as shown. the lid using two (2) shoulder bolts (GWS) and two (2) handle bezels (GVU) as shown.
- Page 26 u SECTION 2 (CONTINUED) TOOLS AND HARDWARE REQUIRED • There are four (4) lower burner plates (GXY). • The rear wall of the cooking chamber has four (4) At one end, there are two tabs. This end goes v-slots with two (2) tabs in each. The v-slots in this toward the front of the cabinet, just below the rear wall are difficult to see, considering the wall is burners.
- Page 27 u SECTION 2 (CONTINUED) TOOLS AND HARDWARE REQUIRED 2.39 2.40 • Bring the burner shield at an angle as far as • Open the grill lid and insert one (1) lower possible to the front of the cooking chamber. burner shield at an angle through the opening in the back as shown.
- Page 28 u SECTION 2 (CONTINUED) TOOLS AND HARDWARE REQUIRED 2.43 • Now bring the lower burner shield forward and insert the tabs at the front end into the slots in the front wall of the chamber. 2.44 • FInally, set the slots in the rear end of the lower burner shield over the two tabs in the v-slot in the rear wall of the chamber.
- Page 29 u SECTION 2 (CONTINUED) TOOLS AND HARDWARE REQUIRED 2.45 2.46 • Set the burner plates (GXW) over the tabs on the • Place the two (2) cooking grates (GXU) and the front and back of the grill box. warming rack (GXT) onto the grill as shown. 2.47 •...
- Page 30 u SECTION 2 (CONTINUED) TOOLS AND HARDWARE REQUIRED 2.48 2.49 • Ensure the handwheel on the propane tank is • Tighten the bolt (GYQ) to secure the propane tank completely shut off. Set the tank in the propane to the floor as shown. compartment.
- Page 31 u SECTION 2 (CONTINUED) TOOLS AND HARDWARE REQUIRED GZO (x1) 2.50 • The electric ignition requires 1 “AA” alkaline battery (included). 1. Remove the igniter button/cap from the igniter panel. 2. Insert the battery, negative end first. 3. Re-attach the igniter button. WARNING: READ THE USER’S GUIDE BEFORE OPERATING THIS APPLIANCE.
-
Page 32: Grill And Smoker Parts View
GRILL AND SMOKER PARTS VIEW Grill Chimney Stack Hopper Lid Upper Grill Grate Lower Grill Grate Grill Lid Handle Temperature Control Knob Grease Bucket Grease Bucket Liner Upper Burner Shields Power Cord Lower Burner Shields... -
Page 33: Grill Cabinet Parts View
GRILL CABINET PARTS VIEW Cabinet Floor Rear Cabinet Panel Left Cabinet Panel Right Cabinet Panel Cabinet Cross Brace Left Cabinet Door Right Cabinet Door Caster Wheel Cabinet Door Handle... -
Page 34: Propane Compartment Parts View
PROPANE COMPARTMENT PARTS VIEW Front Storage Panel Storage Base Storage Box Right Storage Panel Rear Storage Base Panel Ignitor Cover Panel SPARE HARDWARE BAG (GZX) Ignitor Box Cover Description Storage Box Lid #8-32 x 1/2" Truss Screw Storage Box Handle 1/4"-20 x 1/2"... - Page 35 NOTES...
- Page 36 NOTES...
- Page 37 NOTES...
-
Page 38: Registration
. And you can rest assured that Lifetime will not sell or provide your ® ® personal data to other third parties, or allow them to use your personal data for their own purposes. We invite you to read our privacy policy at www.lifetime.com REGISTER today! -
Page 39: Warranty
This warranty is nontransferable and is expressly limited to the repair or replacement of defective Lifetime Gas Grill and Pellet Smoker. If the product is defective within the terms of this warranty, Lifetime Products, Inc. will repair or replace defective parts at no cost to the purchaser. - Page 40 7:00 am–5:00 pm (M–F) MST and 9:00 am–1:00 pm Saturday MST ® AMÉLIORER L’ACHAT LIFETIME EN AJOUTANT DES ACCESSOIRES OU D’AUTRES PRODUITS Pour acheter des accessoires ou des autres produits Lifetime , visiter le : ® www.lifetime.com Ou composer le 1-800-424-3865 Du lundi au vendredi de 7 h à...
Need help?
Do you have a question about the 91025 and is the answer not in the manual?
Questions and answers