Advertisement
Available languages
Available languages
Quick Links
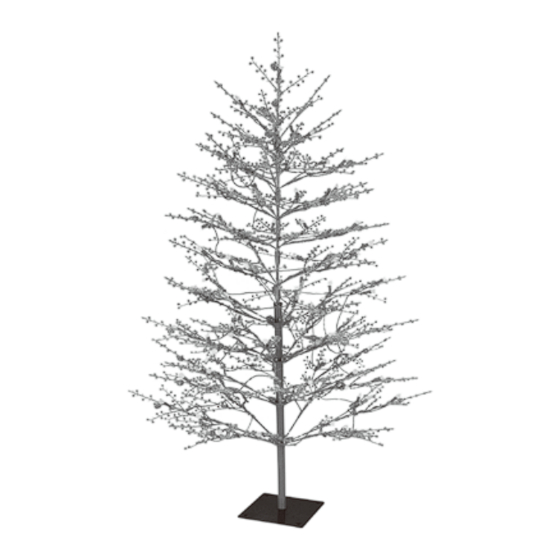
5 Ft Winterberry
ASSEMBLY INSTRUCTIONS
CAUTION: EXERCISE CARE WHEN UNPACKING AND ASSEMBLING
WARNING: Risk of fire and electric shock. Disconnect light set from power before starting.
1) Keep wires clear of being pinched or cut during assembly or installation.
2) Do not press or grasp bulbs during assembly or installation.
3) Before starting make sure stakes are clear of underground: sprinkler, telephone and
power lines.
4) Please read all instructions and warnings included with this product before using.
Approximate assembly time is 20 minutes
Hammer/Mallet may be required for stakes
NOTE: No tools required
Parts List:
(
1) Top section
(1) Spare parts bag with instruction manual
Top section
or
Bottom section
Extender for all types
1.Carefully unpack, removing any bubble pack and inspect the contents of your tree.
The spare parts bag is taped to end flap. Retain the shipping carton to repack your tree.
If applies, set aside any loose bulbs to reattach later.
NOTE:
your assembled tree may be heavy and difficult to move so place the stand in the
Hint:
desired location before assembling. Secure in place using the (4) metal stakes.
2.Look for the bottom section or the extender, identified by a red-colored plastic protective
cap at the bottom of the pole. Remove the cap and place into the tree stand.
3.Locate and untwist the red metal tie wrap holding the branches in place. Save this tie
wrap to use when storing your tree.
If your branches do not fall into place, DO NOT force down. Starting at the bottom
Hint:
gently lift up on the branches to release them from their locked position. During shipping,
branch tips may become intertwined or entangled. Carefully undo. Now, all rows of
branches should be in the open position. Locate the long lead wire and place it to the side
for later use.
10"X10"
Branch Tree
®
(1) Bottom section or Extender for all types
(1) Flat base and 4 stakes
Spare parts bag
with instruction manual
Flat base and 4 stakes
4.Insert the treetop into the opening of the lower section and
shape, being careful to keep the cord from entering the opening
and damaging the wires. Straighten out the top tips if necessary.
5.Depending on the Model of your tree electrically connect
the lighted sections following either a) or b) below:
a) End Plugs - Fully insert the plug from the top pole into
the end connector near the top of the lower pole.
b) Connectors – First find the 2 yellow CONNECTOR cord tags
located between each section.
First align the 2 pins and flat on the connector and then fully inserting into the
other connector. Fully screw on the cap to secure together.
Reattach any loose bulb by fully inserting into an open lamp socket.
NOTE:
Your winter Christmas tree is now assembled!
6.To illuminate find and unhank the long lead wire from the bottom lighted section.
Fully insert the plug directly into a working GFCI outlet or an outdoor rated extension cord.
7.Please check your tree for any loose, unlit or damaged bulbs. They must be replaced
promptly in order to maintain the performance and life expectancy of your pre-lit tree.
Your winter Christmas tree
is now complete!
Note:
Always unplug this product
before installing. Do not plug in, until
entire tree assembled.
Troubleshooting Tips
If one section of your tree does not illuminate,
check that section for loose or missing bulbs or
that all electrical connections on tree are made.
Tree Storage
When your tree is not in use, be sure to store it
neatly in a cool, dry location protected from
sunlight.
GE is a trademark of General Electric Company
and is under license by Nicolas Holiday Inc.
Distributed by Nicolas Holiday Inc.,
Indoor/Outdoor
©
2017 Nicolas Holiday Inc.,
9 F., No. 37, Guangfu North Rd.
Taipei, Taiwan 10560
All rights reserved.
THIS IS NOT A TOY, FOR DECORATIVE USE ONLY.
FLAT BASE-17
Printed in China
Advertisement

Related Manuals for GE Winterberry 23502


Summary of Contents for GE Winterberry 23502
- Page 1 Hint: desired location before assembling. Secure in place using the (4) metal stakes. GE is a trademark of General Electric Company and is under license by Nicolas Holiday Inc. 2.Look for the bottom section or the extender, identified by a red-colored plastic protective cap at the bottom of the pole.
- Page 2 2. Busque la sección inferior o el extensor, se puede identificar por la tapa protectora roja en GE es una marca registrada de General Electric Company y se utiliza con licencia por Nicolas Holiday Inc.
Need help?
Do you have a question about the Winterberry 23502 and is the answer not in the manual?
Questions and answers