Advertisement
Quick Links
Advertisement

Related Manuals for ROOM FOCUS ROOM

Summary of Contents for ROOM FOCUS ROOM
- Page 1 FOCUS ROOM Assembly Manual Scan To Watch Video...
- Page 2 Meet the Chapter 08 Focus Room Carpet & Desk Chapter 01 Chapter 09 Getting Started Lighting Chapter 02 Chapter 10 Frame Remaining Furnishings Chapter 03 Chapter 11 Wall Panels & AC Power Setup Door Chapter 04 Chapter 12 Roof Finishing Touches...
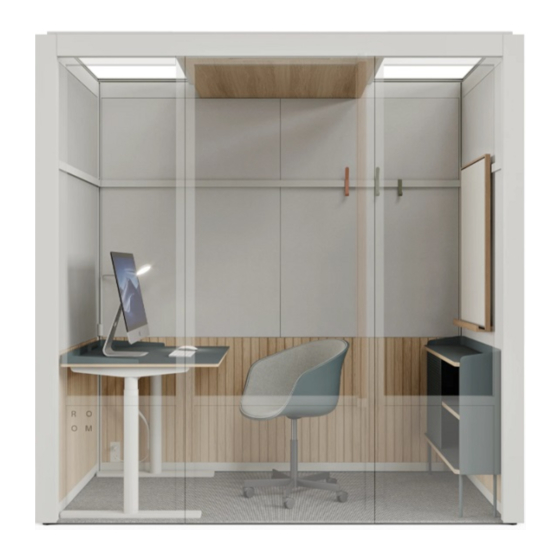
- Page 3 You can rest easy knowing that the soundproofing materials all. Privacy meets productivity with the Focus Room, in this room are made from more than 1,000 recycled plastic a thoughtfully-designed personal office that lets you bottles. It’s our way of doing more by using less, and making concentrate on the task at hand.
- Page 5 Scan to Watch Video Getting Chapter Started...
- Page 6 M6 x 12 M6 x 25 M6 x 50 Flanged Flanged Flat-Head Pan-Head Flat-Head H8 - PRO M5 x 5 ¼ - 20 x ¼ M6 x 60 M5 x 16 M6 x 40 Pan-Head Flat-Head Flat-Head Flat-Head Flanged support@room.com +1 646.880.9651...
- Page 7 Hex Driver Bit 90° Drill Adapter 3 / 4 mm 6 ft Ladder* Bubble Level Floor Click-In Skylight Single Double Gussets Handles Springs Hook Hook Electric Driver * Cutter * Philips Screwdriver* * Items not provided by ROOM support@room.com +1 646.880.9651...
- Page 8 What you’ll need BOX 2 BOX 3 Long Ceiling Short Ceiling Beam Front Beam Long Ceiling Short Floor Beam Back Beam Long Floor Threshold Beam Corner Spring Posts Hiders support@room.com +1 646.880.9651...
- Page 9 BOX 4 BOX 5 Left Click-In Right Click-In Double Click-In Rail Mount Rail Mount Rail Mounts Click-In Left Accessory Rail Click-In Right Accessory Rail Back Wall Click-In Back Back Left Back Right Accessory Rail Outer Wall Outer Wall support@room.com +1 646.880.9651...
- Page 10 What you’ll need BOX 6 BOX 7 BOX 8 AC Box Power Cord Side Wall Side Wall support@room.com +1 646.880.9651...
- Page 11 BOX 9 BOX 10 Focus Room Roof Side Tambours Skylights Back Left Back Center Back Right Tambour Tambour Tambour support@room.com +1 646.880.9651...
- Page 12 What you’ll need BOX 11 BOX 12 BOX 13 BOX 14 Side Fabric Panels Back Left Back Right Left Window Right Window Door Fabric Panel Fabric Panel support@room.com +1 646.880.9651...
- Page 13 BOX 15 DESK ACCESSORIES F16 - STD Standard Desk In-desk Electrical F20 - PRO Carpet Whiteboard F18 - PRO F19 - PRO Sit-stand Desk- Sit-stand Desk Base support@room.com +1 646.880.9651...
- Page 14 What you’ll need VC LIGHT LIGHTING STORAGE UNITS L1- PRO L2 - PRO L3 - PRO VC Light LED Controller Cable Splitter L4 - PRO L5 - PRO F21 - PRO Power Adapter Remote Control Task Lamp Credenza support@room.com +1 646.880.9651...
- Page 16 Roof to Ceiling Allow for a minimum of 6 inches between the unit and the ceiling. We recommend at least 12 inches proper ventilation. support@room.com +1 646.880.9651...
- Page 17 6 - 12´´ 3´´ 3´´ 35´´ support@room.com +1 646.880.9651...
- Page 18 DO NOT USE IMPACT DRIVER Use low clutch setting. Do not use the drill mode. Only use provided bits. support@room.com +1 646.880.9651...
- Page 19 Scan to Watch Video Frame Chapter...
- Page 20 BOX 2 BOX 3 VERIFY FINAL PLACEMENT OF THE UNIT SCREWS NEEDED scale 1:1 M6 x 16 support@room.com +1 646.880.9651...
- Page 21 BOX 2 BOX 3 Keep fingers clear of pinch point when installing roof beams. SCREWS NEEDED scale 1:1 M6 x 16 support@room.com +1 646.880.9651...
- Page 22 BOX 2 BOX 3 MAKE SURE FREE STANDING POSTS ARE SUPPORTED Keep fingers clear of pinch point when installing roof beams. SCREWS NEEDED scale 1:1 M6 x 16 support@room.com +1 646.880.9651...
- Page 23 BOX 3 Keep fingers clear of pinch point when installing roof beams. SCREWS NEEDED scale 1:1 M6 x 16 support@room.com +1 646.880.9651...
- Page 24 SCREWS NEEDED scale 1:1 M6 x 12 support@room.com +1 646.880.9651...
- Page 25 BOX 1 LAST CHANCE TO VERIFY FINAL PLACEMENT OF THE UNIT support@room.com +1 646.880.9651...
- Page 26 UNIT POSITION WILL BE SET AND CANNOT BE MOVED AFTER THIS STEP Make sure the unit is leveled in both length and depth directions. >0.8’’ >2cm 17mm support@room.com +1 646.880.9651...
- Page 27 Scan to Watch Video Wall Panels Chapter & AC Power Setup...
- Page 28 BOX 4 CLICK! Make use of built-in handles. support@room.com +1 646.880.9651...
- Page 29 BOX 1 SCREWS NEEDED scale 1:1 M6 x 12 support@room.com +1 646.880.9651...
- Page 30 BOX 5 CLICK! support@room.com +1 646.880.9651...
- Page 31 BOX 1 Use the provided 90° drill adapter. SCREWS NEEDED scale 1:1 M6 x 40 support@room.com +1 646.880.9651...
- Page 32 BOX 1 Use the provided 90° drill adapter. SCREWS NEEDED scale 1:1 M6 x 40 support@room.com +1 646.880.9651...
- Page 33 BOX 1 Ethernet cable not included. Confirm with customer if install is necessary. support@room.com +1 646.880.9651...
- Page 34 BOX 6 Remove the four pre-attached screws using a Philips screwdriver.* Install AC Box with said screws. Do not use power drill. Philips screwdriver not included. support@room.com +1 646.880.9651...
- Page 35 BOX 6 support@room.com +1 646.880.9651...
- Page 36 BOX 7 BOX 8 CLICK! support@room.com +1 646.880.9651...
- Page 37 Scan to Watch Video Roof Chapter...
- Page 38 BOX 9 MAKE SURE ROOF CABLES ARE NOT PINCHED Place the roof gently. Do not drop. support@room.com +1 646.880.9651...
- Page 39 SCREWS NEEDED scale 1:1 M6 x 25 support@room.com +1 646.880.9651...
- Page 40 BOX 10 Note the fusible link orientation for install. support@room.com +1 646.880.9651...
- Page 41 BOX 10 Note the fusible link orientation for install. support@room.com +1 646.880.9651...
- Page 42 BOX 1 support@room.com +1 646.880.9651...
- Page 43 +1 646.880.9651...
- Page 44 +1 646.880.9651...
- Page 45 BOX 3 Pay attention to orientation of the spring hiders. support@room.com +1 646.880.9651...
- Page 47 Scan to Watch Video Interior Wall Chapter Finishes...
- Page 48 BOX 9 Be extra careful not to split the wooden tambour. SCREWS NEEDED scale 1:1 M6 x 25 x4 - Brass support@room.com +1 646.880.9651...
- Page 49 BOX 11 support@room.com +1 646.880.9651...
- Page 50 BOX 9 SCREWS NEEDED scale 1:1 M6 x 25 x1 - Brass support@room.com +1 646.880.9651...
- Page 51 BOX 9 SCREWS NEEDED scale 1:1 M6 x 25 Brass - x2 support@room.com +1 646.880.9651...
- Page 52 +1 646.880.9651...
- Page 53 BOX 9 support@room.com +1 646.880.9651...
- Page 54 +1 646.880.9651...
- Page 55 BOX 11 support@room.com +1 646.880.9651...
- Page 56 BOX 11 support@room.com +1 646.880.9651...
- Page 57 Scan to Watch Video Accessory Rails Chapter & Accessories...
- Page 58 BOX 4 User-facing Touching side fabric panel CLICK! Bottom SCREWS NEEDED scale 1:1 M6 x 12 support@room.com +1 646.880.9651...
- Page 59 BOX 4 Touching User-facing fabric panel side CLICK! Bottom SCREWS NEEDED scale 1:1 M6 x 12 support@room.com +1 646.880.9651...
- Page 60 BOX 4 CLICK! User-facing Touching side fabric panel Bottom SCREWS NEEDED scale 1:1 M5 x 5 support@room.com +1 646.880.9651...
- Page 61 BOX 1 The rail has three entry points to insert the hooks and lock. support@room.com +1 646.880.9651...
- Page 62 PRO Only ACCESSORIES F20 - PRO support@room.com +1 646.880.9651...
- Page 63 Scan to Watch Video Front Chapter Windows...
- Page 64 BOX 13 SCREWS NEEDED scale 1:1 M6 x 60 M6 x 50 support@room.com +1 646.880.9651...
- Page 65 BOX 12 SCREWS NEEDED scale 1:1 M6 x 50 M6 x 60 support@room.com +1 646.880.9651...
- Page 66 BOX 3 Do not tighten the screw all the way in. Do not use power drill. SCREWS NEEDED scale 1:1 M6 x 14 x4 - Color match support@room.com +1 646.880.9651...
- Page 67 BOX 1 SCREWS NEEDED scale 1:1 M6 x 12 support@room.com +1 646.880.9651...
- Page 68 Turn clockwise to drop the window foot until it presses against the floor firmly. support@room.com +1 646.880.9651...
- Page 69 BOX 1 1 - Make sure gasket is flush at top. 2 - Cut excess at bottom if needed. 3 - Tape the gasket. support@room.com +1 646.880.9651...
- Page 71 Scan to Watch Video Carpet Chapter & Desk...
- Page 72 BOX 15 support@room.com +1 646.880.9651...
- Page 73 +1 646.880.9651...
- Page 74 DESK Standard Desk Assembly Pro Desk Assembly Go to page 95 Go to page 105 support@room.com +1 646.880.9651...
- Page 75 DESK support@room.com +1 646.880.9651...
- Page 77 Scan to Watch Video Lighting Chapter...
- Page 78 PRO Only VC LIGHT L1 - PRO support@room.com +1 646.880.9651...
- Page 79 PRO Only VC LIGHT L3 - PRO L2 - PRO L4 - PRO support@room.com +1 646.880.9651...
- Page 80 PRO Only VC LIGHT 1- Push the panel in and tuck the cable behind. 2- Tuck cables behind tambour edge. support@room.com +1 646.880.9651...
- Page 81 PRO Only VC LIGHT L5 - PRO 1 - Peel adhesive from back of the 2 - Stick the remote to window frame remote. 50´´ inches from the floor beam. support@room.com +1 646.880.9651...
- Page 82 LIGHTING support@room.com +1 646.880.9651...
- Page 83 Scan to Watch Video Remaining Chapter Furnishings...
- Page 84 PRO Only STORAGE UNITS F21 - PRO support@room.com +1 646.880.9651...
- Page 85 Scan to Watch Video Door Chapter...
- Page 86 BOX 14 90º SCREWS NEEDED scale 1:1 M5 x 16 support@room.com +1 646.880.9651...
- Page 87 2.5mm counterclockwise to pull the door left. 3 - Tighten the Side Lock Screws to lock the hinge plate. Door side Window side Side Adjustment Do not use Power Drill. support@room.com +1 646.880.9651...
- Page 88 Push the threshold down, and then tighten the screws all the way. support@room.com +1 646.880.9651...
- Page 89 MAKE SURE THE SEAL IS AIRTIGHT 1 - Release preinstalled gasket by 2 - Manually push down the gasket, loosening three screws. ensuring it sits flat on the threshold without a gap. 3 - Lock the gasket position by tightening three screws. support@room.com +1 646.880.9651...
- Page 91 Scan to Watch Video Finishing Chapter Touches...
- Page 92 BOX 1 support@room.com +1 646.880.9651...
- Page 93 Well done. You’ve just built a private space for the open workplace. If you have any questions, don’t hesitate to contact us. We’re here to help. support@room.com +1 (646) 880-9651...
- Page 95 DESK - STANDARD Assembly Manual...
- Page 96 What you’ll need BOX A Power Box Table Top Power Box Clip support@room.com +1 646.880.9651...
- Page 97 Step by step...
- Page 98 +1 646.880.9651...
- Page 99 +1 646.880.9651...
- Page 100 +1 646.880.9651...
- Page 101 +1 646.880.9651...
- Page 105 DESK - PRO Assembly Manual...
- Page 106 What you’ll need BOX 1 BOX 2 Center Rail Table Top Power Box Long Frame M6 x 14 Power Box Clip Short Frame Flanged support@room.com +1 646.880.9651...
- Page 107 BOX 2 Tools Control Box M6 x 14 Pan-Head Side Bracket Power Cable M6 x 10 Pan-Head Foot Handset Cable Allen Key 4 mm support@room.com +1 646.880.9651...
- Page 109 Step by step...
- Page 110 01 Make sure the table is placed at least 1 in / 2.5 cm from any walls <1¨ 02 Make sure there are no obstacles in the desk’s path <1¨ 03 Make sure all cords are the appropriate length to accommodate the maximum desk height of 47 in / 119.5 cm >47¨ support@room.com +1 646.880.9651...
- Page 111 Do not open any of the components - the legs, control box, or switch, for danger of electric shock. In the event of a power outage, or if the power cord is unplugged, a manual reset may be necessary. Refer to page 125 for additional details. support@room.com +1 646.880.9651...
- Page 112 BOX 2 Ensure correct orientation of the bracket. SCREWS NEEDED scale 1:1 M6 x 10 M6 x 14 support@room.com +1 646.880.9651...
- Page 113 BOX 2 SCREWS NEEDED scale 1:1 M6 x 14 M6 x 10 support@room.com +1 646.880.9651...
- Page 114 BOX 2 support@room.com +1 646.880.9651...
- Page 115 BOX 2 SCREWS NEEDED scale 1:1 M6 x 14 support@room.com +1 646.880.9651...
- Page 116 BOX 1 SCREWS NEEDED scale 1:1 M6 x 14 support@room.com +1 646.880.9651...
- Page 117 6BOX 2 SCREWS NEEDED scale 1:1 M6 x 14 support@room.com +1 646.880.9651...
- Page 118 BOX 2 support@room.com +1 646.880.9651...
- Page 119 +1 646.880.9651...
- Page 120 +1 646.880.9651...
- Page 121 +1 646.880.9651...
- Page 122 +1 646.880.9651...
- Page 123 BOX 1 support@room.com +1 646.880.9651...
- Page 124 +1 646.880.9651...
- Page 125 02 Press and hold the (-) minus button for 10 seconds, and the table will drop 1 cm and rise again. That’s it! Your desk is ready to get to work. If you run into any problems, get in touch. We’re here to help. support@room.com +1 646.880.9651...
- Page 126 830039-01REV. D...
Need help?
Do you have a question about the FOCUS ROOM and is the answer not in the manual?
Questions and answers