
Summary of Contents for Electriel UKKO MPPT-10
- Page 1 UKKO MPPT-10 /USER MANUAL Document Version 1.1 Electriel Ltd © All Rights Reserved Finland...
-
Page 2: Table Of Contents
UKKO MPPT-10 1 (29) /USER MANUAL Table of Contents Introduction ......................... 2 Product Features ........................3 Product Overview ......................3 Technical Specifications....................4 Optional Accessories ..................... 5 2.3.1 Remote Temperature Sensor ................5 2.3.2 UKKO Manager (PC Software) ................. 5 Installation Instructions ...................... -
Page 3: Introduction
UKKO Manager PC Software is used to configure and customize the settings of UKKO MPPT. It features visual presentation of the system data and gives you further control over the energy production. UKKO Manager is available free of charge from Electriel’s website and can be used with any PC via USB cable. No additional accessories required UKKO MPPT is made for easy plug n’... -
Page 4: Product Features
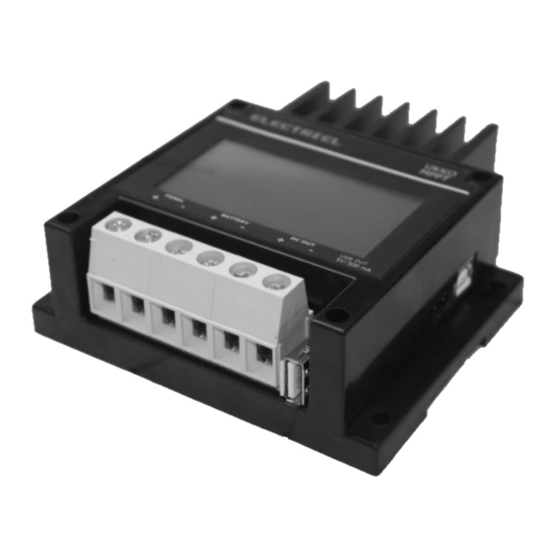
USB Connector for PC This USB connector provides connection to PC. UKKO Manager PC software can be downloaded from Electriel’s website for more careful monitoring of your solar system. Touch Screen In operation mode the display shows graphs of energy production, battery voltage, solar panel voltage, current, power and battery charge state. -
Page 5: Technical Specifications
UKKO MPPT-10 4 (29) /USER MANUAL 2.2 Technical Specifications ELECTRICAL Nominal battery Voltage: 12 / 24 Volts (Auto Detect) Max. Battery Voltage: 16 / 32 Volts Nominal Charging Current: 10 / 5 Amps Max. Solar Panel Voltage: 75 Volts ... -
Page 6: Optional Accessories
Figure 3. Battery Temperature Sensor (Model: BTS10) 2.3.2 UKKO Manager (PC Software) The UKKO Manager PC software is available free of charge from Electriel’s website. Use it to monitoring your solar system or modify the settings of the device. For more information see page 18. -
Page 7: Installation Instructions
UKKO MPPT-10 6 (29) /USER MANUAL Installation Instructions This chapter describes how to install and configure UKKO MPPT solar charger. 3.1 Important Safety Information This manual contains important safety information. Read it carefully before installing and using UKKO MPPT solar charger. -
Page 8: Wiring
UKKO MPPT-10 7 (29) /USER MANUAL 3.3 Wiring Step 1: Connect the Load DC OUT connector provides battery voltage for the system. Connect positive (+) and negative (-) load wires to the load or load distribution panel and DC OUT connector. An USB load can be plugged at this point and it can be used as a standard USB charger output. - Page 9 UKKO MPPT-10 8 (29) /USER MANUAL Step 2: Connect the Battery Connect positive (+) and negative (-) battery wires to the battery. An in-line fuse holder should be wired in series with load as shown in figure 6. Wire a fuse holder no more than 150 mm (6 inches) from the battery terminal.
-
Page 10: Configuration Via Device Menu (Optional)
UKKO MPPT-10 9 (29) /USER MANUAL If the device is already turned on after connecting the wires and voltage is detected in the solar panel input, UKKO MPPT will wait 30 seconds before starting the charging to avoid sparking in the connector. -
Page 11: Display View
UKKO MPPT-10 10 (29) /USER MANUAL 3.4.2 Display View Menu selections FUNCTIONAL ENERGY CURRENT POWER CHARGE STAGE BATTERY VOLTAGE PANEL VOLTAGE CYCLE VIEWS Figure 9. Display View From the display view menu it is possible to choose what to view on the display during normal operation. -
Page 12: Max Current
UKKO MPPT-10 11 (29) /USER MANUAL equalizing charge modes. For more detailed information about different battery types, please refer to chapter (Battery Charging). 3.4.4 Max Current Menu selections 12 V System: Adjust Charging current 0.5…10 A 24 V System: Adjust Charging current 0.5…5 A Figure 11. -
Page 13: Language
UKKO MPPT-10 12 (29) /USER MANUAL 3.4.6 Language Menu selections ENGLISH (default) FINNISH Figure 13. Language Choose UKKO MPPT language. 3.4.7 Charging Menu selections ENABLED (default) DISABLED Figure 14. Charging Turn the battery charging on (Enabled) or off (Disabled) in the Charging menu. The charging is turned off (Disabled) until it is enabled via this menu. -
Page 14: Operation
UKKO MPPT-10 13 (29) /USER MANUAL Operation 4.1 Display Use the display to monitor the system status and functioning during normal operation. The device menu has the following view options: a) Functional view b) Graphs c) Energy bars d) Cycle views Functional View Functional view (Figure 14) shows instant charging condition and battery charge level. - Page 15 UKKO MPPT-10 14 (29) /USER MANUAL Energy Bars The UKKO MPPT logs produced energy per day from last 30 days. Daily energy bars can be viewed as shown in the figure 16. Figure 17. Daily Energy Bars Cycle Views Cycle display view mode cycles all seven display views in 3 second intervals.
-
Page 16: Maximum Power Point Tracking
UKKO MPPT-10 15 (29) /USER MANUAL 4.2 Maximum Power Point Tracking The UKKO MPPT uses advanced Maximum Power Point Tracking (MPPT) algorithm, which guarantees the solar panel is always loaded with optimal power. The tracking feature increases energy production up to 15…40 % compared to standard PWM solar charger. -
Page 17: Battery Charging
UKKO MPPT-10 16 (29) /USER MANUAL 4.3 Battery Charging 4.3.1 Battery Charging Modes The device has four different charging modes. EQUALIZE ABSOPTION FLOATING BULK NIGHT NIGHT Figure 20. Charging Modes TIME Bulk Charge UKKO MPPT starts bulk charging, when solar panel voltage is higher than battery voltage. At this point the device delivers 100 % of available power from the solar panel to the battery. -
Page 18: Battery Types
Configuring the UKKO MPPT parameters can also be performed via the PC software. The software is compatible with standard Windows PC. USB cable is required to connect to UKKO MPPT converter. UKKO Manager is available free of charge from Electriel’s website. 5.1 Requirements For using the UKKO Manager your computer should meet these system requirements. -
Page 19: Installing The Ukko Manager
18 (29) /USER MANUAL 5.2 Installing the UKKO Manager UKKO Manager can be installed after downloading the latest setup file from Electriel’s website. Step 1: Launch the executable setup file. Step 2: Install Microsoft .NET Framework. At first installation program will ask to install Microsoft .NET Framework. If Framework already exists on the computer this step is automatically skipped. - Page 20 UKKO MPPT-10 19 (29) /USER MANUAL Step 3: Install UKKO Manager. To continue, click Next. Figure 23. The UKKO Manager Installation Step 4: InstallShield Wizard Welcome window. To continue, click Next. Figure 24. Ready to Install Electriel Ltd www.electriel.com FINLAND...
- Page 21 UKKO MPPT-10 20 (29) /USER MANUAL Step 5: InstallShield Wizard Welcome window. To continue, read and accept the terms in the license agreement and click Next. Figure 25. License Agreement Step 6: Choose installation destination folder. Default folder will be created under “Program Files”. To continue, click Next.
- Page 22 UKKO MPPT-10 21 (29) /USER MANUAL Step 7: Ready to begin installation. To continue, click Next. Figure 27. Ready to Install Step 8: Wait until installation status bar has completed. Figure 28. Installing Program Files Electriel Ltd www.electriel.com FINLAND...
- Page 23 UKKO MPPT-10 22 (29) /USER MANUAL Step 9: Install an USB Device Driver. The USB driver is needed in order to utilize communication between UKKO MPPT (device) and UKKO Manager (PC software). To continue, click Next. Figure 29. Driver Installation Wizard Step 10: Windows Security may ask for a confirmation for the driver installation.
- Page 24 UKKO MPPT-10 23 (29) /USER MANUAL Step 11: Driver installation is completed. To continue, click Finish. Figure 31. Driver Installation Completed Step 12: The UKKO Manager installation is completed. To continue, click Finish. Figure 32. UKKO Manager Installation Completed Electriel Ltd www.electriel.com...
-
Page 25: Launching The Ukko Manager
UKKO MPPT-10 24 (29) /USER MANUAL 5.3 Launching the UKKO Manager The installation creates shortcuts for UKKO Manager to the desktop and in the Start Menu. In the Start Menu the shortcut can be found at Programs Menu Electriel UKKO Manager. -
Page 26: General Overview
UKKO MPPT-10 25 (29) /USER MANUAL 5.5 General Overview Device Connected Status Green: Connection OK Charging Status Meters Open/Close Graphs Gray: Device not found Battery Voltage Graph Save Graphs as Image Produced Energy Graph 48 hours data Daily Bars ... -
Page 27: Changing Ukko Mppt Settings Via Ukko Manager
UKKO MPPT-10 26 (29) /USER MANUAL 5.6 Changing UKKO MPPT Settings via UKKO Manager Use Ukko Manager to configure UKKO MPPT. Access UKKO Manager setup menu after UKKO MPPT is connected to the computer. Go to Setup Device Parameters. ... -
Page 28: Troubleshooting
UKKO MPPT-10 27 (29) /USER MANUAL After changing the settings remember always to upload settings to UKKO MPPT by clicking the “Synchronize settings with the device” –button. Figure 38. Synchronizing Data with UKKO MPPT Wait until Loading pop-up window disappears in order to continue using the UKKO Manager. Don’t... -
Page 29: Protections
UKKO MPPT-10 28 (29) /USER MANUAL 6.1 Protections Over temperature If the heat sink temperature exceeds 80 °C it starts decreasing charging current until charging stops completely at 90 °C. Charging starts again when the heat sink is cooled down. -
Page 30: Warranty
LIMITED IN DURATION TO THE WARRANTY PERIOD (AS DEFINED ABOVE). YOUR SOLE REMEDY WITH RESPECT TO ANY BREACH OF THE LIMITED PRODUCT WARRANTY SHALL BE THE REPAIR OR REPLACEMENT OF THE DEVICE AS SPECIFIED IN THE LIMITED PRODUCT WARRANTY. ELECTRIEL IS NOT RESPONSIBLE FOR DIRECT, SPECIAL, INCIDENTAL, OR CONSEQUENTIAL DAMAGES RESULTING FROM...
Need help?
Do you have a question about the UKKO MPPT-10 and is the answer not in the manual?
Questions and answers