Table of Contents
Advertisement
Quick Links
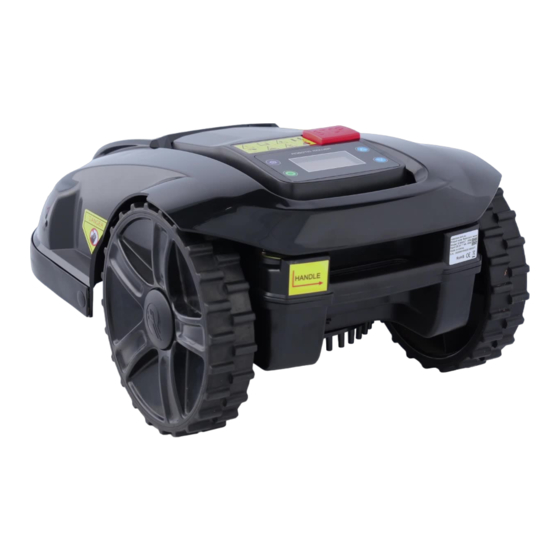
Robot Mower Diagnostics - Wombat & Wombat Joey
Contents
Accessing the Diagnostic Screen .................................................................................................. 2
Testing the wire sensors against the boundary wire ................................................................... 3
Modifying the Charging Station Current ...................................................................................... 4
Testing the Touch Sensor ............................................................................................................. 5
Testing the Bump / Lift Sensors . ................................................................................................... 6
Testing the Pitch / Roll / Angle Sensors ....................................................................................... 7
Testing the Internal Charge Sensors ............................................................................................ 8
Testing the Internal Motor Sensors ............................................................................................. 9
Testing the Rain Sensor .............................................................................................................. 1 1
Advertisement
Table of Contents

Summary of Contents for Robotzoo Wombat
-
Page 1: Table Of Contents
Robot Mower Diagnostics – Wombat & Wombat Joey Contents Accessing the Diagnostic Screen .................... 2 Testing the wire sensors against the boundary wire .............. 3 Modifying the Charging Station Current .................. 4 Testing the Touch Sensor ...................... 5 Testing the Bump / Lift Sensors .................... 6 Testing the Pitch / Roll / Angle Sensors .................. 7 Testing the Internal Charge Sensors .................... 8 Testing the Internal Motor Sensors ..................... 9 Testing the Rain Sensor ...................... 1 1... -
Page 2: Accessing The Diagnostic Screen
Robot Mower Diagnostics – Wombat & Wombat Joey Accessing the Diagnostic Screen To initiate self-detection program: Release the Red emergency button. Immediately press left two buttons. (before the welcome message ends). The diagnostic screen should appear: LL = Left Wire Signal RL = Right Wire Signal Assuming the installation is correct as per the manual, the following readings show: NUL = No wire signal IN = Inside the perimeter wire OUT = Outside the perimeter wire The wire sensors are situated in the undercarriage of the device, near the front wheel. Note the distance between the cutting blades and the sensors, and the distance between the outside wheel edges and the sensors. -
Page 3: Testing The Wire Sensors Against The Boundary Wire
Robot Mower Diagnostics – Wombat & Wombat Joey Testing the wire sensors against the boundary wire In the test shown below, the boundary wire runs under the artificial turf, about 40cm from the left edge, and 40cm from the right edge, looking down. The images show the mower gradually being moved to the right, approaching, and crossing over the boundary wires. As the mower is shifted to the right, the sensors detect the left boundary wire. First the RHS sensor detects it (IN), and then both detect it, as the mower keeps being moved to the right. Finally, the mower recognises that both sensors detect being IN the mowing area. As the mower is shifted further to the right, the sensors detect the Right boundary wire. The RHS sensor begins to detect that it is OUT. As the mower continues to be shifted to the right, Both the RHS and LHS sensors detect that it is OUT. If the above changes are not observed, It could mean that the wire signal is not strong or stable enough. To adjust the strength of the wire signal, follow the steps below. -
Page 4: Modifying The Charging Station Current
Robot Mower Diagnostics – Wombat & Wombat Joey Modifying the Charging Station Current If the device is having difficulty sensing the boundary wire, or if the boundary wire is especially long, it may be necessary to adjust the current in the boundary wire. 1)Press the EMERGENCY STOP button on the mower. 2)Press the HOME button on the charging station. 3) Release the HOME button on the charging station once the wire light on the charging station starts blinking. 4) release the EMERGENCY STOP button on the mower. After hearing the beep, and before the welcome screen appears on the mower, press the UP / DOWN buttons on the mower simultaneously. This will enter the display into current adjustment interface mode. 5) After each restart, the current data will show 00. You can ignore this, and set the current as desired, using the UP / DOWN buttons, followed by the green SET button. You should hear a beep sound from the charging station to confirm. Note: The original factory setting is 28. Please do not adjust to far more than 28. 6) Enter into the testing menu to check the wire signal is good enough or not for your lawn. The current could be adjusted until the signal is good enough. (No need to follow from step one, you can adjust again as step 4). 7) When the current is finally confirmed, disconnect the charger from the charging station, then connected again. The current adjustment process is finished. -
Page 5: Testing The Touch Sensor
Robot Mower Diagnostics – Wombat & Wombat Joey Testing the Touch Sensor The touch sensors are situated on the rear handle of the device. They are designed to cause the mower to stop if the handle at the rear of the device is grabbed. There are two sensors on the handle. Left and Right. First, check that the Touch sensor is active. This is indicated by a T symbol on the control display, as shown at right Test the touch sensors by grabbing the rear handle on either and both sides, whilst in diagnostic mode: L-0 R-0 : neither sensor touched L-0 R-1 : right sensor touched L-1 R-0: left sensor touched L-1 R-1 :both sensors touched... -
Page 6: Testing The Bump / Lift Sensors
Robot Mower Diagnostics – Wombat & Wombat Joey Testing the Bump / Lift Sensors Bump sensors are integrated into the ball joints that connect to the cover. Test the sensor. with the diagnostic screen showing. To test the Left bump sensor, push the cover on the left side at the front. The screen should indicate: Hit : L – 1 R – 0 To test the Right bump sensor, push the cover on the right side at the front. The screen should indicate: Hit : L – 0 R – 1 Lift sensors are also integrated into the ball joints connecting the cover. To test the Lift sensor, pull up on the cover at the front. The screen should indicate: Lift: 1 If the Lift sensor is always on, and the lift sensor alarm is always activated, this means that the Lift sensor Is broken. -
Page 7: Testing The Pitch / Roll / Angle Sensors
Robot Mower Diagnostics – Wombat & Wombat Joey Testing the Pitch / Roll / Angle Sensors There is an in-built gyroscope module to help the mower maintain its course on sloped ground. Test this module with the diagnostic screen showing. To test Pitch, hold the mower by the wheel arches, and turn it to the left and to the right. Check for changes in the Pitch reading as indicated. To test Roll, hold the mower by the wheel arches, and lift the rear wheels, and then the front wheel. Check for changes in the Roll reading as indicated. To test Angle, hold the mower by the wheel arches, and alternately lift one arch at a time. Check for changes in the Angle reading as indicated. -
Page 8: Testing The Internal Charge Sensors
Robot Mower Diagnostics – Wombat & Wombat Joey Testing the Internal Charge Sensors The charging properties of the mower can be checked through the diagnostic screen when the mower is seated in the charging station. The ICH indicator has a range 0~4096. The higher the reading, the more current is being drawn. When charging, the indicator should show >500, until the internal battery voltage rises above 26V. When the internal battery voltage rises above 26V, the ICH reading should gradually decrease, until the mower is fully charged, and no more current is required. The charging connection CH indicates whether or not the electrical connection between the mower and the charging station is good: (1=connected; 0=disconnected) -
Page 9: Testing The Internal Motor Sensors
Robot Mower Diagnostics – Wombat & Wombat Joey Testing the Internal Motor Sensors The Internal Motor current sensors show the status of power to motors. IML: left motor current (0 ~ 4096) IMR: right motor current (0 ~ 4096) IMC: cutting motor current (0 ~ 4096) The Cutting Motor status indicates the operation of the cutting motor. To start the cutting motor, with the diagnostic screen showing, press the green SET button. The display should show: MCut: 1 (1: ON 0:OFF) To stop the Cutting Motor, with the diagnostic screen showing, press the purple HOME button. The display should show: MCut: 0 (1: ON 0:OFF) The Running Motor status indicates the operation of the drive motor. (S:OFF F:forward R:reverse) To start the running motor in forward, with the diagnostic screen showing, press the blue UP button. The display should show: Motor: F... - Page 10 Robot Mower Diagnostics – Wombat & Wombat Joey To start the Running Motor in reverse, with the diagnostic screen showing, press the blue DOWN button. The display should show: Motor: R To stop the Running Motor, with the diagnostic screen showing, press the purple HOME button. The display should show: Motor: S...
-
Page 11: Testing The Rain Sensor
Robot Mower Diagnostics – Wombat & Wombat Joey Testing the Rain Sensor The Rain sensors are situated at the top of the mower, near the control panel display. They are designed to make the mower return to its charging station if rain is detected. The mower cold operate in the rain, but its wheels would find difficulty gaining traction on wet & slippery grass. First, check that the Rain sensor is active. This is indicated by a R symbol on the control display, as shown at right. Test the Rain sensors by touching the points on the sensor. Alternatively, you could pour some water on the sensor. The sensor reading should respond to either of these stimuli.
Need help?
Do you have a question about the Wombat and is the answer not in the manual?
Questions and answers