Advertisement
Quick Links
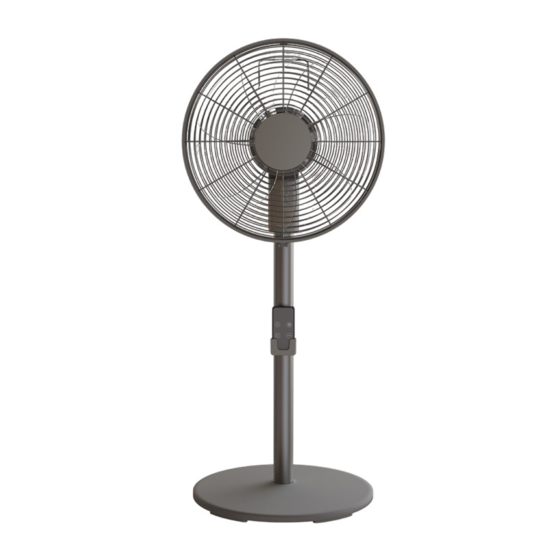
LIVING FAN 優美扇
OPERATION MANUAL 使用說明書
RLF-30KM
僅適用於家庭使用 For Household Use Only
使用前請先詳細閱讀本說明書,並保存以便日後參考。
本說明書中所有圖片僅供解釋用途。
Please read this user manual before using the product and keep it for your future reference.
All the pictures in this manual are for reference only.
1
Advertisement

Subscribe to Our Youtube Channel
Summary of Contents for Rasonic RLF-30KM
- Page 1 LIVING FAN 優美扇 OPERATION MANUAL 使用說明書 RLF-30KM 僅適用於家庭使用 For Household Use Only 使用前請先詳細閱讀本說明書,並保存以便日後參考。 本說明書中所有圖片僅供解釋用途。 Please read this user manual before using the product and keep it for your future reference. All the pictures in this manual are for reference only.
- Page 2 安全注意事項 (請務必詳細閱讀及遵守安全指導) 請務必嚴格遵守以下說明之注意事項,以防止對使用者或其他人造成傷害或財物損失。 用戶必須使用有安全認證的合格插座,否則,可能會引起火災的危險。 此設備可供 8 歲以上兒童,肢體、感官、心智殘缺或缺乏經驗和知識的人使用,但他們必須 已獲得監督和安全使用該設備的指導,並且了解其中的危害。兒童不應將本產品用於玩耍。 不得讓兒童在沒有監督的情況下進行清潔和保養。 本設備是不打算供與(包括兒童)身體,感官或智力有障礙,或缺乏經驗和知識人士使用,除非 他們是在負責他們安全的人員監督或有關使用該設備的指示下使用。兒童應當受到監督以確 保他們不會玩耍器具,請勿讓兒童爬上風扇。 此風扇必須與原裝變壓器配合使用。使用前,確保變壓器與主體機身已徹底連接,否則會因 接觸不良導致產品異常發熱或損壞。 拔掉電源線插頭時須緊握,切勿拉扯電線。 確保電源插頭完全插入插座,否則會引致觸電或插頭過熱而造成火災。 要定期清除電源插頭及插座上之灰塵,否則引致絕緣不良而導致火災。 若電源線有裸露或有損壞時,切勿使用本機。避免危險,必須交由信興電器服務中心有限公 司維修。如果電源線損壞或產品出現故障,必須交由信興電器服務中心有限公司更換或維修, 以避免危險。切勿自行拆卸、檢修,或更換非生產商提供的配件。 10. 切勿過度擰捏,彎曲或扭轉電源線,否則線芯可能會曝露在外或折斷,並引致觸電,短路, 火災及產品損壞。 11. 嚴禁讓機體沾水,否則會導致漏電、短路、產品損壞及導致火災的可能。 12. 為避免過熱,禁止覆蓋機體。 13. 切勿將物品放置在機體上。 14. 手濕時切勿接觸風扇及電源插頭, 否則有觸電的危險。 15. 請勿讓手指或其他異物插入機體任何通風或排氣口,這可能會導致觸電、身體損傷、火災或 損壞機體。 16. 不可用力敲擊或震動機身. 17. 請勿在陽光直射下使用或保存產品。 18. 電源線要擺放好,防止行走時拌倒。 19.
- Page 3 23. 為了安全起見,當人離開產品時,必須關機,以免發生意外事件。 24. 避免將產品出風口長時間直接向嬰幼兒吹風。 25. 產品清洗或移除面蓋前必須先切斷電源並拔掉電源線插頭。 26. 產品外殼清潔時,應用濕布(或加點中性清潔劑)抹擦,不要用有腐蝕性的洗滌劑或溶劑之類清 潔,嚴禁用水沖(淋)洗。 27. 不可將本機進、出風口貼近牆壁、窗簾等物品,否則會阻塞氣流,影響使用效果。 28. 本機在使用一段時間後,若出現異聲或風速不均勻的現象,可能是後殼進風口處的灰塵太多阻 塞了氣流,此時用毛刷清潔一下後即可恢復正常。 29. 產品長期不使用時,應拔下電源插頭,包好本機防止灰塵進入機內,並放置乾燥通風處存放。 部件名稱...
- Page 4 控制面板 遙控器 更換遙控器電池 ① 遙控器背面有一個電池盒,請在壓下電池盒側面的卡榫同時將其拉出。 ② 取出舊電池,然後正面朝上放入硬幣形鋰電池(CR2032)。 ③ 放入電池後,滑動電池盒,然後插入並固定電池盒。 警告 把鋰電池放在嬰幼童接觸不到的地方。...
- Page 5 清潔保養 1. 清潔、保養或移動產品前,必須先關閉產品,然後拔除電源插頭。必須待風扇完全停止轉動後 才可清潔,以免受傷。 2. 確保在拆除前網後網前已關閉電源及拔除插頭。 3. 請使用濕潤軟布抹擦清潔風扇表面。 4. 清潔完畢,必須待產品完全乾燥,才可使用。 如何拆卸 1. 用螺絲批拆下前網下方的固定螺絲。 2. 將前網扣往前提起,然後將前網由掛扣脫出,即可取下前網。 如何安裝 1. 將立柱連接到底座上 ① 用螺絲批從支柱取下底座的固定螺絲。(圖 1) ② 將支柱底部突出的小圓柱和底座的小圓柱孔對齊並後連接好支柱和底座。(圖 2) ③ 用螺絲批鎖緊底座的固定螺絲。(圖 3)
- Page 6 2. 將主機安裝到支柱上 ① 將主體的連接軸對準支柱的插入口。(圖 4) ② 將主機垂直插入支柱直至聽到喀嗒聲。(圖 4) 3. 安裝後網罩 ① 由電機軸上取下扇葉螺母和後網罩螺母。(圖 5) ② 將後網的孔位和凹槽與電機的凸柱對齊並裝入。(圖 6) ③ 將後網罩螺母順時針方向鎖緊。(圖 7)
- Page 7 4. 安裝扇葉 ① 確保扇葉的卡槽對準電機軸的觸位,將扇葉插入。(圖 8) ② 逆時針鎖緊扇葉螺母。(圖 9)
- Page 8 5. 安裝前網 ① 用螺絲批將前網固定螺絲拆下,然後打開前網扣。(圖 10) ② 將前網 5 個掛扣扣入後網罩。(圖 11 & 12) ③ 按下前網的下半部份,固定好後網罩並扣上網扣,鎖緊螺絲。(圖 13)
- Page 9 其他注意事項 : 安裝時,請確保扇葉已完全嵌入,否則扇葉可能無法轉動及正常運作。 切勿將電源線、插頭或主機浸在水中清潔或在水龍頭下沖洗,風扇内部零件不可沾水。 切勿使用鋼絲刷、汽油、火酒、醋或其他揮發、有毒或含腐蝕性液體清潔產品,以免損壞產 品。用微濕的布清潔風扇表面即可。 儲存時,切勿將電源線纏繞在產品四周或壓住電源線,以免造成電源線損壞。 建議最少每個月清潔產品一次。 如長時間不使用產品,請將產品收藏回包裝盒内並放置在乾燥陰涼且安全的地方。 操作說明 把風扇放在一個穩定的平面上使用。先將配送的適配器端子與風扇連接,再將適配器上的電源插 頭連接到一個合適的電源插座上 (220V-240V~ 50-60Hz)。觸摸風扇操作面板按鍵位或遙控器, 則可啟動相應的功能。 開關鍵: 按此鍵可啟動或關閉設備。 擺頭鍵: 按此鍵可開啟或關閉左右搖頭功能。 定時鍵: 選擇所需的定時關機時間2/4/6小時。 風速鍵: 本機備有 6 段風速, 每按此鍵一次即可切換風量/增加一檔風量。 調節俯仰角度 。 按住風扇本體向上/下擺,可以調節俯仰角度,風向可自由選擇...
- Page 10 規格 產品型號 RLF-30KM 顏色 炫灰色 額定電壓 24 伏特(直流電) 額定功率 18 瓦 外型尺寸(寬×深×高) 350 x 300 x 827 毫米 淨重 4.05 公斤 特別聲明 1. 本資料上所有內容經過認真核對,如有任何印刷及內容上的誤解,本公司將保留解釋權。 2. 本產品若有技術改進,會編進新版說明書中,恕不另行通知;產品外觀及顏色如有改動,則以 實物為準。 3. 用戶如需要電子版使用說明書,請致電信興電工工程有限公司熱線查詢:2861 2767。 售後服務 由購買日期起之一年保修期內,經信興電器服務中心有限公司之服務人員證實乃在正常使用之情 況下發生者,本公司將提供免費修理及更換零件。經更換之任何損壞零件,將歸屬本公司。保修 範圍不包括修理或更換產品之附件、外接線及機殼等,如有需要服務時,用戶須另付費用。 用戶請於維修時出示購買收據 / 換購收據及保修證,如有任何疑問,請致電信興電器服務中心有 限公司熱線查詢:2406 5666。 如在保修證內所列之電器:1.) 曾經被非本公司技術人員明顯地或非明顯地進行改裝、更改或修...
- Page 11 SAFETY PRECAUTIONS (Be sure to read carefully and follow these safety instructions) Be sure to read the following safety precautions, in order to avoid possible injury to yourself or others and damage to your belongings. The user must use qualified socket with safety certification, or it may cause fire. This appliance can be used by children aged from 8 years and above and persons with reduced physical, sensory or mental capabilities or lack of experience and knowledge if they have been given supervision or instruction concerning use of the appliance in a...
- Page 12 15. Do not insert fingers or conductive object into the front and back air outlets of the machine to avoid the risk of electric shock, human injury, fire or damage of appliance. 16. Avoid any concussions or shocks to the fan. 17.
- Page 13 Part Name Control Panel...
- Page 14 Remote Controller Battery Replacement ① Pull out the battery case from the back of remote controller, press tab toward to right and pull out the battery holder. ② Replace the coin lithium battery into the battery holder, keep the positive pole upwards (3V CR2032).
- Page 15 Cleaning and Maintenance 1. Always unplug the unit before cleaning, maintenance or moving. To avoid danger, unplug the unit and wait until the fan stop running before cleaning. 2. Ensure that the fan is switched off from the supply mains and unplug before removing the guard.
- Page 16 Joint the main body to the tube ① Align the axis of main body with the axis hole of tube. (Figure 4) ② Inserted the main body vertically into the tube until hear “click”sound. (Figure 4) 3. Install back guard ①...
- Page 17 4. Install fan blade ① Align the groove of fan blade with motor axis connect position, then install it on the motor. (Figure 8) ② Tighten the fan blade screw cap in anticlockwise direction. (Figure 9)
- Page 18 5. Install front guard ① Remove the screw under the front guard by screwdriver, pull the front guard net buckle and remove the front guard. (Figure 10) ② Align the hook of front guard with install position of back guard. (Figure 11 & 12) ③...
- Page 19 Additional Advices 1. While installing the unit, make sure fan blade is inserted completely. If not, the fan blade could not rotate and the unit could not work properly. 2. Do not immerse the power cord, plug and the whole unit into water or rinse under the tap.
-
Page 20: Specification
Adjust the wind direction Hold the fan up or down to adjust the wind direction. SPECIFICATION Model RLF-30KM Colour Metallic Grey Rated voltage 24Vd.c. Rated power Dimension(W×D×H) 350 x 300 x 827mm Net weight 4.05 kg SPECIAL AVOWAL 1. The information above has been checked. Our company reserves the hermeneutic power to any printing errors or misunderstanding on the content. -
Page 21: After Sales Services
AFTER SALES SERVICES For any defect, in the judgment of technician from Shun Hing Electric Service Centre Limited, caused under normal use, we are responsible for repairing or replacing parts of the said electrical appliance free of charge within one year guarantee period commencing from the date of purchase. - Page 22 辦公室: 香港九龍尖沙咀東部麼地道 67 號半島中心 9 樓 OFFICE: 9/F, PENINSULA CENTRE, 67 MODY ROAD, TSIMSHATSUI EAST, KOWLOON, HONG KONG 電話 TEL: (852) 2861 2767 傳真 FAX: (852) 2865 6706 網址 WEBSITE: www.rasonic.com 電郵 EMAIL: shew@shunhinggroup.com 保養及維修 MAINTENANCE AND REPAIR SERVICE 信興電器服務中心有限公司...


Need help?
Do you have a question about the RLF-30KM and is the answer not in the manual?
Questions and answers