Advertisement
Quick Links
Advertisement

Related Manuals for SilverStone SUGO Series


Summary of Contents for SilverStone SUGO Series
- Page 1 SUGO SERIES SG05...
-
Page 2: Cooling System
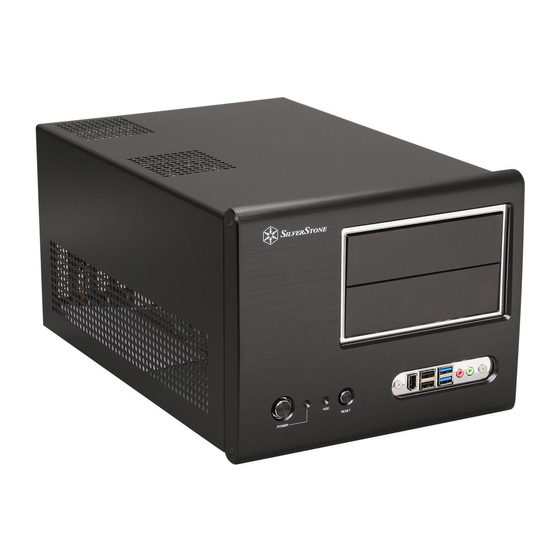
Product Overview SG05 Specification Model No. SST-SG05B (black, 300W) SST-SG05W (white, 300W) SST-SG05BB-450 (black, black interior, 450W) Material Plastic front panel, 0.6mm SECC body Motherboard Mini-DTX, Mini-ITX Drive Bay External Slim optical x 1 Internal 3.5” x 1, 2.5”x 1 Cooling System Front 1 x 120mm intake fan 1200rpm... - Page 3 Product Overview Specifications of Power Supply Max. DC Output 300W Load Range +3.3V +12V1 +12V2 +5VSB -12V Max.(Amps) 2.5A 0.5A Peak (Amps) Min.(Amps) 0.5A 0.5A Range (%) +/-5% +/-5% +/-5% +/-5% +/-5% +/-5% Ripple(mVp-p) 70mV 70mV 140mV 140mV 70mV 70mV Connectors 1 x 24-pin motherboard connector (300mm) Combined +3.3, +5V...
- Page 4 SLIM OPTICAL DRIVE (SOLD SEPARATELY) 3.5” HDD TRAY 3.5” HDD (SOLD SEPARATELY) PSU (300 / 450W) 2.5” HDD (SOLD SEPARATELY) TOP COVER SLIM OPTICAL DRIVE TRAY EXPANSION SLOTx 2 USB2.0 MOTHERBOARD (OPITON) 3.25 Bay MIC.EARPHONE 12025 FAN USB2.0 RESET BUTTON POWER BUTTON FILTER BKT USB2.0 CONNECTOR...
- Page 5 С помощью отвертки открутите Please remove the screws holding шурупы, удерживающие верхнюю the top cover with a screw driver, крышку, а затем снимите ее, then pull it toward the back to lift it сдвинув назад и приподняв. outward away from the chassis. 상부...
- Page 6 Нажмите на указанные зажимы и Press the area as shown to release снимите переднюю панель. the clips, then remove the front panel. 그림에서와 같은 위치를 눌러 클립을 Drücken Sie auf die Stelle wie 풀어준 후, 전면 패널을 제거합니다. abgebildet, um die Klemmen zu lösen und entfernen Sie die Frontabdeckung.
- Page 7 Открутите шурупы, как показано на Remove the screws as shown to рисунке, и снимите крышку тонкого remove the slim optical drive cover. оптического привода. Entfernen Sie die Schrauben wie 그림과 같이 나사를 제거해 슬림 abgebildet und entfernen Sie die 광드라이브 커버를 제거합니다. Abdeckung des dünnen optischen Laufwerks.
- Page 8 Установите материнскую плату в Install your motherboard into the корпус и закрепите ее прилагаемыми chassis as shown and secure with шурупами. included screws. Installieren Sie Ihr Motherboard im 그림과 같이 나사를 제거해 슬림 Chassis und befestigen Sie es mit 광드라이브 커버를 제거합니다. den beiliegenden Schrauben.
- Page 9 Установите ваш 2,5-дюймовый жесткий Install your 2.5” hard drive onto the диск в кронштейн оптического привода, optical drive bracket as shown and как показано на рисунке, и закрепите secure with included screws. прилагаемыми шурупами. (the maximum thickness of 2.5” hard (Максимальная...
- Page 10 Снова установите переднюю панель. Reinstall the front panel onto the chassis. Installieren Sie die Frontabdeckung 전면 패널을 케이스에 재 설치합니다. wieder am Chassis. フロントパネルをケースに戻します。 Réinstallez le panneau frontal sur le boîtier. 繁体中文 繁体中文 將前面板裝回機殼上. Reinstale el panel frontal en el chasis.
- Page 11 Открутите шурупы на крышке слота Please remove the screws holding карты расширения и снимите крышку. the expansion card slot cover, and remove it. 확장슬롯 커버를 고정하고 있는 나사를 Bitte entfernen Sie die Schrauben 제거한 후 슬롯 커버를 제거합니다. der Expansionssteckplatzabdeckungen und entfernen Sie sie.
- Page 12 Подключите все необходимые провода After all cables and wirings are и кабели, после чего поставьте на место connected, reinstall the top cover верхнюю крышку и закрепите ее шурупами. and secure it. Nachdem alle Kabel und Drähte 모든 케이블과 선들이 연결되었으면 verbunden sind, installieren und 상부...
- Page 13 Notice If you need to clean the filter or replace/remove the fan, please refer to the following steps: С помощью отвертки открутите Please remove the screws holding the шурупы, удерживающие верхнюю top cover with a screw driver, and then крышку, а затем снимите ее, сдвинув pull it toward the back and lift it outward назад...
- Page 14 Для того чтобы убрать фильтр, Press the area as shown to remove нажмите на указанную область. the filter. 그림에서와 같은 위치를 눌러 필터를 Drücken Sie die Stelle wie abgebildet, 제거합니다. um den Filter zu entfernen. 図に示された場所を押 Appuyez sur la zone comme montré してフィルタを外します。...
- Page 16 July, 2010 G11212370...
Need help?
Do you have a question about the SUGO Series and is the answer not in the manual?
Questions and answers