
Related Manuals for Dellcool XCD-90B

Summary of Contents for Dellcool XCD-90B
- Page 1 User and Installation Manual Absorption refrigerator for recreational vehicles Models: XCD-90B Read manufacturer’s instructions before use...
- Page 2 Warning: FOR YOUR SAFETY Please read this instruction manual carefully before operating the unit. Do not store or use gasoline or other flammable vapors and liquids in the vicinity of this or any other appliance. If you smell gas: 1. Open windows. 2.
-
Page 3: Table Of Contents
Table of Contents Page Safety Introduction………………………………………………………………………….4 Instructions…………………………………………………………………………………..5 Installation instructions……………………………………………………………………..7 Operation Instructions………………………………………………………………………9 Trouble Shooting and Maintenance………………………………………………………12 Maintenance………………………………………………………………………………...13 Wiring Diagram……………………………………………………………………………..15 Limited Warranty……………………………………………………………………………15 Schedule 1…………………………………………………………………………………..16 Schedule 2…………………………………………………………………………………..17 REFERENCE INFORMATION: Please complete the following information for future reference. You will need it to obtain warranty service. Model Name*: __________________________________ Serial Number *: __________________________________ Date and place of Purchase: __________________________________... -
Page 4: Safety Introduction
Safety Instructions Before you use your absorption refrigerator, please read this instruction manual carefully 1.The appliances are suitable for installation in recreation vehicles such as caravans and motor homes. 2.The appliance may be connected to more than one source of energy. 3.The appliance shall not be exposed to rain. - Page 5 Introduction Thank you for choosing our gas refrigerator. Please read through these instructions carefully before operating this refrigerator. When using it, always exercise safety instructions. This refrigerator is designed for installation in recreation vehicles such as caravans and motor homes. It is intended to be built inside a cupboard enclosure.
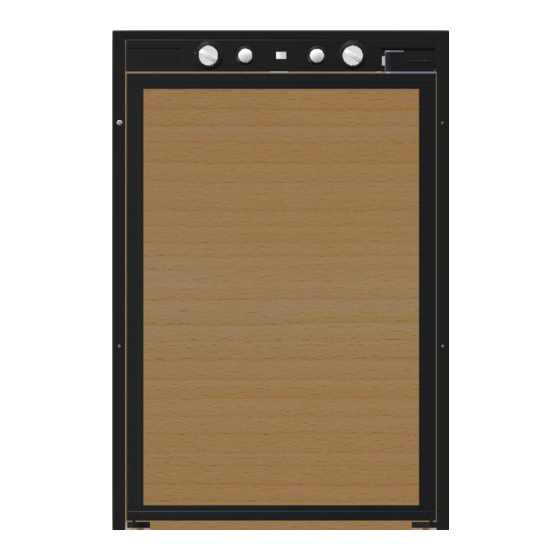
- Page 6 Parts and Features Control panel Lock and handle Freezer Door Drip tray Crisper Balcony...
-
Page 7: Installation Instructions
3. Installation Instructions(See the schedule 1. 2) 1. The refrigerator is designed to install into enclosure in the vehicle. No clearance is required on both sides. Bottom must be leveled very well. Particularly a cut-out should be left for hinge to access. 2. - Page 8 Gas connection The refrigerator is designed to work on LPG gas, not natural gas or town gas. Check that the pressure of supplied gas is 11 inches water column. A suitable threaded coupling must be used to connect the gas pipe to the inlet. Leakage test must be carried out after the connection is done.
-
Page 9: Operation Instructions
Operation Instructions A: Power selector B: Battery igniter C: Flame indicator D: Safety valve E: Thermostat The power selector has five positions: - Main supply AC (110V-120V) - DC 12V - Gas - Switch off (2 positions) Gas Operation Prior to starting gas operation, open the gas cylinder valve and the shut-off valve for gas supply to the refrigerator. - Page 10 4 mm or less in thickness. Door panels should be installed in the refrigerator doors before installing the refrigerator in " " the vehicle. The door panel dimensions for XCD-90B are 19.1 (485±0.5mm) wide by 26.3 (670±0.5mm) high. To install the door panels, first pull the panel retainer off the bottom of the door by removing two screws. Push the door panel into the slots of the door and put the panel retainer back into place to hold the panel inside the door.
- Page 11 Replace the battery for electronic spark ignition (Fig 1, Fig 2) The battery for ignition is mounted inside the right lamp box. Remove the light cover with a knife. You can get access to the battery. Simply replace the battery with a new one and put the cover back. Fig 1 Fig 2 Fig3...
-
Page 12: Trouble Shooting And Maintenance
Always remember: - Wrap up separately raw food and cooked food in aluminum or plastic wrap. - Don’t remove the packing if useful information about the product are written on it. - Don’t leave refrigerated products outside the refrigerator too long. - Put the products that have to be eaten first in the front of the refrigerator. -
Page 13: Maintenance
6. Maintenance Inspect the gas hose periodically for cracks or deep chafing marks. Connections can be tested for leaks using a soap solution. Cleaning the refrigerator General: Do not use harsh chemicals, abrasives, ammonia, chlorine bleach, concentrated detergents, solvents or metal scouring pads. - Page 14 Cleaning the Cooling System and Flue tube WARNING Carbon Monoxide can be hazardous to your health. Gas appliances may emit excessive Carbon Monoxide if the refrigerator’s burner, burner orifice, and the flue tube are not regularly cleaned. To prevent Carbon Monoxide, the burner, burner orifice, and the cooling system’s flue tube must be cleaned at least once a year and after all prolonged (seasonal) shut-down periods.
-
Page 15: Wiring Diagram
7. Circuit Diagram Limited Warranty As a condition to any warranty service obligation, the consumer must present the Warranty Certificate along with a copy of the original purchase invoice. THIS WARRANTY DOES NOT COVER: 1) Damage, accidental or otherwise, to the absorption refrigerator while in the possession of a consumer not caused by a defect in material or workmanship. -
Page 16: Schedule 1
Schedule 1 The Frist Installation 1. Install the seven screws in the following order (Use the screws in the parts bag.): Six screws installed through the front frame; One screw installed in the rear base. 2. To install the ventilation grills, cut two rectangles17.8" x 6.2” (452 mm x 158 mm) in the outer wall of the vehicle. The distance between the two holes is defined as: take the bottom of the refrigerator cabinet as the reference for opening, size A is 3.1"... -
Page 17: Schedule 2
Schedule 2 The Second Installation 1. Install the seven screws in the following order(Use the screws in the parts bag.): Six screws installed through the front frame; One screw installed in the rear base. 2. To install the ventilation grills, cut one rectangle 17.8" x 6.2" (452 mm x 158 mm) in the outer wall of the vehicle,the distance is defined as: take the bottom of the refrigerator cabinet as the reference for opening, size (A) is 3.1"...
Need help?
Do you have a question about the XCD-90B and is the answer not in the manual?
Questions and answers
How to change door swing