Table of Contents
Advertisement
Quick Links
Advertisement
Chapters
Table of Contents

Summary of Contents for Air Direct Dr's Cam Air
- Page 1 Wireless Intraoral Camera Enjoy wireless Wireless type User manual...
- Page 2 Wireless Intraoral Camera Enjoy wireless Wireless type User manual...
-
Page 3: Table Of Contents
Contents 1. Introduction - Features - Description - Overview 2. Safety Information - Symbols - Notes and reference - Installation and Connection - Operation - Maintenance 3. List of Components 4. Parts and functions 5. Installation 6. How to use 7. -
Page 4: Introduction
Introduction Thank you for purchasing the device. The instructions described below have been designed to provide the necessary information for the successful operation, daily maintenance and safety for the use of this unit. Features - High speed digital wireless - Autofocus - Gyro mouse built-in 。... -
Page 5: Safety Information
Safety information It is important to understand the following information to use this product safely. Symbols Warning and Caution used in this manual are shown below. Indicates a potentially hazardous situation which, if not avoided, may result in serious injury or death. Warning Indicates a potentially hazardous situation which, if not avoided, may result in minor/moderate injury or in damage of property. -
Page 6: Installation And Connection
Safety information Installation and Connection Warning - The adapter should be disconnected from the charger before connecting the power cable to prevent an electric shock. - Keep away from sources of ignition to avoid fire or explosion. - Protect the device from any liquid to avoid electric shock or functional error. - Place the charger on a flat and stable surface. -
Page 7: Operation
Safety information Operation Warning - Do not plug the power cord with wet hands. This may result in an electric shock. - In case of fluid leak from battery or partial discoloration/deformation of the device, immediately discontinue use. - In case of partial discoloration of the device, immediately disconnect the power plug and repair it. -
Page 8: Maintenance
Safety information Maintenance Warning - Use only accessories supplied to avoid fluid leak, explosion, or malfunction. - Do not disassemble or overhaul the device. Unusual performance may cause injuries, electric shock, fire, or malfunction. - Ensure that charger and camera are always separated from the device prior to cleaning. - Be careful from any liquid when clearing. -
Page 9: List Of Components
Please check the contents described below when removing the contents from the original packaging. Camera Charger Adapter (Part No. DCAMM1001) (Part No. DCAMM2001) (Part No. AC0105) Power cable Receiver-Air Direct Data USB (Part No. AC0111) (Part No. AC0216) (Part No. AC0201) Disposable Plastic Cover Quick Guide 1. -
Page 10: Parts And Functions
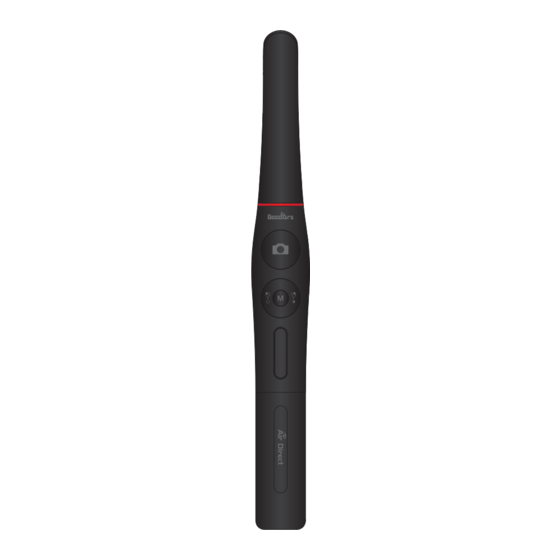
Parts and functions ① Lens ③ Button ⓐ Capture button ② Head ⓑ Left button ⓒ Right button ⓓ Mode button ④ OLED screen ⑤ Wireless antenna ⑧ Charging port ⑦ Charging indicator ⑥ Charger ① Lens ⑤ Wireless antenna - Image is reflected on the lens through prism. -
Page 11: Installation
Installation 1. Connection between adapter and charger 1) Securely insert the power cable with 100~240V power outlet. 2) Connect power cable with adapter. 3) Connect adapter with charger - Use only the original adapter supplied. - When the adapter is connected with charger, red and blue light will blink. - If red and blue light is not blinking when adapter is connected, it is a charger Note malfunction. - Page 12 Installation 3. Receiver installation 1) Connect the receiver to the USB port on your PC Connect to the USB port 2) After approximately 5 seconds, the receiver will display a logo and the receiver's default number "001" 3) To change to a number that does not overlap with other receivers, press the ▲ and ▼ buttons on the receiver to change the number.
- Page 13 Installation 5) When "Air Direct connected" message shows up and connected well, receiver's number will display in the main screen which is connected to wireless icon Successful connection Not connected with the receiver Number with at least 3 digits More than 3 digits of number will display as "00" and you can check the whole number...
- Page 14 Installation 6. Camera device setup - Click and hold left button and right button for 3 seconds. Then the device is turn to setup mode. - ⓐ Capture button: select ⓐ Capture button - ⓑ Left button: down - ⓒ Right button: up Reference - ⓓ...
-
Page 15: How To Use
How to use 1. Turn on the device - Click the capture button. Then the device turn on with LED blink with beep sound. 2. Image capture - Click camera icon on the DrsViewer2. Then live image is shown. - Half click is focus adjusting, and click is image capture. If the mode is full autofocus mode, half click is image capture. - Page 16 How to use 6. Black & White mode - Click mode button with mouse right button. Then LED turn off, and live image changed to black & white mode. Normal ⇒ Black & White mode is rotated. Black & White mode is worked on live image is on. Reference 7.
-
Page 17: Maintenance
Maintenance Cleaning and disinfection - Clean the camera and charger gently with clean, soft, lint-free cloth. - Avoid using solvents which contain ethanol or acetone. - Do not use sharp or pointed tools to clean as they may damage or scratch the plastic. - Be careful not to spill any liquid into the device. -
Page 18: Trouble Shooting
Trouble shooting If the device does not work normally, please refer to the following points. Problem Cause and solution If the button is pressed with excessive force, it will not work, try pressing the button gently. And check the button condition. If the device is not recognized well, the button could not work well. -
Page 19: Specification
Specification ■ Equipment Class Model: IC-DCAM70 Trademark: Dr’s Cam Air Power supply: 3.7V Lithium Ion Receiver: 5V USB power Protection from ingress of liquids: IPX0 (ordinary equipment) ■ Operation, transport, and storage condition for the main unit Operation Storage Transport Temperature 10~30C 10~40C... -
Page 20: Accessories
No hooks Reuse is not allowed Fragile item Do not device on place where get direct sunshine. Accessories Adapter Power cable Receiver-Air Direct (Part No. AC0105) (Part No. AC0111) (Part No. AC0216) Disposable Plastic Cover 1. Product - Disposable Plastic Cover 2. -
Page 21: Warranty
Warranty This product is only shipped after strict inspection. Should the product incur any problems under normal use conditions within one year from the date of purchase, the repair will be free of charge. However, repair of consumables (Disposable Cover, and etc.) are not covered by the warranty. For more information, refer to the 12. -
Page 22: Warranty Card
Warranty card Enjoy wireless... - Page 23 Wireless Intraoral Camera Enjoy wireless Wireless type User manual...
- Page 24 목차 1. 소개 - 특징 - 사용목적 - 개요 2. 안전에 관한 정보 - 기호 - 노트와 참조 - 설치 시 - 사용 시 - 유지보수 시 3. 내용물 4. 부품 및 기능 5. 설치 방법 6. 사용 방법 7. 유지 보수 8.
- Page 25 소개 본 제품을 구매해주셔서 감사드립니다. 본 매뉴얼에는 제품 설치, 사용 및 유지보수에 관한 사항이 적혀있습니다. 안전하고 원활한 사용을 위하여 본 매뉴얼을 꼭 읽고 숙지 해 주시길 바랍니다. 특징 - 하이스피드 디지털 무선 방식 - 오토 포커스 - 내장형 자이로 마우스 - 280도...
-
Page 26: 안전에 관한 정보
안전에 관한 정보 다음의 정보들은 제품의 안전한 사용을 위한 표시입니다. 기호 발생할 경우 심각한 부상이나 죽음에 이를 수 있는 잠재적인 위험요소 경고 발생할 경우 가벼운 부상이나 재산상의 피해를 야기하는 잠재적인 위험요소 주의 노트와 참조 노트 및 참조 표시는 다음의 경우에 표시됩니다. 무시할... - Page 27 안전에 관한 정보 설치 시 경고 - 감전을 방지하기 위해서 어댑터의 전원케이블은 전원이 입력되기 전에 충전기로부터 분리가 되어있어야 합니다. - 화재나 폭발을 방지하기 위해 발화물질 등에 제품을 가까이 두지 마십시오. - 감전이나 기능적인 에러 등을 방지하기 위해 액체나 습기 등으로부터 제품을 보호해주십시오. - 충전기를...
- Page 28 안전에 관한 정보 사용 시 경고 - 전원코드를 젖은 손으로 만지지 마십시오. 감전의 위험이 있습니다. - 배터리로부터 액체가 흐르거나 부분적인 변형이 오는 경우 즉각 사용을 중단하십시오. - 제품의 부분적인 변형이나 변색이 온 경우에는 전원을 분리하시고 수리를 받으십시오. - 배터리로부터 흘러나온 액체가 눈에 들어갔을 경우, 즉각 흐르는 물에 씻어주시고, 병원으로...
- Page 29 안전에 관한 정보 유지보수 시 경고 - 누설전류, 폭발 혹은 고장 등을 방지하기 위해서 제공되는 배터리나 악세서리만을 사용하십시오. - 제품을 임의로 분해하거나 수리하지 마십시오. 부상이나 감전, 혹은 화재의 위험이 있습니다. - 제품을 청소할 경우, 충전기와 제품을 꼭 분리해주시기 바랍니다. - 제품을 청소 시, 습기가 제품에 들어가는 것에 대해서 주의를 해주십시오. 주의...
-
Page 30: 내용물
제품 개봉 후 다음과 같은 내용물들이 있는지 확인 바랍니다. 카메라 충전기 어댑터 (Part No. DCAMM1004) (Part No. DCAMM2001) (Part No. AC0110) 전원 케이블 수신기-Air Direct Data USB (Part No. AC0111) (Part No. AC0216) (Part No. AC0201) Disposable Plastic Cover 1. Product... -
Page 31: 부품 및 기능
부분 및 기능 ① 렌즈 ③ 버튼 ⓐ 캡쳐 버튼 ② 헤드 ⓑ 왼쪽 버튼 ⓒ 오른쪽 버튼 ⓓ 모드 버튼 ④ OLED 스크린 ⑤ 무선 안테나 ⑧ 충전기 포트 ⑦ 충전 표시 ⑥ 충전기 ① 렌즈 ⑤ 무선 안테나 - 안테나와... -
Page 32: 설치 방법
설치 방법 1. 어댑터와 충전기 연결 1) 전원케이블을 100~240V 전원콘센트 확실하게 연결해주십시오. 2) 전원케이블을 어댑터와 연결해주십시오. 3) 어댑터의 단자를 충전기에 연결해주십시오. - 제공되는 어댑터만을 사용하여주시기 바랍니다. - 어댑터와 충전기가 연결되었을 경우 충전기에서 붉은색과 파란색의 불빛이 점등합니다. - 어댑터를 연결했을 때 붉은색과 파란색빛이 한번씩 깜박이지 않으면 충전기의 고장 노트... - Page 33 설치 방법 3. 수신기 설치 1) 수신기를 PC의 USB 포트에 연결합니다. USB포트에 연결 2) 약 5초 후 수신기에서 로고가 표시되고 수신기의 기본 고유 번호 “001” 이 표시됩니다. 3) 다른 수신기와 중복되지 않는 고유 번호로 변경하려면 수신기의 ▲/▼ 버튼을 눌러서 고유 번호를 변경합니다. (▲/▼ 버튼을 누르고 있으면 빠르게 변경됩니다.) 4.
- Page 34 설치 방법 5) “Air Direct connected” 메시지가 나오고 정상적으로 연결이 되면, 무선 아이콘과 연결된 수신기의 고유 번호가 표시된 메인 화면이 표출됩니다. 정상적으로 연결 된 경우 수신기 연결이 안된 경우 3자리 이상의 고유번호 3자리 이상의 고유 번호는 “00” 으로 표기되며 M 키를 누르고 있으면 전체 번호의...
- Page 35 설치 방법 6. 카메라 장치 설정 - 왼쪽버튼과 오른쪽버튼을 동시에 3초 동안 누르고 있으면 설정 모드로 바뀝니다. - ⓐ 캡처버튼: 선택 ⓐ 캡처버튼 - ⓑ 왼쪽버튼: 아래 - ⓒ 오른쪽버튼: 위 Reference - ⓓ 모드버튼: 취소 ⓑ 왼쪽버튼 ⓒ 오른쪽버튼 ⓓ...
-
Page 36: 사용 방법
사용 방법 1. 전원켜기 - 캡쳐 버튼을 누르십시오. LED가 깜박거리면서 삐 소리와 함께 켜집니다. 2. 이미지 캡쳐 - DrsViewer2에 카메라 아이콘을 클릭하십시오. 라이브 이미지가 보여 집니다. - 포커스를 조절하기 위해서 카메라 아이콘을 살짝 눌러 주십시오. 누르면 이미지가 캡쳐 됩니다. 오토 포커스 모드에서는 반셔터 기능이 작동하지 않습니다. 디폴트... - Page 37 사용 방법 6. 흑백모드 - 마우스 오른쪽 버튼과 모드 버튼을 클릭 하십시오 LED가 꺼지고 라이브화면이 흑백으로 변합니다. 일반 흑백모드 ⇒ 흑백모드는 라이브화면이 떠있을 때만 작동합니다. 참조 7. 설정 모드 - 마우스 왼쪽 오른쪽 버튼을 동시에 3초 동안 클릭 하면 설정 모드가 나옵니다. - 설정...
-
Page 38: 유지 보수
유지 보수 청소 및 소독 - 제품 청소 시, 부드럽고, 세정제 등이 첨가되어있지 않은 천 등으로 부드럽게 닦아 주십시오. - 에탄올, 아세톤 등이 포함된 용매의 사용을 금합니다. - 날카로운 기구 등으로 제품을 청소하지 마십시오. 제품에 스크래치나 고장 등을 일으킬 수 있습니다. - 본... -
Page 39: 문제해결
문제해결 제품이 정상적으로 작동을 하지 않는 경우 다음을 참조하여 주십시오. 문제 원인 및 해결 버튼에 무리한 힘이 가해졌을 경우, 버튼이 작동하지 않을 경우 제품이 작동하지 않을 수 있습니다. 버튼을 천천히 눌러주시고, 버튼의 상태를 확인하여 주십시오. 버튼이 작동하지 제품의 설치가 제대로 되지 않는 경우 버튼이 작동하지 않을 수 있습니다. “5. - Page 40 사양 - 제품명: 구강용카메라 - 형명: IC-DCAM70 - 품목분류 번호: A31020.05 (1) - 상품명: Dr’ s cam Air - 제조업체: 주식회사 굿닥터스 - 주소: (우21315) 인천광역시 부평구 부평대로 283 B동 208호 (청천동, 우림라이온스밸리) - 연락처: 032) 424-6325 - 제조업허가번호: 제 2341 호 - 제조품목신고번호: 제신...
-
Page 41: 악세서리
직사광선에 있는 곳에 두지 마세요. 깨질 위험이 있습니다. 온도 변화에 민감 합니다. 뾰족한 것에 주의 해주세요. 악세서리 어댑터 전원 케이블 수신기-Air Direct (Part No. AC0105) (Part No. AC0111) (Part No. AC0216) Disposable Plastic Cover 1. Product - Disposable Plastic Cover 2. -
Page 42: 품질 보증
품질 보증 본 제품은 엄격한 품질관리 하여 출고된 제품입니다. 정상적인 작동환경에서 문제없이 사용할 수 있습니다. 정상적인 작동환경에서 사용하여 문제가 생기는 경우 구입일로부터 1년간 무상으로 수리가 가능합니다. 그러나 소비재의 (일회용커버 등) 경우는 품질보증에서 제외됩니다. 자세한 사항은 첨부되어있는 품질 보증서를 참조하여 주시기 바랍니다. 시리얼... -
Page 43: 품질 보증서
품질 보증서 Enjoy wireless... - Page 44 GDUM-IC-DCAM70-Dr’s Cam Air_Rev.1 Address. #208, B-dong, 283 Bupyeong-daero, Bupyeong-gu (Woolim Lions Valley, Cheongchoen-dong), Incheon,21315, Republic of Korea Tel. +82-32-424-6325 Fax. +82-32-424-6326 Website. www.gooddrs.com E-mail. sales@gooddrs.com / info@gooddrs.com...
Need help?
Do you have a question about the Dr's Cam Air and is the answer not in the manual?
Questions and answers