
Related Manuals for Oceanscience HydroLink ML4 Series

Summary of Contents for Oceanscience HydroLink ML4 Series
- Page 1 HydroLink ML4 Series Wireless Data Transceivers Quick-Start Guide User’s Manual 110 Copperwood Way, Suite E Oceanside, CA 92054 760.754.2400...
-
Page 2: Table Of Contents
Table of Contents Title Page Number Quick-Start Guide .......................3 Overview ..........................4 Section 1: Configuring the ADCP ..................4 Section 2: Configuring a secondary instrument ............5 Section 3: Remote transceiver setup ................5 Section 4: Base transceiver setup and system power up ..........6 Section 5: WinRiver setup....................6 Section 6: Connections and wiring ..................7 Section 7: Power requirements..................7... -
Page 3: Quick-Start Guide
IVERBOAT Using an RD Instruments WorkHorse series ADCP If this is the first time you have used your Oceanscience Riverboat system we highly recommend you familiarize yourself with the setup procedures prior to field deployment. Testing in the office can save valuable field time. While testing the transceivers in close proximity it is advisable to unscrew the MaxRad antenna from the boat. -
Page 4: Overview
4. Send the command CR1 to enter setup. 5. Find the baud rate on the table below that matches the baud rate of your Oceanscience HydroLink transceivers (Com 1 = 19,200 bps; Com 2 = 4,800 bps; Com 3 = 4,800 bps;... -
Page 5: Section 3: Remote Transceiver Setup
The baud rate of your GPS, echosounder, or other secondary device must match the Com 2, 3, or 4 baud rate. When you are setting an instrument’s baud rate you are setting its RS232 data rate. Note: If using an Oceanscience supplied instrument, the baud rate has been pre-set to the correct rate. -
Page 6: Section 4: Base Transceiver Setup And System Power Up
Now install and connect the battery with the battery cable (see figure 6). Connect the other end of the battery cable to the red wire with the male fast-on that is part of the ADCP cable. Figure 6 Finally you will need to make the switch connections. There are two leads coming from the on/off switch. -
Page 7: Section 5: Winriver Setup
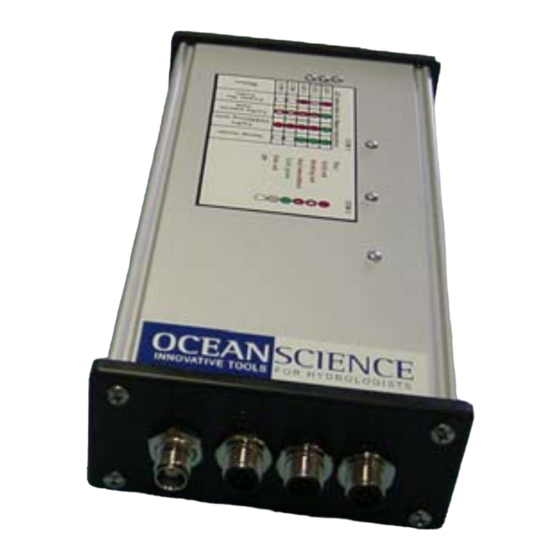
Shortly after both units are powered up they should establish a communications link with each other to complete the connection. Refer to Table ML4-1 below to confirm that a proper link has been established. This table is also printed on both transceivers. (In this initial test condition, with ADCP and both transceivers powered up and the laptop off, transceiver LEDs should conform to line two on the table “link established, remote sending data”.) Table ML4-1... -
Page 8: Section 6: Connections And Wiring
Each unit of the pair (set) is programmed with a unique serial number ID. When using the cables provided by The Oceanscience Group, note that the 8-pin circular connector is keyed and will not align in any way except in the correct alignment. Once the keyway is properly aligned, the backshell of the connector should be screwed to finger tightness. - Page 9 When configuring the instrument and application software to match the transceiver, the PC and instrument should be connected directly. If using a GPS provided by Oceanscience there is no need to change the baud rate as they are configured at the factory.
-
Page 10: Section 10: Troubleshooting
If using a Trimble DSM132 and you experience garbled data or are having problems establishing communications with your GPS, you should restore the unit to factory settings by performing the following steps: • Press the v arrow 6 times. This places you at the Clear BB RAM? screen. •... -
Page 11: Section 11: Technical Specifications
This device must be operated as supplied by The Oceanscience Group. Any changes or modifications made to the device without the express written approval of The Oceanscience Group may void the user's authority to operate the device. - Page 12 Hydrolink ML4 Pin Assignment...
Need help?
Do you have a question about the HydroLink ML4 Series and is the answer not in the manual?
Questions and answers