
Related Manuals for Spectra Precison GL1425C

Summary of Contents for Spectra Precison GL1425C
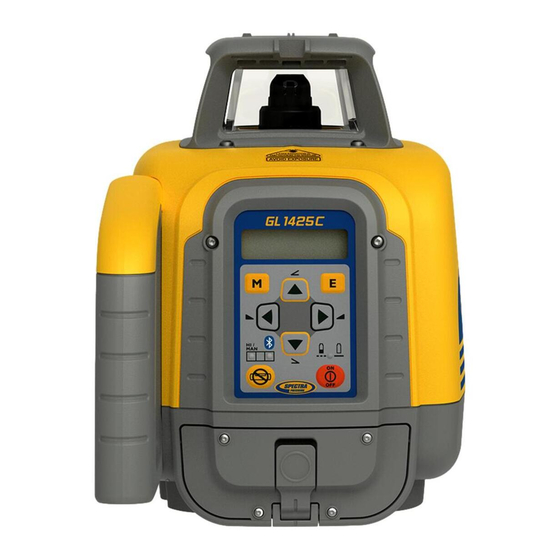
- Page 1 GL1425C User Guide Bedienungsanleitung Manuel de l´utilisateur Guida per l´uso spectraprecision.com...
- Page 2 Exit of Laser Beam Exit of Laser Beam...
-
Page 5: Table Of Contents
Contents Introduction ..................7 Safety Instructions ................7 Product ....................8 General description ................8 Product Components ................8 RC1402 Remote Control ..............9 Batteries ....................9 3.4.1 Installing batteries ................9 3.4.2 Battery indication ................10 3.4.3 Recharging the batteries ..............10 3.4.4 LED indication on the charger ............10 Laser Setup..................11 Turn On/Off the laser ...............11 Menu Navigation ................ - Page 6 Cleaning and maintenance ............34 Protecting the environment ............34 Warranty ..................35 Technical Specification ..............36 30.1 Technical Specification Laser GL1425C ........36 30.2 Technical Specification Laser Remote RC1402 ......36 Declaration of Conformity ...............37 UKCA ....................37 Electro-Magnetic Compatibility ............37...
-
Page 7: Introduction
Introduction Thank you for choosing the GL1425C dual grade laser from the family of Spectra Precision professional lasers. The GL1425C is an easy-to-use self-leveling laser that offers accurate horizontal, grade and vertical laser reference using a receiver. Safety Instructions For hazardless and safe operation, read all the user guide instructions. -
Page 8: Product
Note: Charging the rechargeable NiMH battery pack beyond the temperature mentioned in the technical specifications may lead to decreased battery lifetime or undercharged batteries. Product Components GL1425C Laser Power Button Press for one second to turn on; press and hold for... -
Page 9: Rc1402 Remote Control
Rechargeable Battery Pack Universal Charger CH10 RC1402 Remote Control The remote control offers the same functions as the GL1425C keypad. Power Button Press for one second to turn on; press and hold for two seconds to turn off Battery LED... -
Page 10: Battery Indication
Close the battery door. 3.4.2 Battery indication WHY: Displays the battery status prior to starting work on the job site. WHAT: The battery indication shows the remaining battery capacity for the rechargeable or alkaline batteries. Actual capacity depends on battery brand, environmental factors, age, and recharge cycles. -
Page 11: Laser Setup
Laser Setup Position the laser horizontally or vertically on a stable platform, wall mount or tripod at the desired elevation. The laser automatically recognizes the horizontal or vertical orientation when switched on. Position the laser within its self-leveling range (see chapter 30.1). When the laser is not positioned within the self-leveling range, the manual and leveling indicator LEDs (d and e) flash simultaneously and a warning sound is emitted. -
Page 12: Menu Navigation
Menu Navigation WHY: A menu driven interface can access all features of the GL1425C. This is an intuitive way to operate the laser. It is easy to use since it does not require various two or three finger button presses. -
Page 13: Bluetooth® Connectivity
When the Bluetooth® connection was successful, the laser status LED (d) will be blue and the Laser Remote App shows the standard display of the GL1425C. Option 2: Press M button (h) on the laser (not the remote control) to enter the menu. -
Page 14: Horizontal Manual Mode
Just align the laser in the grade direction, and input desired grade into the laser. WHAT: The GL1425C automatically levels to the specific grade value that is entered. HOW: Option 1: Digit Select Mode (Default) - Page 15 and release E button (j) to enter the grade function. The grade values for both the Y axis as well as the X axis are shown. A cursor flashes at the + sign of the Y axis. Pressing and releasing Right or Left arrow buttons (g) moves the cursor to the right or left and in a circle to the next row.
-
Page 16: Grade Value From +/- 9% To +/- 15%; Laser Pre-Tilt Is Needed
WHAT: The GL1425C provides 3 rotation speeds: 300, 600 and 900 RPM. HOW: Press ‘M’ button to enter the menu. Using the Up or Down buttons (f), scroll to and select >>... -
Page 17: Temperature Reference Check
reflections detected by the laser receiver and lead to erroneous readings. WHAT: The mask mode allows electronic shut off the laser beam in up to 3 of 4 quadrants. The status of the mask mode is shown on the standard LCD (pic 17). HOW: There are two options to activate the mask mode. -
Page 18: Standby Mode
Standby Mode WHY: There might be times when the laser is not used for a period of time (e.g. lunch break), and the laser can be put in Standby Mode to conserve battery life. Standby Mode retains the laser settings. WHAT: In Standby mode, the self-leveling will be stopped and the beam will be turned off while the HI-alert is still active. -
Page 19: Planelok
Using PlaneLok, the GL1425C connects a first elevation reference point, where the laser is positioned, with a second elevation reference point where the laser receiver is positioned with the correct grade. - Page 20 Now the on-grade position of the receiver has the same elevation as the laser beam. 3.) Without changing the receiver’s elevation on the rod, position the rod at the second reference point with the front of the receiver facing the laser. 4.) Use the sighting guides on the top of the laser and align the laser to the receiver.
-
Page 21: Pairing
Apple store. Download the app from the store to your smartphone and install. HOW: Option 1: When powering the GL1425C, it is in connectivity mode for the first thirty seconds. During this time start the Laser Remote App. When starting the Laser Remote App for the first time, accept the EULA. -
Page 22: Settings
This is why the GL1425C provides a delay time for the Shock Warning. The Shock Warning is active when the delay time is over and the setup has been completed within this time frame. -
Page 23: Grade Display
WHAT: The GL1425C provides three different possibilities to display the slope value: percentage, per mill or degree. This can be changed in the Settings menu. Changing the grade display will result in the correct calculation from percentage into per mill and into degrees accordingly. -
Page 24: Sensitivity
Nevertheless the tolerance allowing for a disturbance by vibration or wind will be different. The three different levels of sensitivity provided by the GL1425C are low to work with high wind and vibrations, middle to work under normal job site conditions (default) and high to work in very calm conditions. -
Page 25: Info
WHAT: The GL1425C provides six different radio channels. Those are 0 (default), 1, 2, 3, 4 and 5. HOW: The radio channel can be changed only at the laser. Press M button (h) to enter the menu. Scroll to >>Radio Channel<< and press the E button (j) to open the sub menu. -
Page 26: Determining The Height Of Instrument (Hi)
Scroll to >>SENS-Firmware<< and press E button (j) to read out the SENS-Firmware revision. Scroll to >>RADIO-Firmware<< and press E button (j) to read out the RADIO-Firmware revision. Scroll to >>Serial Number<< and press E button (j) to read out the internal serial number of the laser in HEX code (see pic 81). -
Page 27: Vertical Application
Vertical Application 20.1 Vertical Automatic Mode 20.1.1 Laser Line Position WHY: For many applications, two reference points need to be aligned to each other. Between the two reference points, a trench can be excavated or a vertical setup is needed to install formwork, fences or similar items. WHAT: In vertical automatic mode, the laser provides a laser plane that is leveled vertically (along the Y-axis) and can be adjusted horizontal (along the X-axis) HOW: The unit is in vertical position in the automatic mode (see pic 27). -
Page 28: 20.1.3 Planelok In Vertical
Pic 29 Line Scan in progress Pic 30 Line Position 20.1.3 PlaneLok in Vertical See chapter 16 20.2 Vertical Manual mode HOW: When unit is in vertical automatic mode, press the manual button (c) to switch into vertical manual mode. Now the laser plane can be adjusted using the Up/Down arrow buttons (f) for the Y-axis or using the Left/Right arrow buttons (g) for the X-axis. -
Page 29: Pair The Laser With Cr700
After completing PAIR, “OK” will be displayed on the receiver and a long beep occurs. The GL1425C has been paired with this receiver and turns back to the standard function. On the CR700 press and release the power button once to exit the menu at the receiver. -
Page 30: Remote Control Rc1402
22.3 Pairing the RC1402 remote control with the laser WHY: The communication between RC1402 remote control and the GL1425C laser is based on a radio communication path. This enables a unique communication path that ensures only the paired laser will be controlled by the paired remote control. -
Page 31: Rc1402 Menu Navigation
Press and release the ‘M’ button to go back to the previous or standard display. Press and release the Up or Down buttons until the desired function at the selected menu row is selected. Menu functions for the GL1425C: >>Rotation<< >>Mask Mode<<... - Page 32 Error Description Solution code PWR-Board data recovered Press E button (j) on the laser or remote control or OK button in the app to confirm the error message. The laser has changed to default settings. You may need to redo your personal settings. The laser may have lost the pairing to the remote control, to the HL760/CR700 or the smartphone.
-
Page 33: Check Calibration
Check Calibration 24.1 Checking calibration of the Y and X Axis 1. Set up the laser 30 m (100 ft.) from a wall and allow it to level. 2. Allow the unit to acclimate to ambient temperature. 3. Set the grade to 0.00% in both axis. 4. -
Page 34: Technician Menu
25.1 Technician Menu Access to Technician menu (pic 33), is only possible for trained service dealer personnel. Pic 33 Technician menu Protect the unit Do not expose the unit to extreme temperatures or temperature changes (do not leave inside the car). The unit is very robust and can resist damage if dropped even from tripod height. -
Page 35: Warranty
Warranty Spectra Precision LLC warrants the GL1425C to be free of defects in material and workmanship for a period of five years. Spectra Precision LLC or its authorized service center will repair or replace, at its option, any defective part, or the entire product, for which notice has been given during the warranty period. -
Page 36: Technical Specification
Technical Specification 30.1 Technical Specification Laser GL1425C Leveling Accuracy vertical, horizontal ± 1,5mm / 30m; 1/16” @ 100ft; 10 arc seconds Grade Accuracy ± 3,0mm / 30m; 1/8” @ 100ft.; 20 arc seconds Grade temperature drift ± 0,9mm / 30m / 1°C; 1/16” @ 310ft. @ 1°F Grade range no pre-tilt typ. -
Page 37: Declaration Of Conformity
EN300 440-2 V1.1.1:2004, EN301 489-03 V1.4.1:2002, EN301 489-01 V1.4.1:2002, EN50371:2002 following the provision of directive R&TTE 1999/5/EC. UKCA We declare under our sole responsibility that the GL1425C and RC1402 comply with all applicable provisions of the regulations listed below and are in conformity with the following standards. - Page 38 Spectra Precision LLC Spectra Precision (Kaiserslautern) GmbH 3265 Logistics Lane Am Sportplatz 5 Vandalia, OH 45377 67661 Kaiserslautern U.S.A. GERMANY Phone +1 888-272-2433 Phone +49-6301-711414 spectraprecision.com © 2023, Spectra Precision LLC. All rights reserved. PN 128223-00 Rev. A (01/23)
Need help?
Do you have a question about the GL1425C and is the answer not in the manual?
Questions and answers