Table of Contents
Advertisement
Quick Links
Advertisement
Chapters
Table of Contents

Summary of Contents for Ditch Witch W12 HYDROVAC
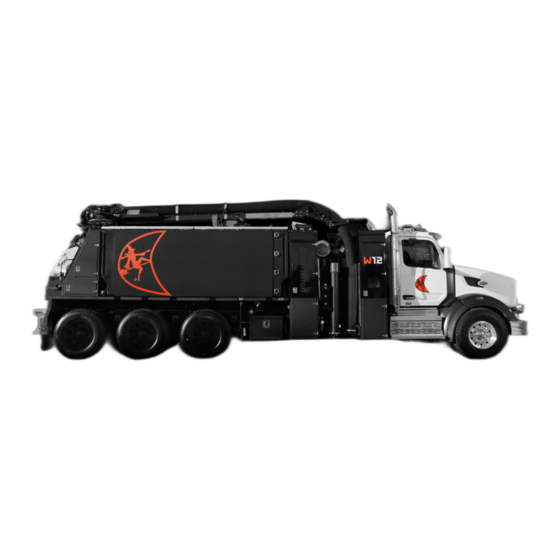
- Page 1 Operator’s Manual Issue 1.0 053-10036 CMW® Original Instruction...
-
Page 2: Table Of Contents
W12 Operator’s Manual Overview - 1 Overview Chapter Contents Serial Numbers Location ..... 2 Intended Use ......2 Method of Operation . -
Page 3: Serial Numbers Location
Date of purchase Intended Use The W12 Hydrovac Truck is a vacuum excavation machine capable of vacuuming and transporting a wide variety of nonhazardous, non-flammable liquid and solid debris. This machine is designed to perform efficient soft excavation, including exposing utilities for visual verification and potholing. -
Page 4: Method Of Operation
W12 Operator’s Manual Overview - 3 Method of Operation Method of Operation NOTICE: The vacuum system is designed for liquids, slurries, and damp materials. Dry or dusty materials must be wet down before vacuuming. This can be accomplished by connecting one of the water hose reels to the debris tank misting port. - Page 5 W12 Operator’s Manual Overview - 4 Equipment Modification made by competent personnel possessing knowledge of applicable standards, regulations, equipment design functionality/requirements and any required specialized training.
-
Page 6: Major Components
W12 Operator’s Manual Overview - 5 Major Components Major Components TTW12-OV-005a 1. Truck Chassis 9. Dust Filter 2. Water Tanks 10. Control Panel and Remote Control 3. Debris Tank 11. Manual Control Levers 4. Boom 12. Rear Door 5. Silencer 13. - Page 7 W12 Operator’s Manual Overview - 6 Major Components Item Description 1. Truck Chassis Diesel truck chassis (see “Specifications” on page 128 for detailed information on the truck chassis). 2. Water Tanks Four interconnected polyethylene tanks equipped with sight gauges and drain valves hold clean water for use during excavation operations.
-
Page 8: Air Flow Diagram
W12 Operator’s Manual Overview - 7 Air Flow Diagram Item Description 13. Water Pump The pump provides pressurized water at up to 3,000 PSI for excavation operations. It is driven by a hydraulic motor mounted on the transfer case. Air Flow Diagram Suction is created by the flow of air through the system, driven by the blower. -
Page 9: Water Flow Diagram
W12 Operator’s Manual Overview - 8 Water Flow Diagram 7. In the event of a clog in the system that blocks or reduces suction, the vacuum breaker can be activated. This diverts the system intake from the boom and opens it to the atmosphere. This cuts off suction through the boom and debris tank, allowing the operator to clear the clog without the need to shut down the blower. -
Page 10: Winterization System
W12 Operator’s Manual Overview - 9 Water Flow Diagram Winterization System There are two parts of the winterization system installed on the W12 truck. There is a crossover manifold below the clean water tanks. Hot water from the truck engine is routed through the manifold and heats the connection between the two front water tanks. -
Page 11: Operator Orientation
W12 Operator’s Manual Overview - 10 Operator Orientation Operator Orientation FRONT IMPORTANT: Top view of machine is shown. 1. Front 2. Right side (Curb side) 3. Rear 4. Left side (Road side) Operating Area LEFT RIGHT ( ROAD SIDE) (CURB SIDE) Operate within easy access of controls and/or remote control. -
Page 12: Foreword
If you sell your equipment, be sure to give this manual to the new owner. If you need a replacement copy, contact your Ditch Witch dealer. If you need assistance in locating a dealer, visit our website at www.ditchwitch.com or write to the following address: The Charles Machine Works, Inc. - Page 13 Issue number 1.0/OM-2/2023 Part number 053-10036 Copyright 2023 by The Charles Machine Works, Inc. and Ditch Witch are registered trademarks of The Charles Machine Works, Inc. This product and its use may be covered by one or more patents at http://patents.charlesmachine.works.
- Page 14 W12 Operator’s Manual Contents - 13 Contents Overview Machine serial number, information about the type of work this machine is designed to perform, basic machine components, and how to use this manual Foreword Part number, revision level, and publication date or this manual, and factory contact information Safety Machine safety alerts and emergency procedures...
-
Page 15: Safety
W12 Operator’s Manual Safety - 14 Safety Chapter Contents For additional precautions, see “Prepare” chapter. Safety Alert Classifications ....15 Guidelines ....... 16 Emergency Procedures . -
Page 16: Safety Alert Classifications
W12 Operator’s Manual Safety - 15 Safety Alert Classifications Safety Alert Classifications These classifications and the icons defined on the following pages work together to alert you to situations which could be harmful to you, jobsite bystanders or your equipment. When you see these words and icons in the book or on the machine, carefully read and follow all instructions. -
Page 17: Guidelines
Mark jobsite clearly and keep spectators away. • Review jobsite hazards, safety and emergency procedures, and individual responsibilities with all personnel before work begins. Safety videos are available from your Ditch Witch dealer or at www.ditchwitch.com/safety. Safety Data Sheets (SDS) are available at www.ditchwitch.com/support. •... -
Page 18: Emergency Procedures
W12 Operator’s Manual Safety - 17 Emergency Procedures Emergency Procedures Underground utilities. Contact can cause death or serious injury. Locate and verify underground utilities before digging or drilling. Before operating any equipment, review emergency procedures and check that all safety precautions have been taken. -
Page 19: If A Gas Line Is Damaged
W12 Operator’s Manual Safety - 18 Emergency Procedures • Have someone contact electric company to shut off power. • If you leave the area, do not return to jobsite or allow anyone into area until given permission by utility company. If a Gas Line is Damaged If you suspect a gas line has been damaged, take the following actions. -
Page 20: Machine Safety Alerts
W12 Operator’s Manual Safety - 19 Machine Safety Alerts Machine Safety Alerts Truck, Driver’s Side TTW12-SA-003a Silica dust. Exposure can cause lung disease. Use breathing protection. Silica dust. Exposure can cause lung disease. Use breathing protection. Hot parts. Contact can cause burns. Only touch when cool or wear gloves. - Page 21 W12 Operator’s Manual Safety - 20 Machine Safety Alerts Hot parts. Contact can cause burns. Only touch when cool or wear gloves. Fall restraint anchor point. Attach restraint to anchor point when using maintenance platform. Do not get boom near power lines. Death or serious injury will occur.
-
Page 22: Debris Tank Door
W12 Operator’s Manual Safety - 21 Machine Safety Alerts Debris Tank Door TTW12-SA-005a Confined space will cause suffocation. Use proper procedures for entering or stay away. Static charge. Fire or explosion can cause death or serious injury. Never vacuum flammable or combustible substances. -
Page 23: Rear Control Panel
W12 Operator’s Manual Safety - 22 Machine Safety Alerts Rear Control Panel TTW12-SA-006a Pressurized fluid or air could pierce skin and cause severe injury. Refer to operator’s manual for proper use. Incorrect boom procedures could result in serious injury or death. Lock boom before transporting or tilting. -
Page 24: Air Compressor And Water Heater Cabinet
W12 Operator’s Manual Safety - 23 Machine Safety Alerts Air Compressor and Water Heater Cabinet TTW12-SA-001a Hot parts. Contact can cause burns. Only touch when cool or wear gloves. Flying objects thrown by machine may strike people. Wear safety glasses and hard hat. Underground utilities. - Page 25 W12 Operator’s Manual Safety - 24 Machine Safety Alerts Hot parts. Contact can cause burns. Only touch when cool or wear gloves. Pressurized fluid or air could pierce skin and cause severe injury. Refer to operator’s manual for proper use.
-
Page 26: Control Panel Cabinet
W12 Operator’s Manual Safety - 25 Machine Safety Alerts Control Panel Cabinet TTW12-SA-002a Misuse of machine can cause death or serious injury. Read and understand operator’s manual and all other safety instructions before use. Misuse of machine can cause death or serious injury. - Page 27 W12 Operator’s Manual Safety - 26 Machine Safety Alerts Flying objects thrown by machine may strike people. Wear safety glasses and hard hat. High noise levels. Exposure can cause hearing loss. Wear hearing protection.
-
Page 28: Prepare
W12 Operator’s Manual Prepare - 27 Prepare Jobsite Prepare Chapter Contents See “Safety” for additional precautions. Wear proper personal protective equipment. Prepare Jobsite Underground utilities. Contact can cause death or serious injury. Locate and verify underground utilities before digging or drilling. To help avoid injury: •... -
Page 29: Review Job Plan
W12 Operator’s Manual Prepare - 28 Prepare Jobsite • Accessories..........35 Pre-Operational Checklist . -
Page 30: Identify Hazards
W12 Operator’s Manual Prepare - 29 Prepare Jobsite Identify Hazards Inspect jobsite before transporting equipment. Check for the following: • overall grade or slope • changes in elevation such as hills or open trenches • obstacles such as buildings, railroad crossings, or streams •... -
Page 31: Locate Utilities
W12 Operator’s Manual Prepare - 30 Prepare Jobsite Locate Utilities Notify One-Call Services Mark proposed path with white paint and have underground utilities located before working. • In the US or Canada, call 811 (US) or 888-258-0808 (US and Canada). Also contact any local utilities that do not participate in the One-Call service. - Page 32 W12 Operator’s Manual Prepare - 31 Prepare Jobsite Apply Precautions Underground utilities. Contact can cause death or serious injury. Locate and verify underground utilities before digging or drilling. Once classified, precautions appropriate for jobsite must be taken. Follow US Department of Labor regulations on excavating and trenching (Part 1926, Subpart P) and other similar regulations.
-
Page 33: Arrange For Traffic Control
W12 Operator’s Manual Prepare - 32 Prepare Jobsite Other Jobsite Precautions You may need to use different methods to safely avoid other underground hazards. Talk with those knowledgeable about hazards present at each site to determine which precautions should be taken or if job should be attempted. -
Page 34: Prepare Operator
Check that you will have access to a telephone. • Review jobsite hazards, safety and emergency procedures, and individual responsibilities with all personnel before work begins. Safety videos are available from your Ditch Witch dealer or at www.ditchwitch.com/safety. Safety Data Sheets (SDS) are available at www.ditchwitch.com/support. •... -
Page 35: Prepare Equipment
W12 Operator’s Manual Prepare - 34 Prepare Equipment Prepare Equipment Check Supplies • • marking flags or paint • notepad and pencil • spare fuses • lubricants Check Equipment Fluid Levels • fuel • engine oil • hydraulic fluid • engine coolant •... - Page 36 W12 Operator’s Manual Prepare - 35 Pre-Operational Checklist Accessories Fire Extinguisher A fire extinguisher is provided, and stored in the truck cab. If appropriate, place a fire extinguisher near the truck but away from possible points of ignition where shown. The fire extinguisher should always be classified for both oil and electric fires.
-
Page 37: Controls
W12 Operator’s Manual Controls - 36 Controls Chapter Contents Emergency Stop Buttons ....37 Truck Cab Controls......38 •... -
Page 38: Emergency Stop Buttons
W12 Operator’s Manual Controls - 37 Emergency Stop Buttons • Turning Remote On ......... . .65 •... -
Page 39: Truck Cab Controls
W12 Operator’s Manual Controls - 38 Truck Cab Controls Truck Cab Controls Main Button Controls BLOWER ON/OFF ON/OFF WORK T.PTO LIGHTS TTW12-CI-014a.ai NOTICE: For trucks not equipped with air compressor the “T.PTO” button will be non-functional. 1. Hydraulic ON/OFF Button 3. -
Page 40: Audible Alarm
W12 Operator’s Manual Controls - 39 Truck Cab Controls Item Description IMPORTANT Blower ON/OFF Button Used to toggle the blower NOTE: Blower can only be operated in system on/off. conjunction with hydraulic system. Engages/disengages the upper section of the transfer case, responsible for the Blower operations. -
Page 41: Miscellaneous Controls
W12 Operator’s Manual Controls - 40 Truck Cab Controls Miscellaneous Controls TTW12-CI-015a.ai 1. Parking Brake Control 3. Main Battery Circuit Breakers 2. Trailer Air Supply Control Item Description IMPORTANT Parking Brake Control Push to apply parking brake. Pull to release parking brake. Trailer Air Supply Control Pull to evacuate air system. -
Page 42: Light Bar Control Panel
W12 Operator’s Manual Controls - 41 Truck Cab Controls Light Bar Control Panel The light bar control panel operates the lightbar located on the back of the tank. The controller is powered by the beacon switch in the cab. In order to activate the light bar, the beacon switch on the dash must be turned on first. -
Page 43: Control Panel Controls And Indicators
W12 Operator’s Manual Controls - 42 Control Panel Controls and Indicators Control Panel Controls and Indicators The Main Control Panel for the W12 is located in a cabinet on the passenger side, just behind the cab. The following components are contained in the cabinet: 1. -
Page 44: Main Control Panel
W12 Operator’s Manual Controls - 43 Control Panel Controls and Indicators Main Control Panel 12 13 14 15 TTW12-CI-004a.ai... - Page 45 W12 Operator’s Manual Controls - 44 Control Panel Controls and Indicators Item Description IMPORTANT 1. Digital Control Panel See “Digital Control Panel Functions” on page 62 for details 2. iRAT Port Data port Used by factory service personnel. 3. Emergency Stop Button Press to stop all operations in After being activated, must be pulled event of an emergency.
- Page 46 W12 Operator’s Manual Controls - 45 Control Panel Controls and Indicators Item Description IMPORTANT 8. Water Pump Mode Cycles through the following Button modes: OFF/MANUAL/ REMOTE/AIRDIG • Manual allows the pump speed to be controlled on the panel Button shows GREEN •...
- Page 47 W12 Operator’s Manual Controls - 46 Control Panel Controls and Indicators Item Description IMPORTANT 15. Water Pump Dec Button When the WATER PUMP MODE is set to Manual, increases "Water Pump %" (Pump Speed) Hold button to ramp down...
-
Page 48: Digital Control Panel
W12 Operator’s Manual Controls - 47 Control Panel Controls and Indicators Digital Control Panel SELECTION SELECTION BUTTONS BUTTONS ESC BUTTON OK BUTTON NAVIGATION BUTTONS TTW12-CI-016a NOTICE: Refer to “Digital Control Panel Functions” on page 62 for more information Item Description IMPORTANT 1. -
Page 49: Remote Control
W12 Operator’s Manual Controls - 48 Control Panel Controls and Indicators Remote Control TTW12-CI-007a.ai NOTICE: Refer to “Remote Control Functions” on page 65 for more information. Item Description IMPORTANT 1. Green Power Button Used with the Red Power button to turn the remote control on. -
Page 50: Scale Control Panel
W12 Operator’s Manual Controls - 49 Control Panel Controls and Indicators Scale Control Panel 5 6 7 TTW12-CI-009a NOTICE: Refer to the Right Weigh 201-RTS OEM documentation for full operating instructions. Item Description IMPORTANT 1. Power ON/OFF Button While holding the Up and Down buttons, press to power on the scale. -
Page 51: Water Heater Controls And Indicators
W12 Operator’s Manual Controls - 50 Water Heater Controls and Indicators Item Description IMPORTANT 6. 3/Down Button Used to enter PIN number and set options during calibration. 7. 4/Up Button Used to enter PIN number and set options during calibration. Water Heater Controls and Indicators The Water Heater Controls for the W12 is located in a cabinet on the passenger side, just behind the boom storage. -
Page 52: Water Heater Control Panel Controls And Indicators
W12 Operator’s Manual Controls - 51 Water Heater Controls and Indicators Water Heater Control Panel Controls and Indicators TTW12-CI-001a 5. Circuit Breaker 1. Test Flow Button 2. Test Flow Indicator 6. Hourmeter 3. Test Thermostat Button 7. Thermostat Dial 4. Test Thermostat Indicator 8. - Page 53 W12 Operator’s Manual Controls - 52 Water Heater Controls and Indicators Item Description IMPORTANT 4. Test Thermostat LED that illuminates if test Indicator passes successfully. 5. Circuit Breaker 25 Amp circuit breaker. Press • Tripped circuit breaker may be an to reset.
-
Page 54: Water Heater System Controls And Indicators
W12 Operator’s Manual Controls - 53 Water Heater Controls and Indicators Water Heater System Controls and Indicators TTW12-CI-003a... - Page 55 W12 Operator’s Manual Controls - 54 Water Heater Controls and Indicators 1. Hot Water Temperature Gauge 5. Priming Squeeze Bulb 2. Rear Reel Water Control Valve 6. Water System Purge Valve 3. Right Side Reel Water Control Valve 7. Winterization Solution Valve 4.
-
Page 56: Water Hose Reel Controls And Indicators
W12 Operator’s Manual Controls - 55 Water Heater Controls and Indicators Water Hose Reel Controls and Indicators TTW12-CI-002a.ai Item Description IMPORTANT 1. Water Pressure Gauge Analog gauge indicates water pressure at water pump. 2. Reel Retract Lever Press lever to retract hose onto reel. -
Page 57: Air Compressor Controls And Indicators
W12 Operator’s Manual Controls - 56 Air Compressor Controls and Indicators Air Compressor Controls and Indicators TTW12-CI-010a Item Description IMPORTANT 1. Receiver Pressure Gauge Displays the air pressure available to the air lance (PSI). 2. Hourmeter Digital display of cumulative operating hours. -
Page 58: Manual Hydraulic Controls
W12 Operator’s Manual Controls - 57 Manual Hydraulic Controls Manual Hydraulic Controls TTW12-CI-012a... - Page 59 W12 Operator’s Manual Controls - 58 Manual Hydraulic Controls Item Description IMPORTANT 1. Hydraulic Pressure Indicates hydraulic pressure IMPORTANT: Never adjust pressure Gauge at manifold. relief settings. This will void your truck’s warranty. 2. Tank Lift Lever Push to lower the tank lift. IMPORTANT: Do not operate when Pull to raise the tank lift.
-
Page 60: Rear Controls
W12 Operator’s Manual Controls - 59 Rear Controls Rear Controls TTW12-CI-013a Item Description IMPORTANT 1. Auxiliary Hydraulic Adjusts the operation of the Speed Control auxiliary hydraulic accessories. 2. Reel Retract Lever Press lever to retract water hose onto reel. -
Page 61: Debris Tank/Truck Rear
W12 Operator’s Manual Controls - 60 Debris Tank/Truck Rear Debris Tank/Truck Rear TTW12-CI-018A Item Description IMPORTANT 1. Main Gate Valve Open to discharge waste from debris tank 2. Decant Gate Valve Open to drain liquid waste from top of debris tank 3. - Page 62 W12 Operator’s Manual Controls - 61 Debris Tank/Truck Rear Item Description IMPORTANT 5. Glad Hands Coupling used to connect the service and emergency air lines from the truck to a trailer. 6. Safety Tie-off Can be used to secure a safety harness to the truck when working near a severe slope or open hole.
-
Page 63: Digital Control Panel Functions
W12 Operator’s Manual Controls - 62 Digital Control Panel Functions Digital Control Panel Functions Main Status Screen TTW12-CI-020a Item Description IMPORTANT 1. Water Temperature Displays current temperature Indicator of water exiting the water heater 2. Water Pressure Indicator Displays current water pressure 3. - Page 64 W12 Operator’s Manual Controls - 63 Digital Control Panel Functions Item Description IMPORTANT 10. OK Button Used to select options Main Status Screen (Cont.) TTW12-CI-021a Item Description IMPORTANT 11. Water Pressure Preset Eight buttons allow operator • The pre-sets will only be "active" Buttons to select preset water when the water pump mode is...
- Page 65 W12 Operator’s Manual Controls - 64 Digital Control Panel Functions Item Description IMPORTANT 14. Water Pump % Water pump setpoint ranging Can only be changed when water from 0-100% pump mode is set to MANUAL Main Status Screen (Cont.) TTW12-CI-022a NOTICE: Additional information on the various sub-menu functions is available in Appendix A.
-
Page 66: Remote Control Functions
W12 Operator’s Manual Controls - 65 Remote Control Functions Remote Control Functions The remote control allows the operator to control a number of operating functions wirelessly via a handheld controller. This controller communicates with the receiver located in the control panel cabinet, above the water hose reel. GREEN BUTTON Remote... -
Page 67: Turning Remote Off
W12 Operator’s Manual Controls - 66 Remote Control Functions Turning Remote Off Press and release the red button IMPORTANT: Unlinking the remote will trigger a "soft stop" condition indicated by a yellow "RADIO STOP" splash screen on the digital control panel. The splash screen can be cleared by pressing the "ESC"... - Page 68 W12 Operator’s Manual Controls - 67 Remote Control Functions BOOM RIGHT/CLOCKWISE BOOM RETRACT BOOM EXTEND VACUUM ON VACUUM OFF WATER ON WATER OFF...
- Page 69 W12 Operator’s Manual Controls - 68 Remote Control Functions ALTERNATE FUNCTIONS When the green button at the top of the remote is held, the icons on the display and the corresponding button function will change as listed below. DOOR LOCK DOOR UNLOCK DOOR OPEN DOOR CLOSE...
- Page 70 W12 Operator’s Manual Controls - 69 Remote Control Functions WATER PRESSURE INCREASE/WATER PRESSURE DECREASE *Current water pressure displayed...
-
Page 71: Remote Control Safety Interlocks
W12 Operator’s Manual Controls - 70 Remote Control Functions Remote Control Safety Interlocks It is important to understand the safety controls in place for the remote system. A function may work with the manual hydraulic handles but may appear not to function with the remote control. These functions will appear grayed out on the remote. -
Page 72: Vacuum And Pothole Operations
W12 Operator’s Manual Vacuum and Pothole Operations - 71 Vacuum and Pothole Operations Chapter Contents For additional precautions, see “Safety” and “Prepare” chapters. IMPORTANT: For more information on how to operate controls, see “Controls” chapter. Set Up ........72 •... -
Page 73: Set Up
W12 Operator’s Manual Vacuum and Pothole Operations - 72 Set Up • Check Air Filter..........93 •... -
Page 74: Startup
W12 Operator’s Manual Vacuum and Pothole Operations - 73 Set Up Startup With the truck engine running, start the system as follows: Engage Hydraulics Only BLOWER 1. Disengage clutch. ON/OFF ON/OFF 2. Press and hold "HYD ON/OFF" button for approximately 3 seconds. 3. -
Page 75: Engaging Air Compressor (If Equipped)
W12 Operator’s Manual Vacuum and Pothole Operations - 74 Set Up Engaging Air Compressor (if equipped) 1. Disengage clutch. BLOWER 2. Press and hold "T. PTO” button. (Hydraulics ON/OFF ON/OFF will engage automatically if not already engaged) 3. Wait for the keypad to turn green. 4. -
Page 76: Monitoring Interlocks
W12 Operator’s Manual Vacuum and Pothole Operations - 75 Set Up 7. Select LOW PRESSURE or HIGH PRESSURE using the toggle switch (5). 8. Check RESET BEFORE STARTING button (4) and ensure that it is latched in. • If not, press it to latch in. •... -
Page 77: Start Water Heater
W12 Operator’s Manual Vacuum and Pothole Operations - 76 Set Up Start Water Heater 1. Set water heater switch to ON. 2. Set water temperature. TTW12-VP-003a... -
Page 78: Remote Control
W12 Operator’s Manual Vacuum and Pothole Operations - 77 Set Up Remote Control Remove the remote control from the charging cradle and check battery charge level before operations. If remote battery is not charged, operation must be controlled using the control panel. Refer to “Remote Control Functions”... -
Page 79: Boom Operation
W12 Operator’s Manual Vacuum and Pothole Operations - 78 Boom Operation Boom Operation Precautions near Electrical Power Lines Overhead electric lines. Exposure will cause death or serious injury. Keep boom away from electric lines. Use a spotter. To help avoid injury: •... -
Page 80: Procedure
W12 Operator’s Manual Vacuum and Pothole Operations - 79 Boom Operation Procedure Raised component. Crushing can cause death or serious injury. Stay away or secure raised component with locking device. Use correct equipment and procedures. To help avoid injury: • Never move truck without boom secured in its rest •... -
Page 81: Remove Debris
W12 Operator’s Manual Vacuum and Pothole Operations - 80 Remove Debris Remove Debris EMERGENCY SHUTDOWN: • Use the emergency stop button (on the control panel, on rear panel, and on remote control) to shut down operations. • Turn ignition switch off. Suction. -
Page 82: Pothole
W12 Operator’s Manual Vacuum and Pothole Operations - 81 Pothole 3. Engage blower (“Engage Blower” on page 73). 4. Ensure vacuum breaker is closed to begin suction. 5. Use sight glass and/or weight scale to monitor debris level in tank. Pothole EMERGENCY SHUTDOWN: •... -
Page 83: Pothole With Air
W12 Operator’s Manual Vacuum and Pothole Operations - 82 Pothole Pothole with Air Set Up 1. Remove air lance (1) from storage. 2. Attach air hose (2) to air valve (3). 3. Connect air lance (1) to air hose (2). 4. - Page 84 W12 Operator’s Manual Vacuum and Pothole Operations - 83 Pothole High pressure. Impact can cause death or serious injury. Refer to air tool manual to ensure proper pressures are used. To help avoid injury: High pressure setting is for air lance only. Hot parts.
-
Page 85: Pothole With Water
W12 Operator’s Manual Vacuum and Pothole Operations - 84 Pothole Pothole With Water NOTICE: Two dig wands can be used simultaneously, with one attached to the water hose in the water heater cabinet and another attached to the water hose at the rear of the truck. Set Up 1. - Page 86 W12 Operator’s Manual Vacuum and Pothole Operations - 85 Pothole Operate Overhead electrical lines. Contact will cause death or serious injury. Know location of lines. Stay away. To help avoid injury: Never direct water at overhead lines. Pressurized fluid or air. Contact can cause death or serious injury.
-
Page 87: Empty Debris Tank
W12 Operator’s Manual Vacuum and Pothole Operations - 86 Empty Debris Tank 15. Adjust water pressure as needed to match soil conditions and/or material of utility being exposed. 16. Ensure water sprays from nozzle. If it does not, nozzle may be clogged and pump will not function properly. - Page 88 W12 Operator’s Manual Vacuum and Pothole Operations - 87 Empty Debris Tank 1. Ensure boom is in transport position and haul to approved dumping area. TRANSPORT POSITION DUMP POSITION TTW12-VP-007A NOTICE: Never drive with debris tank or tank door raised. 2.
- Page 89 W12 Operator’s Manual Vacuum and Pothole Operations - 88 Empty Debris Tank 4. Open door lockout valve (1) and tank hoist lockout hydraulic valve (2) on manual control panel. 5. Optionally, open bottom tank gate valve (3) TTW12-EX-009a.ai and/or decant gate valve (4) to partially drain fluid from debris tank.
- Page 90 W12 Operator’s Manual Vacuum and Pothole Operations - 89 Empty Debris Tank 8. Pull Tank Lift lever (7) to raise debris tank up and drain solids from tank. Confined space. Suffocation will cause death. Stay away or follow procedures for entering. 9.
-
Page 91: Use Auxiliary Hydraulic Tools
W12 Operator’s Manual Vacuum and Pothole Operations - 90 Use Auxiliary Hydraulic Tools Use Auxiliary Hydraulic Tools Operate hydraulic power tools with power pack hydraulics. 1. Connect auxiliary tool to rear hydraulic ports (1). 2. Adjust flow control to appropriate speed for auxiliary tool. -
Page 92: Shut Down
W12 Operator’s Manual Vacuum and Pothole Operations - 91 Shut Down Shut Down Blower Diesel Flush Hot parts. Fire can cause injury. Follow procedures to lubricate blower. To help avoid injury: • Never lubricate a hot blower. • Blower will be hot after deadheading. •... -
Page 93: System Shutdown
W12 Operator’s Manual Vacuum and Pothole Operations - 92 Shut Down IMPORTANT: Perform diesel flush with blower operating. 1. Run the blower at operating rpm with no load for approximately 10mins to allow the blower to cool. 2. With vacuum breaker open, restrict boom hose opening. IMPORTANT: The diesel flush valve has a spring return. - Page 94 W12 Operator’s Manual Vacuum and Pothole Operations - 93 Shut Down Check Air Filter 1. Unscrew and remove door wingnut (1) and remove washer (2), then swing door (3) open. 2. Unscrew and remove wingnut (4), washer (5), and retaining plate (6). 3.
- Page 95 W12 Operator’s Manual Vacuum and Pothole Operations - 94 Shut Down Clean Out Particulate Trap 1. Unscrew and remove wingnut (1), washer (2), and rubber washer (3). 2. Swing door (4) open. 3. Rake out particulates from particulate trap. 4. Using low pressure water clean out particulate trap.
-
Page 96: Complete The Job
W12 Operator’s Manual Complete the Job - 95 Complete the Job Chapter Contents For additional precautions, see “Safety” and “Prepare” chapters. Rinse Equipment ......96 Disconnect . - Page 97 W12 Operator’s Manual Complete the Job - 96 Rinse Equipment Rinse Equipment Confined space. Suffocation will cause death. Stay away or follow procedures for entering. To help avoid injury: Enter tank only if necessary. Follow US Department of Labor guidelines for entering confined spaces. Pressurized fluid or air.
- Page 98 Lubricate machine and apply grease to unpainted surfaces. • Cover exhaust pipe. • Inflate tires to recommended tire pressure. Decommission Machine Before decommissioning machine, follow local regulations for disposing of hazardous substances. For more information on draining fluids, see Maintenance chapter or contact your Ditch Witch dealer.
-
Page 99: Maintenance
W12 Operator’s Manual Maintenance - 98 Maintenance Chapter Contents For additional precautions, see “Safety” and “Prepare” chapters. Maintenance Precautions ....100 • Washing Precaution .........100 •... - Page 100 W12 Operator’s Manual Maintenance - 99 • Check Miscellaneous Items ........110 •...
-
Page 101: Maintenance Precautions
W12 Operator’s Manual Maintenance - 100 Maintenance Precautions Maintenance Precautions Jobsite hazards. Exposure can cause death or serious injury. Use correct equipment and work methods. Use and maintain appropriate safety equipment. To help avoid injury: • Wear personal protective equipment including hard hat, safety eye wear, foot protection, hearing protection, and gloves (except when near rotating equipment). -
Page 102: Welding Precaution
W12 Operator’s Manual Maintenance - 101 Maintenance Precautions Welding Precaution NOTICE: Welding can damage electronics. • Welding currents can damage electronic components. Always disconnect the Digital Control Panel ground connection from the frame and other electronic components prior to welding on machine or attachments. - Page 103 W12 Operator’s Manual Maintenance - 102 Maintenance Precautions Handrail The maintenance platform has a safety handrail that should be raised any time personnel are working on the maintenance platform. 1. Remove locking pin (1) from storage bracket. 2. Lift handrail (2) into vertical position. Pinch hazard.
-
Page 104: Working Under Raised Debris Tank
W12 Operator’s Manual Maintenance - 103 Maintenance Precautions Working under Raised Debris Tank Raised component. Crushing can cause death or serious injury. Stay away or secure raised component with locking device. Use correct equipment and procedures. 1. Using the manual hydraulic controls, raise the debris tank. 2. -
Page 105: Working Under Raised Tank Door
W12 Operator’s Manual Maintenance - 104 Maintenance Precautions Working under Raised Tank Door Raised component. Crushing can cause death or serious injury. Ensure door is opened and locked into place before working beneath open door. 1. Open tank door until safety locks (1) are engaged. 2. -
Page 106: Truck Chassis Maintenance Interval Chart
W12 Operator’s Manual Maintenance - 105 Truck Chassis Maintenance Interval Chart Truck Chassis Maintenance Interval Chart IMPORTANT: Chart indicates first instance of repeated maintenance procedures. See detailed information below. IMPORTANT: This section does not cover the air system, auxiliary tools, or the components of the hydrovac system. - Page 107 W12 Operator’s Manual Maintenance - 106 Truck Chassis Maintenance Interval Chart Service 400 Hours 800 Hours 1200 Hours Brakes: adjustment, shoe wear, air service lines, maxi- brake adjustment, slack adjusters, s- cams, auto- adjusters, brake shoes (oil, dirt), dust guards Hydraulic System: tank, control valves, pressure/ return lines, bypass valve, pressure regulator, cooling unit...
-
Page 108: Change And Sample Engine Oil
W12 Operator’s Manual Maintenance - 107 Truck Chassis Maintenance Interval Chart Service 400 Hours 800 Hours 1200 Hours Engine: crankcase vent, blow by tube, belt tensioner, Amot valve operation Air Filter: Inspect and/or change only if needed Engine oil - change oil / filter and sample Air conditioning compressor, belt, condenser, blowing cold Grease all points on chassis and hydrovac system... -
Page 109: Check Brakes
W12 Operator’s Manual Maintenance - 108 Truck Chassis Maintenance Interval Chart Check that air conditioner is blowing cold air. Inspect compressor and condenser for signs of damage or leaks. Inspect belt for wear, cuts, chafing of other damage. Repair or replace defective components as required. -
Page 110: Check Chassis Exterior Components
W12 Operator’s Manual Maintenance - 109 Truck Chassis Maintenance Interval Chart Check Chassis Exterior Components Inspect bumpers, hood, cab, fenders, fuel tanks, air tanks, air dryer, paint, grille, doors, door handles, grab bars, mirrors/ brackets, warning/safety decals, safety tie downs, and tow hooks for loose or missing components, severe rust or corrosion, or other signs of damage that might compromise functionality and integrity of suspension system. -
Page 111: Check Gearboxes
W12 Operator’s Manual Maintenance - 110 Truck Chassis Maintenance Interval Chart Check Gearboxes Inspect transmission and transfer case mounts, sensors, shift cylinders, supply lines, vents, seals, input and out put shafts, gear box protection unit, shift lever, PTO, PTO shift cylinder/linkage for loose or missing components, leaks, severe rust or corrosion, or other signs of damage that might compromise functionality and integrity of gearbox. -
Page 112: Lubricate Chassis Components
W12 Operator’s Manual Maintenance - 111 Truck Chassis Maintenance Interval Chart Inspect wheels for cracked rims, bent rims, axle cap seals, damaged wheel studs, loose or missing lug nuts. Repair or replace wheels as required. Lubricate Chassis Components Grease all grease fittings on truck chassis. -
Page 113: Hydrovac Maintenance Interval Chart
W12 Operator’s Manual Maintenance - 112 Hydrovac Maintenance Interval Chart Hydrovac Maintenance Interval Chart IMPORTANT: Chart indicates first instance of repeated maintenance procedures. See detailed information below. IMPORTANT: This section does not cover the air system, auxiliary pneumatic tools, or the truck. Please see manufacturer’s manuals for maintaining those products. - Page 114 W12 Operator’s Manual Maintenance - 113 Hydrovac Maintenance Interval Chart Service Weekly Monthly Rear Debris Door Inspect Seal Inspect Door Surface (inside/outside) Inspect Lock Pins/Hinges Check Hydraulic Cylinders and Hoses Decals/Warning Labels Debris Tank Check Tank for General Damage Check Decant Valves Inspect Shutoff Float Ball Assembly and Gasket Inspect Debris Float Assembly or Sight Glass Decals/Warning Labels...
-
Page 115: Recommended Lubricants
Proper lubrication and maintenance protects Ditch Witch equipment from damage and failure. Maintenance intervals listed are for minimum requirements. In extreme conditions, service machine more frequently. Use only genuine Ditch Witch parts, filters, approved lubricants, TJC, and approved coolants to maintain warranty. Fill to capacities listed in “Specifications” on page 128. -
Page 116: Hydrovac System Maintenance
W12 Operator’s Manual Maintenance - 115 Hydrovac System Maintenance Hydrovac System Maintenance Change Hydrovac Air Filter 1. Unscrew and remove door wingnut (1) and remove washer (2), then swing door (3) open. 2. Unscrew and remove wingnut (4), washer (5), and retaining plate (6). -
Page 117: Check Water Heater Cabinet Components (Weekly Checks)
W12 Operator’s Manual Maintenance - 116 Hydrovac System Maintenance Check Water Heater Cabinet Components (Weekly Checks) 1. Check inline water filter. Flush dirt, debris and contaminants with clean water. Replace filter if required. TTW12-MP-009a 2. Verify that pump operates with no vibration, leaks, or excessive noise. - Page 118 W12 Operator’s Manual Maintenance - 117 Hydrovac System Maintenance 4. Inspect air hose and water hoses for leaks, cracks, chafing, or other damage that might impair proper operation. Repair or replace defective components. TTW12-MP-023a 5. Inspect washout gun (1) and dig wand (2) for leaks, cracks, or other damage that might impair proper operation.
-
Page 119: Check Water Heater Cabinet Components (Monthly Checks)
W12 Operator’s Manual Maintenance - 118 Hydrovac System Maintenance Check Water Heater Cabinet Components (Monthly Checks) 1. Change water pump oil (1) in accordance with manufacturer’s procedures. - Drain port (3) - Fill port (2) - Sight glass (4) 2. Check pump pressure using gauge (5). 3. -
Page 120: Inspect Rear Debris Door
W12 Operator’s Manual Maintenance - 119 Hydrovac System Maintenance 2. Check hydraulic fluid level and add fluid as necessary - Fill port (1) - Sight glass (2) - Reservoir (3) - Temperature gauge (4) TTW12-MP-013a Inspect Rear Debris Door 1. Inspect rear debris door seal (1) for signs of wear, damage, corrosion or other defects that might impair operation. -
Page 121: Lubricate Grease Manifold
W12 Operator’s Manual Maintenance - 120 Hydrovac System Maintenance 4. Check hydraulic cylinders and hoses for leaks, abrasions, loose or missing components, or other defects that might impair operation. Repair or replace defective components. 1) tank lift cylinder (located under front end of debris tank) 2) boom lift cylinders (qty. -
Page 122: Inspect Debris Tank
W12 Operator’s Manual Maintenance - 121 Hydrovac System Maintenance Inspect Debris Tank 1. Inspect exterior of debris tank for signs of wear, damage, corrosion or other defects that might impair operation. Repair or replace defective components as required. 2. Inspect debris door decant gate valve (1) and main gate valve (2) for signs of leakage, loose or missing hardware, and proper operation of valve levers. -
Page 123: Check Boom (Weekly Checks)
W12 Operator’s Manual Maintenance - 122 Hydrovac System Maintenance 4. Inspect debris tank sight glass for damage or leaks. Repair or replace as necessary. 5. Inspect safety post for proper operation. Repair or replace as necessary. TTW12-MP-029a Check Boom (Weekly Checks) 1. -
Page 124: Check Boom (Monthly Checks)
W12 Operator’s Manual Maintenance - 123 Hydrovac System Maintenance Check Boom (Monthly Checks) 1. Check all pivot pins (1), bolts (2), and rollers (3) for loose or missing hardware, corrosion, other defects that might impair operation. Repair or replace defective components as required. 2. -
Page 125: Check Blower (Weekly Checks)
W12 Operator’s Manual Maintenance - 124 Hydrovac System Maintenance Check Blower (Weekly Checks) 1. Lubricate blower drive line. 2. Test vacuum release operation using the remote control. Ensure linkage and vacuum breaker function properly. Check components for loose or missing hardware, excessive corrosion, or other damage that might impair operation. -
Page 126: Hydraulic System Maintenance
W12 Operator’s Manual Maintenance - 125 Hydraulic System Maintenance Hydraulic System Maintenance Checking Fluid Level Use the three sight glasses (1) in the hydraulic tank to monitor fluid level. Check the fluid as prescribed in “Hydrovac Maintenance Interval Chart” on page 112. Add fluid as necessary via fill port (2). -
Page 127: Replace Hydraulic Charge Filters
W12 Operator’s Manual Maintenance - 126 Hydraulic System Maintenance Replace Hydraulic Charge Filters Replace hydraulic filters any time hydraulic fluid is changed. NOTICE: There is one filter mounted in the top of the hydraulic reservoir, and one or two charge filters mounted to the back of the water heater cabinet, above the hydraulic tank. -
Page 128: Boom, Mounting Bolts
W12 Operator’s Manual Maintenance - 127 Hydraulic System Maintenance Boom, Mounting Bolts Check top (shown) and bottom bolts every 100 hours. Adjust as needed. NOTICE: Bottom bolts are accessed from inside tank. 1. Ensure both sets of bolts are tightened to 285 ft•lb (385 N•m). -
Page 129: Specifications
W12 Operator’s Manual Specifications - 128 Specifications Specifications are called out according to SAE recommended practices. Specifications are general and subject to change without notice. If exact measurements are required, equipment should be weighed and measured. Due to selected options, delivered equipment may not match that shown. Truck Chassis Manufacturer Peterbilt... - Page 130 W12 Operator’s Manual Specifications - 129 Debris Tank Metric Drain valve size 6 in diameter| 15.42 cm 8 in diameter 20.32 cm on door on door Dump angle 36° 36° Water System Metric Tank capacity 1,200 gal 4542 l Hose reel length Side: 100 ft Side: 33.33 m Rear: 80 ft...
-
Page 131: Support
Support Registration If your equipment was purchased through a Ditch Witch dealer, it is already registered. If you purchased from any other source, please email productsupportwarrantyadmin@ditchwitch.com or fill out the registration card located in the back of the parts manual. Registration enables you to receive updates on this equipment as well as information on new products of interest. - Page 132 Defects will be determined by an inspection within thirty (30) days of the date of failure of the product or part by Ditch Witch Product Support (DWPS) or its authorized dealer. DWPS will provide the location of its inspection facilities or its nearest authorized dealer upon inquiry.
Need help?
Do you have a question about the W12 HYDROVAC and is the answer not in the manual?
Questions and answers