Advertisement
Advertisement
Table of Contents

Subscribe to Our Youtube Channel
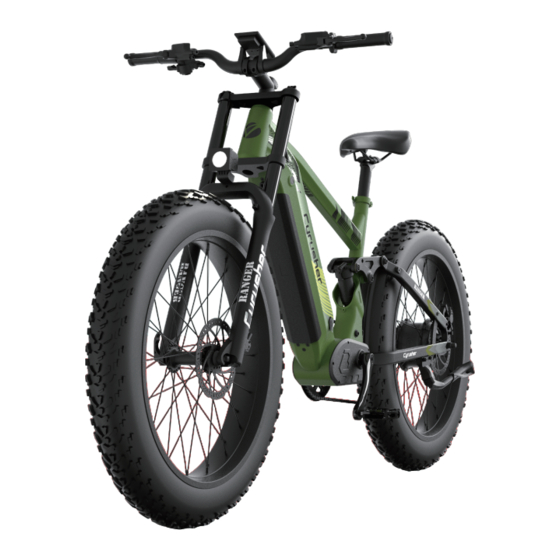
Summary of Contents for Cyrusher RANGER
- Page 1 E-BIKE OWNER’S MANUAL RANGER ALL-TERRAIN...
- Page 2 Bike Diagram Bike Diagram OWNERS MANUAL | CYRUSHER RANGER...
-
Page 3: First Ride
✓ Learn how to use the LCD display ✓ Wear a helmet before riding Please Note: Bike may need further adjustments after assembly If you have any trouble with setup, please contact us online https://www.cyrusher.com/pages/contact OWNERS MANUAL | CYRUSHER RANGER... - Page 4 6) Tighten screws on stem end (4mm allen wrench with 6N strength) and top of the stem (5mm allen wrench with 6-8N strength). 7) Check all headset items are tight. Screw 3: Tight torque 6NM Screw 4: Tight torque 6-8NM Screw 5: Tight torque 6NM OWNERS MANUAL | CYRUSHER RANGER...
- Page 5 4) The End Nut must be very tight, be sure to re-tighten after your first couple rides, its tight torque shall be 15-18NM. Figure 1 Figure 2 Tight torque: 15-18NM Brake Caliper and Brake disk on left side of bike OWNERS MANUAL | CYRUSHER RANGER...
- Page 6 Rear Front Use your 15mm Both pedals tighten wrench to properly towards the front tighten the pedals Right Pedal / Left Pedal / Chain Side Key Side Wrench icon made by Gregor Cresnar from www.flaticon.com OWNERS MANUAL | CYRUSHER RANGER...
-
Page 7: To Install The Battery
2) Seat the bottom of the battery into the receptacle first and push the upper side of the battery into the frame tightly until it gets locked with a clatter sound. Seat your battery securely, turn the key clockwise to lock the battery. Remove the key from the lock before each riding. OWNERS MANUAL | CYRUSHER RANGER... - Page 8 When the lock is released, hold the battery with both hands and take it off from the bike. Note: Please hold the battery tight with one hand at least as it will drop off when the lock is released. OWNERS MANUAL | CYRUSHER RANGER...
- Page 9 Figure 4 functional area distribution interface 3. Button definition The display is equipped with buttons on the corresponding operating unit: power on/off plus , minus and toggle . Light and horn button is on a separate button set. OWNERS MANUAL | CYRUSHER RANGER...
-
Page 10: Routine Operation
When the display is powered on, it will show the Current Speed (MPH) and Odometer (mile) by default. Short press to switch between Odometer (mile), Trip Odometer(mile), Maximum Speed (MPH), and Average Speed(MPH). Trip Odometer Odometer Average speed Maximum Speed Figure 5-1 Display Interface Switching OWNERS MANUAL | CYRUSHER RANGER... - Page 11 When the battery is fully depleted, the bar will begin to flash, warning the user to charge the battery as soon as possible. Full power Four bars power Three bars power Two bars power One bar power Empty power flashing Figure 5-5 Battery Level Display Interface OWNERS MANUAL | CYRUSHER RANGER...
-
Page 12: Before Riding
4) Push the battery pack into the downtube tightly until it gets locked with a clatter sound. Seat your battery securely and remove the key from the lock. 5) Check all the tires, tightness of fasteners and brakes before every riding. OWNERS MANUAL | CYRUSHER RANGER... - Page 13 6) Due to high temperature in summer time, it is NOT advisable to charge it immediately after riding. In winter, it is FORBIDDEN to charge the battery in environment below 0℃. You are recommended to charge it in room temperature. OWNERS MANUAL | CYRUSHER RANGER...
-
Page 14: Troubleshooting
Torque sensor –torque signal fault. Contact technical support. E026 Speed Signal Fault Torque sensor –speed signal fault. Contact technical support. Poor connection between the controller and the display. Check all cable connectors. E030 Communication Fault Check for corrosion damage. OWNERS MANUAL | CYRUSHER RANGER... - Page 15 Issue with battery Contact Support Team Loose hardware Tune-up and inspection needed Issue on drivetrain Maintenance needed E-bike making strange noises Issue with motor Contact Support Team OWNERS MANUAL | CYRUSHER RANGER...
- Page 16 OWNERS MANUAL | CYRUSHER RANGER...
Need help?
Do you have a question about the RANGER and is the answer not in the manual?
Questions and answers