Table of Contents
Advertisement
Quick Links
User manual
WARNING
When you handle electronic products, make sure to observe precautions for safety.
Otherwise, fire or an accident resulting in injury may occur.
This user manual shows important precautions to prevent accidents and how to handle the
product. Read this manual carefully, and use the product safely.
After reading this manual, be sure to keep this in an easily accessible place.
Ohira Tech Ltd.
4489-1 Ikonobecho, Tsuzukiku, Yokohama City, Kanagawa, 224-0053, Japan
Tel +81-45-507-3531 / Fax +81-45-507-3532
Email class@megastar.jp / Web https://www.megastar.jp/en
Ver. 2.0 ( June. 7, 2021 )
Advertisement
Table of Contents

Summary of Contents for Ohira Tech MEGASTAR CLASS
- Page 1 Read this manual carefully, and use the product safely. After reading this manual, be sure to keep this in an easily accessible place. Ohira Tech Ltd. 4489-1 Ikonobecho, Tsuzukiku, Yokohama City, Kanagawa, 224-0053, Japan Tel +81-45-507-3531 / Fax +81-45-507-3532 Email class@megastar.jp / Web https://www.megastar.jp/en...
-
Page 2: Table Of Contents
Contents 1 Introduction ............4 1 .1 For Safety ..............4 1 .1 .1 Handling Precautions ............5 1 .1 .2 Safety Precautions ..............6 1 .1 .3 Consideration for Health .............7 1 .2 Main Unit and Major Accessories.........8 1 .3 Main specifications............9 1 .4 Warranty ..............10 1 .5 Identification label and symbols used ......10 2 Preparation ............11 2 .1 Carrying the Main Unit .......... - Page 3 4 Menu control ..........21 4 .1 Menu ................21 4 .2 MODE ................22 4 .2 .1 Enjoying the stars .............22 4 .2 .2 Enjoy the lights..............24 4 .2 .3 Getting lights and stars together ........25 4 .3 DATE TIME ..............26 4 .4 TIMER ................27 4 .5 SETTING ..............32 4 .5 .1 TIME .................32 4 .5 .2 LOCATION ................33...
-
Page 4: Introduction
1 Introduction 1 .1 For Safety In order to prevent harm to humans such as electric shock or injury or damage to property caused by fire, etc, which may occur when you use the product improperly, make sure to observe the following. •... -
Page 5: Handling Precautions
1 .1 .1 Handling Precautions WARNING CAUTION • Do not apply an impact to the product. • Do not drop the product. • Do not place the product in an unstable place. • Do not place the product in a place where the temperature is likely to become high. •... -
Page 6: Safety Precautions
1 .1 .2 Safety Precautions WARNING CAUTION • The product is intended to use indoor in private areas. Not for professional use. • Don’t use the device in a different way it is designed for. The manufacturer is not liable for improper use. -
Page 7: Consideration For Health
by authorized and experienced technicians to prevent any risk. • Never wrap the power cord around your hand when the appliance is connected to the mains power supply. • In the case of thunderstorm, disconnect the power cord from the power outlet. •... -
Page 8: Main Unit And Major Accessories
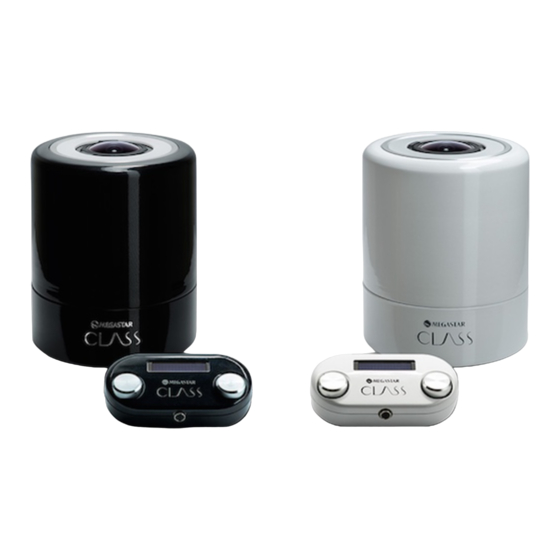
1 .2 Main Unit and Major Accessories Before using, confirm that all of the following are provided. Main Unit Controller 1 Year Warranty Certificate Product name : MEGASTAR CLASS Serial number Main unit : MCR Controller : MCR Delivery date (D/M/Y) :... -
Page 9: Main Specifications
1 .3 Main specifications MEGASTAR CLASS Model name Power supply 100-240 Vac, 1A max, 50-60Hz from external power supply mod. Model : LSU60-108 Input voltage 24Vdc Input current 1.45A max Number of projected stars Over 1 Million Light source Ultra bright LED... -
Page 10: Warranty
1 .4 Warranty When the product arrives, enter required matters in the Product Warranty packaged with the product, and send the warranty to us. We will register the product as the object of the product warranty. For the details of warranty, check the Product Warranty. For the serial number of the product, check the product number seals attached to the bottom surface of the main unit and of the controller. -
Page 11: Preparation
2 Preparation 2 .1 Carrying the Main Unit This product is a precision device. When carrying the main unit, turn the power off, pull out the cable, and hold the bottom surface of the main unit with both hands securely. In particular, carrying the main unit in a dark place is dangerous. - Page 12 • Fixing method On the bottom surface of the product, thread holes for fixing (M5) are provided. In particular, if you install the product on a place other than a flat stand, use them to fix the product securely. When using the thread holes for fixing, remove the rubber feet fastened with screws in advance.
-
Page 13: Connection
2 .3 Connection • How to connect the cable 1. Connect the cable for the controller to the controller. When connecting the cable, be cautious about the direction of the holes. If they fit properly, the cable will lock auto- matically. - Page 14 • How to remove the cable A lock is applied to the cable connected to the main unit and the controller in order to prevent them from coming out. Hold the plug part at the head of the cable, and pull it out straight without turning it.
-
Page 15: Basic Usage
3 Basic Usage 3 .1 Name of Components Projection lens Focus adjustment ring Indoor environmental lighting window Controller cable terminal Power terminal Power switch of the main unit Figure: The component names of the main unit Display window Operation dial (left) Operation dial (right) Controller cable terminal Figure: The component names of the controller... -
Page 16: How To Use The Controller
3 .2 How to use the Controller This product can be operated easily through the use of the provided controller. All opera- tions are to be made with the two dials attached to the right and left of the controller. Each dial has operation functions of “push”, “long push (for about 2 seconds)”, and “rotation”, and the menu and the status of the main unit will be shown on the display. -
Page 17: Turning On / Off The Power , Standing By
3 .3 Turning ON / OFF the power , Standing by • Turning the power on When the connecting the controller to the main unit and turning on the main unit, the main unit and controller will be powered on and initialization will start. After the initial operation has been completed and the screen has changed to the mode screen, you can use the product. - Page 18 • Standby / Restart If you put the product in standby mode (standby status) without turning off the power, you can shorten the startup time when restarting the product and can use it immediately. In particular, if you use some timers, you are required to put the product in standby mode. Further, if you put the product in standby mode, it will be able to memorize the status at the time of exit and will reproduce the status at the last time of exit.
-
Page 19: Focusing The Lens
3 .4 Focusing the Lens The focus of the stars is different depending on the place for projection. Adjust the focus of the projection lens so that you can see the stars clearly, watching the projected stars. Focus adjustment ring Figure: How to focus the projection lens WARNING When focusing the lens, do not look into it. -
Page 20: Switching From / To The Menu Screen To
3 .6 Switching from / to the Menu Screen to / from the Mode Screen • Switching from / to the Menu Screen to / from the Mode Screen Switch from / to the mode screen to / from the menu screen MODE 2 0 1 6 . 0 3 . 0 2 2 2 : 3 0 Screen (example) S T A R + 2 4 h... -
Page 21: Menu Control
4 Menu control 4 .1 Menu MODE : Stars and 5 light modes • STAR : Planetarium (only stars) • AUTO : Simulation of full day sky lights. • FAST : Same as AUTO but day time goes fast. • RELAX : Relaxation lights •... -
Page 22: Mode
4 .2 MODE This device has star mode as well as lights mode. To choose modes, use left dial to get menu MODE, and right dial to choose between modes. M E N U M O D E S T A R Chosen MODE Select Figure: Choosing MODE... - Page 23 • AUTO AUTO mode simulates the stars as well as daily lights, sunset and sunrise lights of the ob- server location. You can adjust daily motion speed. Time 2 0 1 6 . 0 3 . 0 2 2 2 : 3 0 ー...
-
Page 24: Enjoy The Lights
4 .2 .2 Enjoy the lights • RELAX Choose your favorite color and its brightness (LV) and tone (TONE) and enjoy the lights. Time ー ー 2 0 1 6 . 0 3 . 0 2 2 2 : 3 0 R E L A O N E Mode... -
Page 25: Getting Lights And Stars Together
• COLOR You can choose any color. Saturation H / S / V Lightness C O L O R 1 8 2 Value Indicator ー ー 【Pressing right dial】 Saturation C O L O R Numeric increment by 10 20 2 Numeric increment by 1 【Pressing right dial】 C O L O R Lightness 1 4 7 Figure: Color mode (COLOR) -
Page 26: Date Time
4 .3 DATE TIME Change the time of projected sky. When the time changes, the visible and invisible stars will be different. This is a real simulation of the night sky according to time and observer location. 【Available modes】STAR / AUTO / FAST •... -
Page 27: Timer
4 .4 TIMER This device has 4 timers : ON TIMER, OFF TIMER, SLEEP TIMER and WAKE UP TIMER. • CHECK You can check the value of each timer. The screen will display the state of each timer. Stop Next O N T I M E R ON TIMER [ O F F ]... - Page 28 • ON TIMER Automatically switches on the device (from standby state). The device will start in the same mode in which it was when was last switched off (to standby state). Change / Set O N T I M E R O FF 0 0 : 00 Disable timer ー...
- Page 29 • WAKE UP TIMER The device starts a slow fade-in for lights simulating sunrise. Change / Set W A K U P T I O FF 0 : 00 Disable timer ー W A K U P T I M O FF 0 0 : 00 Input time Enable timer Set time...
- Page 30 • SLEEP TIMER Once this timer is enabled, the device will go to standby state after specific set time. NORMAL : Once the Sleep time comes, the devices goes to standby state. STAR : Automatically slowly turns on the lights from evening sunset to night stars only. Once the Sleep time comes, the devices goes to standby state.
- Page 31 • Shortcut to SLEEP TIMER Long press of the right dial is a shortcut to the SLEEP TIMER menu. Sleep Timer Mode 2 0 1 6 . 0 3 . 0 2 2 2 : 3 0 display A U T O + 2 4h Sleep S LE E P T I M E...
-
Page 32: Setting
4 .5 SETTING SETTING is the menu for all settings of the device or its controller. 4 .5 .1 TIME • TIME ZONE Setting the time zone. (This related to the internal clock.) T I M E Z O N E 0 9 . -
Page 33: Location
4 .5 .2 LOCATION • CITY LIST By selecting the closest city in northern latitude to your location, the sunset and sunrise time will be most accurate. Default value: Akashi (Japan) • List of cities in Japan Tokyo / Shizuoka / Nagoya / Osaka / Akashi / Hiroshima / Yamaguchi / Fukuoka •... -
Page 34: Sunset
• LONGITUDE You can set exact value for the longitude for a better accuracy of the observe location. L O N G I T U DE ー ー + 0 0 0 . 0 0 Set longitude Decimal point value Longitude integer value Figure: Setting longitude +: For Eastward ‒: For Westward •... -
Page 35: Display
MEGASTAR CLASS CONTROLLER from Google Play store. Megastar Class should appear in the devices list in the controller application. This allow you to control your device. For detailed control, please refer to the application. Below are description on how to make your device visible via Bluetooth and configure it. -
Page 36: Offset
• NAME Device name. You can change the default name of the device. Default name : CLASS"000" N A M E ー C L A S S 0 0 0 Set value Move cursor Input value Figure: Setting device name • PIN CODE Pairing pincode for Bluetooth connection. -
Page 37: Factory Settings
5 Factory settings Resetting the device into factory settings will erase your settings and time, and bring the device back to its original settings. To do so, first fully switch off the device. Press and keep pressing both dials on the control- ler, and switch on the power of the unit while keep pressing the dials. -
Page 38: Device Service
6 Care and storage 6 .1 Cleaning and Maintenance To conduct maintenance works on the device, switch off the power, and unplug the AC adapter output cable. Wide the device with dry soft cloth (glasses wiping etc). Do not use mops that are prone to static electricity, or tissue paper. -
Page 39: Replacing Battery
6 .3 Replacing battery When the internal clock shows wrong value, or timer not working properly, you need to re- place the battery. This is button battery, its type is: CR 2032. 【Replacing procedure】 1. Switch off the power, unplug the AC adapter output cable. 2. -
Page 40: In Case Of Trouble
7 In case of trouble Generally, in case of trouble, check the cables are firmly connected. Try switching off the power, disconnect cables, connecting again, and switching on the power. Do not connect or disconnect cables while power is on. This might damage the device. 7 .1 Main device trouble •... -
Page 41: Troubles With Star Projection
7 .2 Troubles with star projection • No stars • Check lens cover. • Check focus, bright environment will prevent stars from being visible. • Choose a mode where stars are visible: STAR / AUTO / FAST. In case of AUTO / FAST modes, stars are not visible during noon time. -
Page 42: Lights Troubles
7 .3 Lights troubles • Lights does not function • Check the mode: One of these modes should be selected RELAX, CANDLE and COLOR. • Light is flashing • In case of CANDLE mode, the device simulates the candle with variable bright- ness. -
Page 43: Bluetooth® Troubles
Does not connect to Bluetooth devices • Switch Bluetooth on. • Check Device name and pin code. • Use the application released by Ohira Tech MEGASTAR CLASS CONTROLLER. • Use the latest version. • Check your smartphone and OS versions on compatibility. -
Page 44: Misc
7 .6 Misc • The serial number is typed on the bottom of the device and controller. • If the device or the controller strongly fails down, even if no direct visible damage on the surface are noticed, an internal damage could happen to it. •... -
Page 45: Information On Disposal
8 Information on disposal Information on Disposal for Users of WEEE This symbol on the product(s) and / or accompanying documents means that used electrical and electronic equipment (WEEE) should not be mixed with general household waste. For proper treatment, recovery and recycling, please take this product(s) to designated collection points where it will be accepted free of charge. -
Page 46: Ue Declaration Of Conformity
O O H H I I R R A A T T E E C C H H L L T T D D . . UE DECLARATION OF CONFORMITY (No.021_18_0) We manufacturer: OHIRA TECH LTD. Address: Via 4489-1 Ikonobecho, Tsuzukiku, Yokohama City, Kanagawa, 224-0053, Japan... - Page 47 Contacts Ohira Tech Ltd. 4489-1 Ikonobecho, Tsuzukiku, Yokohama City, Kanagawa, 224-0053, Japan Tel +81-45-507-3531 Fax +81-45-507-3532 Email class@megastar.jp Web https://www.megastar.jp/en...
- Page 48 Ohira Tech Ltd.
Need help?
Do you have a question about the MEGASTAR CLASS and is the answer not in the manual?
Questions and answers