Table of Contents
Advertisement
Quick Links
Advertisement
Table of Contents

Summary of Contents for iio WC1
- Page 1 (iFF2-WS30) Use & Care Instructions ...
-
Page 2: Table Of Contents
Video review must be at least 30 seconds in duration, clearly show the product in use in a natural setting and include insightful product-specific audio commentary. The photo or video must be of sufficient quality, in the opinion of the iio™ management, that it can be used on our website and in other promotional materials. -
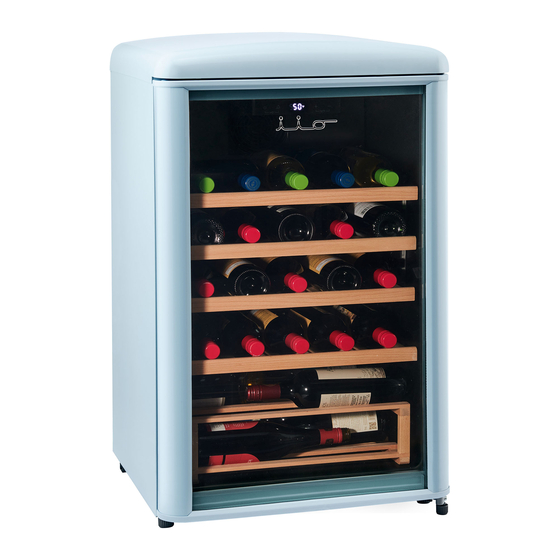
Page 3: Product Overview
PRODUCT OVERVIEW The images in this guide may differ from the actual components and accessories, which are subject to change without prior notice for product improvement purposes. NOTE: The appearance of components in the appliance may differ from model to model. ... -
Page 4: Important Safety Notes
IMPORTANT SAFETY NOTES Always read and follow all safety messages. This appliance is not intended to be used as a built-in appliance. READ ALL INSTRUCTIONS BEFORE USE. Alert Symbol – will display WARNING or CAUTION beside the instruction. Messages with the Alert Symbol will inform you of the potential hazard, provide guidance for reducing the hazard, and inform of the possible outcome if the instruction is not followed. - Page 5 CAUTION Appliance MUST be in a vertical position for 24 hours before being connected to power. Replace all appliance parts and panels before operation. To avoid injury two or more people are required to move and install the appliance. ...
-
Page 6: Installation
INSTALLATION WARNING When using this appliance follow basic precautions to reduce the risk of electrical shock, explosion, fire, serious injury or death. Do not damage the refrigerant circuit. Only connect this product to a dedicated grounded electrical outlet rated for use with this product (110-120V~, 60Hz, AC only). - Page 7 UNPACK CHOOSE LOCATION LEVEL LEGS Remove the Packaging Remove tape and any temporary labels from your appliance before use. Do not remove any warning labels, the model and serial number labels, or the circuit diagram from the appliance as this will void the warranty. ...
-
Page 8: Product Dimensions
PRODUCT DIMENSIONS Your appliance should be installed on a flat and even floor. Keep the appliance level by adjusting the front leg levers. Dimensions and Clearances Check the dimensions of the appliance and the installation path to ensure there is sufficient room to move the appliance through doors or narrow openings. -
Page 9: Reversing The Door
REVERSING THE DOOR No. Description Description Top cover screw Limit block Top cover Door screw Left upper hinge Bottom hinge Left upper hinge screw Bottom hinge screw Upper hinge screw Short front foot Right upper hinge Long front foot Figure 1 ... - Page 10 Figure 3 Lay the door on a protected surface and ensure that the door seal does not get damaged. Remove door screw ⑧ and limit block ⑦. Install the limit block ⑦ into the corresponding hole on the other side of the door and affix the door screw ⑧....
-
Page 11: Operation
OPERATION Before Use WARNING When the control is OFF, power is still supplied to the appliance. Disconnect the power before servicing or cleaning to prevent injury or death. If the appliance is unplugged, turned OFF, or has lost power, you must wait for 3 to 5 minutes before restarting the unit. - Page 12 Control Panel Display Depending on the model, some of the following functions may not be available. The control panel display may differ from model to model. Power key LED light Increase key Decrease key Digital display Auto Lock – No setting can be changed when the lock is activated. The lock is automatically activated 2 minutes after a setting is changed or there is no activity.
-
Page 13: Energy Saving Tips
Wood Shelves Wood shelves can be positioned to the desired height by the user. To reposition or remove a shelf gently slide out the shelf out towards you. Gently re-install the shelf at the desired position by reversing this step. Water Drain Port ... -
Page 14: Cleaning
CLEANING WARNING Unplug the appliance from the power source before cleaning. Do not use large amounts of water or liquid when cleaning the appliance as this may affect electrical components, insulating properties of the appliance and the wooden shelves. CAUTION ... - Page 15 Water Drain Port The drain opening that collects moisture is located near the bottom of the appliance. When cleaning the appliance ensure that the opening is not clogged. Inspect and clean this frequently (i.e. with a plastic straw). Water Catch Basin ...
-
Page 16: Troubleshooting
Call a service technician. Do not attempt to repair this yourself as LED lighting there is a danger of making contact with high voltage. does not work: For other troubleshooting inquiries or for an iio™ authorized repair center please contact us at: 1--833-446-4461 or email us a service@iiokitchen.com. -
Page 17: Warranty
WARRANTY iio™ warrants this appliance will be free from defects in materials or workmanship for a period of TWO YEARS from the date of original purchase. THERE ARE NO OTHER WARRANTIES, EXPRESSED OR IMPLIED, INCLUDING BUT NOT LIMITED TO, WARRANTIES OR MERCHANT ABILITY OR FITNESS FOR A PARTICULAR PURPOSE. Proof of purchase/original invoice may be required to claim warranty. -
Page 18: Your Appliance Information
YOUR APPLIANCE INFORMATION To make it easier to request maintenance or warranty service, please record the following information and keep this manual near your appliance. Make: Model: Serial Number: Invoice Number: Date Purchased: Store Name: NOTES:... - Page 19 We do the utmost to ensure that the provided information is complete and accurate; however, images and specifications are subject to change without notice. Visit www.iiokitchen.com to download the latest version of the user manual. WC1 (iFF2-WS30) Use and Care Instructions Manual 202210V1...
Need help?
Do you have a question about the WC1 and is the answer not in the manual?
Questions and answers