
Summary of Contents for GoSAT GS 240T2
- Page 1 Digital terrestrial receiver HD DVB-T2 GS 240T2 Cat. n. 14580384 User manual Please read this user manual thoroughly before setting up the receiver and follow all provided safety instructions.
- Page 2 Introduction Dear customer, thank you for purchasing GoSAT receiver and we hope you will be satisfied with it. Please read all information and instructions in this manual. Pay special attention to the information marked as "Warning" and "Please note". Store this manual in a dry and dark place for future reference.
-
Page 3: Table Of Contents
Contents 1. Important safety instructions 2. Receiver description 2.1 Package contents 2.2 Front panel 2.3 Rear panel 2.4 Remote control functions 2.5 Remote control battery installation 2.6 Using the remote control 2.7 Remote control programming 3. Setting up the receiver 3.1 Installation 3.2 First start 3.3 Basic receiver operation... -
Page 4: Important Safety Instructions
1. Important safety instructions WARNING! Risk of electric shock! Do not remove the cover! All repairs must be carried out by authorised personel only! Warning! Prior to first use of the receiver, please read all safety instructions and follow all instructions in this manual. - Page 5 Use only original accessories and components approved by the manufacturer for safe use with the receiver. If the original accessories are missing or show signs of damage, please contact your dealer or GoSAT technical support for replacement. Unplug the receiver from the wall outlet, and disconnect the antenna cable from the receiver if there is an incoming thunderstorm, or if the receiver will not be used for a long time.
-
Page 6: Receiver Description
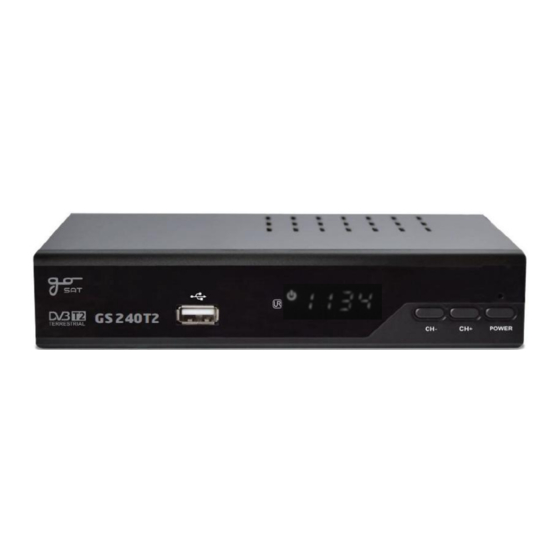
Prior to first installation and use of the receiver, please make sure that all the components listed below are included in the package, and that they are not damaged in any way. Otherwise, please contact your dealer. 1x receiver GoSAT GS 240T2 1x user manual 1x remote control 2x AAA batteries 2.2 Front panel... -
Page 7: Rear Panel
2.3 Rear panel 1) Antenna input (IEC): connection to a terrestrial antenna or cable TV 2) Antenna output (IEC): signal output for routing the antenna signal to another device 3) S/PDIF (coaxial): digital coaxial connection for audio devices 4) HDMI connector: connection for a display device, such as a TV set 5) Ethernet port (RJ-45): connection to a local area network / Internet 6) Scart AV output: analog audio/video output for older types of TV sets 2.4 Remote control functions... -
Page 8: Remote Control Battery Installation
3 cm. 2. Press and hold the SET key on GS 240T2 remote control. The Power ON / OFF key will start glow with a dim red light. Once this key lights up with a brighter red light, you can release the SET key. -
Page 9: Setting Up The Receiver
performed correctly. Certain TV remote controls are not compatible with programmable remote controls. This is not considered as a manufacturing fault, or defect. 3. Setting up the receiver 3.1 Installation Before installation, please make sure that both the receiver and the TV are fully disconnected from the AC mains power supply. -
Page 10: Basic Receiver Operation
3.3 Basic receiver operation Here is a brief overview of the basic receiver functions. These functions are only applicable when no menu of the receiver is active or opened. For a more detailed overview OK: shows channel list UP / DOWN: switches to the next / previous channel LEFT / RIGHT: adjusts the volume Numerical keys: selects a channel via its number TV/Radio: switches between a TV / Radio channel list... -
Page 11: Epg
3.6 EPG Electronic Program Guide displays information about planned broadcast on different channels up to 7 days in advance (if available). If you press EPG button, a daily EPG mode will appear. You can change the preferred program in the left screen section by pressing UP / DOWN. In the right section of the screen you can see the day, hour and name of the current or upcoming broadcast on the selected channel. -
Page 12: Picture
remove a channel from the Fav group. Program guide Displays the Electronic Program Guide. This function is described above in the chapter 3.6 EPG. Sort: selection of how channels are automatically sorted in the channel list (by LCN, by ONID, by TP, by service ID, by service name) LCN: logical channel numbering according to the provider (On / Off). -
Page 13: Time
4.4 Time Region and time Time offset: option to select an automatic time offset based on the selected country, or a manual offset setting Time zone: sets the GMT offset value if the manual time offset is selected Summer time: toggles the summer time OFF or ON (advancement by 1 hour) Current time: shows the current set time Sleep (HOUR): sets the inactivity time after which the receiver will enter a sleep mode Timer setting: enables to add a new timer event or to manage existing events. -
Page 14: System
4.6 System Parental guidance: to access the sub-menu, enter the default password 000000. The viewer age limit can be then adjusted from 4 to 18 years, of switched off. Lock control: to access the sub-menu, enter the default password 000000. Menu lock: will lock the menu against unauthorized access. -
Page 15: Usb
4.7 USB Media centre With Media centre you can easily browse and view multimedia files on the connected USB drive, such as video files, music or pictures. Select you preferred category and press OK to view a file. Files can be played in a loop by pressing the Play button; the duration can be adjusted via the settings button (gear wheel). - Page 16 Contact your dealer regarding service repair options, or contact Tipa s.r.o., or seek information at www.gosat.cz. Problem Possible cause Solution No power Plug the STB into the electrical wall outlet No picture The STB is turned off Turn the STB on via the POWER key...
-
Page 17: Technical Specification
The buyer can file a product complaint with the seller, or with Tipa s.r.o., which provides authorized GoSAT service. The buyer is obliged to file a complaint without undue delay during the warranty period. During the complaint procedure, the buyer is obliged to provide the necessary cooperation, in particular the provision of the purchase document for inspection, and the information necessary to determine the existence of defects and their subsequent assessment. - Page 18 The full text of the business and warranty conditions, including other sources of relevant information, is available on the website www.tipa.eu. Address of the manufacturer and provider of the authorized GoSAT brand service: Tipa, spol. s r.o. Sadová 2749/42...
Need help?
Do you have a question about the GS 240T2 and is the answer not in the manual?
Questions and answers