
Summary of Contents for tylr TYL-SU501
- Page 1 INSTRUCTIONS MANUAL TYL-SU501 ICE CREAM MAKER The ultimate tool for fuss-free frozen treats www.tylrhome.us...
-
Page 3: Table Of Contents
Table of Contents IMPORTANT SAFETY INSTRUCTIONS ........2 PARTS AND FEATURES ............5 BEFORE FIRST USE ..............6 ASSEMBLING YOUR ICE CREAM MAKER ......6 USING YOUR ICE CREAM MAKER ........8 CLEANING AND MAINTENANCE .......... 11 WARRANTY TERMS AND CONDITIONS ......15... -
Page 4: Important Safety Instructions
IMPORTANT SAFETY INSTRUCTIONS When using any electrical appliance, basic safety precautions should always be followed including the following: 1. Read all instructions. 2. Remove all bags and packaging from appliance before use. 3. Make sure the appliance is thoroughly cleaned before using. 4. - Page 5 in order to avoid a hazard. 12. Do not use the appliance if any of the parts are damaged. 13. Do not place on or near a hot gas burner, hot electric burner, or in a heated oven. 14. Do not operate any appliance with a damaged cord or plug or after the appliance malfunctions, or has been damaged in any manner.
- Page 6 children) with reduced physical, sensory, or mental capabilities, or lack of experience and knowledge, unless they have been given supervision or instruction concerning use of the appliance by a person responsible for their safety. SAVE THESE INSTRUCTIONS. FOR HOUSEHOLD USE ONLY.
-
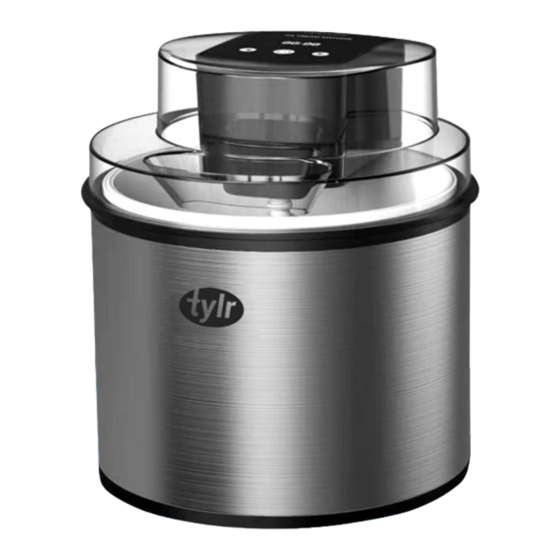
Page 7: Parts And Features
PARTS AND FEATURES 1 – Power 2 – Lid (Splash guard) with chute 3 – Spindle 4 – Paddle 5 – Inner (freezing) bowl 6 – Outer bowl 7 – Control Panel 8 – Decrease Time button 9 – Power button 10 –... -
Page 8: Before First Use
BEFORE FIRST USE Remove all packaging and clean your ice cream maker and all of its components according to the section on Cleaning and Maintenance. ASSEMBLING YOUR ICE CREAM MAKER Important: The inner bowl must be placed in the freezer for 8-12 hours prior to use. - Page 9 2. Insert the paddle into the spindle, then insert the spindle into the power unit until it clicks into place. NOTE: The parts included in steps 1 & 2 are already pre-assembled. If the parts need to be disassembled for cleaning purposes, follow the steps above to reassemble.
-
Page 10: Using Your Ice Cream Maker
USING YOUR ICE CREAM MAKER 1. Before starting, make sure the inner bowl has been inside your freezer for at least 8-12 hours. Shake the bowl - if you hear liquid moving inside, return the bowl to the freezer until it has frozen solid. - Page 11 • When pouring mixture into the bowl, always leave at least 4 cm (1.575 inch) from the top, as the mixture will increase in volume during freezing. 6. Allow the Ice Cream Maker to churn the mixture until frozen or when desired consistency is reached.
- Page 12 • Do not use metal utensils to remove mixture from the bowl. • Do not puncture or heat the inner bowl. Helpful Hints: • Keep the inner bowl in the freezer so that it is ready for use. Place in a plastic bag before freezing. Freeze the inner bowl in the upright position.
-
Page 13: Cleaning And Maintenance
CLEANING AND MAINTENANCE IMPORTANT: Allow the inner bowl to reach room temperature before cleaning. • Always make sure to turn off and unplug the unit if left unattended and before assembling, disassembling or cleaning. • Use warm, soapy water to wash the paddle, spindle, lid (splash guard) and outer bowl. - Page 14 RECIPES EASY VANILLA ICE CREAM Ingredients Whole Milk 1 cup Heavy cream 2 cups Pinch of salt Granulated sugar 3/4 cup Vanilla Extract 1 tablespoon Procedure 1. In a medium bowl, whisk to combine the milk, sugar and salt until the sugar is dissolved.
- Page 15 CHOCOLATE ICE CREAM Ingredients Whole Milk 1 cup Heavy cream 2 cups White sugar ½ cup Cocoa Powder ¼ cup Vanilla Extract 1 teaspoon Procedure 1. Combine sugar and cocoa in a small bowl. 2. In a saucepan over medium heat, warm the cream and milk. 3.
- Page 16 STRAWBERRY SORBET Ingredients Strawberries, fresh or 4 cups thawed frozen Water 1 cup Granulated sugar ½ Lemon juice 1 tablespoon Procedure 1. Combine sugar and water in heavy saucepan. Bring to a boil. 2. Reduce heat to low and simmer until all sugar is dissolved. 3.
-
Page 17: Warranty Terms And Conditions
Any unit or defective part that have been replaced shall become TYLR’s property. After the lapse of this warranty, a charge will be made on all labor and replacement of parts. - Page 18 Types of Services Defective Products must be sent to any TYLR service center (where available) or to the authorized distributor to obtain warranty service. TYLR is neither responsible for transportation/shipping costs to the service center/distributor nor is TYLR responsible to cover return shipping to the customer.
- Page 19 10. If any part or parts of the unit are replaced with a part or parts not supplied or approved by us, or if the unit has been dismantled or repaired by any person other than a TYLR authorized technician. 11. Any equipment/product which has its serial number removed or made illegible/tampered with.
- Page 20 IMPLIED WARRANTY OF MERCHANTABILITY AND FITNESS FOR A PARTICULAR PURPOSE, SHALL BE LIMITED IN DURATION TO THE PERIOD OF TIME SET FORTH ABOVE. TYLR’S TOTAL LIABILITY FOR ANY AND ALL LOSSES AND DAMAGES RESULTING FROM ANY CAUSE WHATSOEVER INCLUDING TYLR’S NEGLIGENCE, ALLEGED DAMAGE,...
Need help?
Do you have a question about the TYL-SU501 and is the answer not in the manual?
Questions and answers