
Summary of Contents for VCL Orbiter Gold Microspheres
- Page 1 Video Controls Limited Document Number - MNGLXXXX0901UK Orbiter Gold / Orbiter Lite Microspheres with user selectable Coax and Twisted Pair Telemetry modes Owners Operation & Installation Guide...
-
Page 3: Table Of Contents
Owners Operation & Installation Guide Orbiter Gold / Lite Safety Instructions, Maintenance & Fault Table of Contents Finder 1 Installing the Orbiter Gold / Lite Installing the Orbiter Gold / Lite Sample Configurations and Notes for RS485 Twisted Pair Installations 2 Setting up the Orbiter Gold / Lite Wiring Details Settings on the Orbiter Gold / Lite Top... - Page 4 Orbiter Gold / Lite Owners Operation & Installation Guide Table of Contents Page ii © Video Controls Limited 2001 MNGLXXXX0901UK...
-
Page 5: Safety Instructions, Maintenance & Fault Finder
© VCL 2001 Maintenance Cleaning the Acrylic VCL Recommend that the Acrylic on this product is cleaned regularly. For cleaning, VCL suggests that the acrylic is cleaned using a propriety foam cleaner or methalyted spirits and a soft cloth. © Video Controls Limited 2001 MNGLXXXX0901UK... - Page 6 Orbiter Gold / Lite Owners Operation & Installation Guide Fault Finder Safety Notes Page iv © Video Controls Limited 2001 MNGLXXXX0901UK...
-
Page 7: Installing The Orbiter Gold / Lite
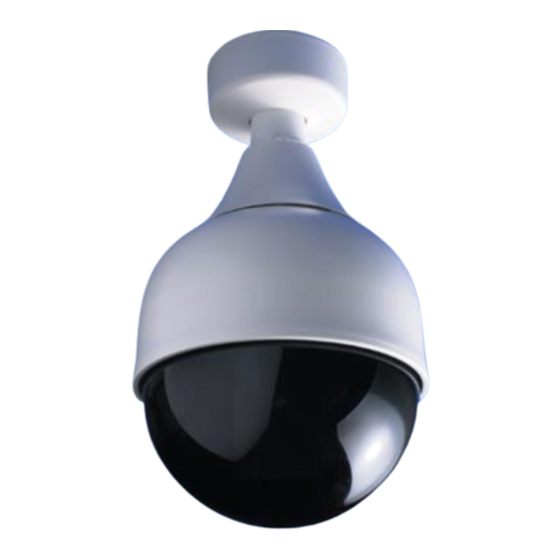
Owners Operation & Installation Guide Orbiter Gold / Lite Installing the Orbiter Gold / Lite Note: When handling the Orbiter Gold / Lite DO NOT touch the acrylic, or any sensitive or precision parts, as this will cause damage to the unit. Installing the Orbiter Gold / Lite Ceiling and Wall Mounted Models Chapter 1... - Page 8 Orbiter Gold / Lite Owners Operation & Installation Guide Step Instruction Attach the bracket (wall or ceiling type) using fixings which are appropriate for the surface and able to support the weight of the Orbiter Gold / Lite (1.1 kg) as shown in Figure ii.
- Page 9 Owners Operation & Installation Guide Orbiter Gold / Lite Step Instruction Fit the M3 CSK safety locking screw into the bracket to lock the Orbiter Gold / Lite in place. This is ESSENTIAL for the safe operation of the Orbiter Gold / Lite.
- Page 10 Orbiter Gold / Lite Owners Operation & Installation Guide False Ceiling Model Note: The Orbiter Gold / Lite is designed to be mounted in a flat ceiling installation. Mounting the Orbiter Gold / Lite in an angled ceiling installation will affect the units centre of gravity and, consequently, programmed tours will be affected.
- Page 11 Owners Operation & Installation Guide Orbiter Gold / Lite Follow the installation diagram in Figure vi to fit the Lanyard. Ensure that the Lanyard is fitted correctly at the point indi- cated. (Point ‘A’.) Insert the Orbiter Gold / Lite through the ceiling and fit the retaining disk to the back of theOrbiter Gold / Lite.
- Page 12 Orbiter Gold / Lite Owners Operation & Installation Guide Installing the Orbiter Gold External 1.3.1 Wall, Soffit and Pole Mounts - Dimensions For dimensions, see Figure vii, through to Figure ix. (All dimensions given in mm.) Add to the following Chapter 1 Installation Figure vii Wall Mount Dimensions...
- Page 13 Owners Operation & Installation Guide Orbiter Gold / Lite 1.3.2 Installing the External orbiter Gold Housing W all M o un tin g B ox S o ffit and P o le M ou n tin g P la te F ixing H ole s F ixing H ole s Q T Y 4 S C R E W -H E AD S LO TS...
- Page 14 Orbiter Gold / Lite Owners Operation & Installation Guide These products are supplied with a base sealing gasket and a lid sealing gasket which provide adequate sealing of the unit to a smooth surface. These must be used to prevent ingress of moisture into the housing.
- Page 15 Owners Operation & Installation Guide Orbiter Gold / Lite Chapter 1 Installation Figure xiii Fitting the sphere Align the arrow with the notch on the neck of the sphere as shown above. When these two are aligned, the unit may be fitted by following the instructions printed on the underside of the unit.
-
Page 16: Sample Configurations And Notes For Rs485 Twisted Pair Installations
Orbiter Gold / Lite Owners Operation & Installation Guide Sample Configurations and Notes for RS485 Twisted Pair Installations Note: Use screened cables for RS485 twisted pair cables. Individual Twisted Pair Output If a single twisted pair RS485 telemetry receiver is to be connected to an individual twisted pair output, then the ap- Chapter 1 propriate link should be fitted on the topboard.(For the... - Page 17 Owners Operation & Installation Guide Orbiter Gold / Lite The link MUST be fitted across for temination ON on the last Orbiter Gold / Lite. Figure xv below shows a system using two Orbiter Gold / Lites in this way. Star Connections DO NOT connect several twisted pair RS485 telemetry receivers in a Star Connection to one twisted pair output...
- Page 18 Orbiter Gold / Lite Owners Operation & Installation Guide Chapter 1 Installation Figure xv ‘Daisy Chain’ Installation IMPORTANT: The above rules concerning the use of RS485 must be adhered to so that the telemetry data is not corrupted. Failure to adhere to these rules will seriously reduce the performance of the Orbiter Gold / Lite units...
-
Page 19: Setting Up The Orbiter Gold / Lite
Owners Operation & Installation Guide Orbiter Gold / Lite Setting up the Orbiter Gold / Lite Wiring Details Installing the Orbiter Gold / Lite Internal The Orbiter Gold / Lite is designed for speed of installation and set up and so the wall and ceiling mount brackets are supplied pre-wired. - Page 20 Orbiter Gold / Lite Owners Operation & Installation Guide Figure xvii Terminal Block Details Table 6: VC408 Teminal BlockPCB Chapter 2 TWISTED PAIR ‘DATA IN COAX’ Set-up (Not Used) (Not Used) (Not Used) (Not Used) Twisted Pair (Not Used) Telemetry (Not Used) Video Video...
- Page 21 Owners Operation & Installation Guide Orbiter Gold / Lite 1.1.2 False Ceiling Mount From end of cable Solder side view of socket fitted on 3 metre cable supplied Figure xviii Wiring Details for the Orbiter Gold / Lite (False Ceiling Mount) Chapter 2 Set-up Table 7: Pin Descriptions of Pin outs for False Ceiling...
-
Page 22: Settings On The Orbiter Gold / Lite Top
Orbiter Gold / Lite Owners Operation & Installation Guide Settings on the Orbiter Gold / Lite Top Board (VC472) In the following section, please refer to Figure xix below, for the locations on the board. GA IN C ontro l - S ee te xt for how to us e this con trol LIF T C ontrol - S ee te xt for how to Term ination Links... -
Page 23: Address Settings
Owners Operation & Installation Guide Orbiter Gold / Lite Address Settings The addresses for each Orbiter Gold / Lite are set as shown in the table below. Set the Poles on DILSW2 to the desired position for each address. Table 8: Address settings ',/ 6:,7&+ 6(77,1*6 ',/ 6:,7&+ 6(77,1*6 ',/ 6:,7&+ 6(77,1*6... -
Page 24: Coax Telemetry
Orbiter Gold / Lite Owners Operation & Installation Guide Coax Telemetry Coax telemetry Orbiter Gold / Lites do not require an address setting, therefore the settings of positions 1 - 7 on DILSW2 are ignored. Position 8 controls the alarm feature as described in Section 7.0. - Page 25 Owners Operation & Installation Guide Orbiter Gold / Lite ALARM INPUT- PRESET TIME-OUT TYPE Normally 10 Seconds Open Normally 10 Seconds Open Normally 10 Seconds Open Normally 10 Seconds Chapter 2 Set-up Open When an alarm input becomes active, the Orbiter Gold / Lite will move to the corresponding preset and Relay 1 will close its contacts.
-
Page 26: Led On The Orbiter Gold / Lite Bottom Board (Vc472)
Orbiter Gold / Lite Owners Operation & Installation Guide LED on the Orbiter Gold / Lite Bottom Board (VC472) In the following section, please refer to Figure xx, below, for the locations on the board. D2 - D ata R ec eived LE D Flashes wh en ev er a valid telem e try com m an d is re ce ived... -
Page 27: Alarm / Relay Connections
Owners Operation & Installation Guide Orbiter Gold / Lite Alarm / Relay Connections The connections to the alarm inputs and relay output are via 2 RJ45 sockets located at the top of the Orbiter Gold / Lite, shown in Figure xxi, below. Chapter 2 Set-up A larm s... - Page 28 Orbiter Gold / Lite Owners Operation & Installation Guide Table 10: RJ45 Connections CONNECTOR 1 CONNECTOR 2 SIGNAL SIGNAL Alarm in 5 Alarm in 1 Alarm in 6 Alarm in 2 Alarm in 7 Alarm in 3 Alarm in 8 Alarm in 4 Chapter 2 Set-up...
-
Page 29: Technical Specification
Owners Operation & Installation Guide Orbiter Gold / Lite Technical Specification Internal Lite Gold Gold Gold X Optical Zoom Digital Total Zoom 144x 176x 144x Colour / Mono Alarm Chapter 3 Inputs Relay Outputs Presets Tours (with idents) Presets per Tour Mimic Tours Remote... - Page 30 Orbiter Gold / Lite Owners Operation & Installation Guide Internal Lite Gold Gold Gold X Line Lock Facility Sector Idents Wide Dynamic Range X Wave Technology Scanning System NTSC Chapter 3 Scanning System PAL Line Resolution NTSC Line Resolution Pixels NTSC 768(H) x 768(H) x 768(H) x...
- Page 31 Owners Operation & Installation Guide Orbiter Gold / Lite Internal Lite Gold Gold Gold X Video 1V pk-pk Output Illumination (lux) Illumination Integration lux colour / mono S/N Ratio >48 >50 >50 >50 Chapter 3 Operating -10 - 50 -10 - 50 -10 - 50 -10 - 50 Temp °C...
- Page 32 Orbiter Gold / Lite Owners Operation & Installation Guide External Gold Gold Gold Gold X Gold Optical Zoom Digital Total 144x 176x 144x 144x 184x Zoom Colour / Mono Alarm Inputs Chapter 3 Relay Outputs Presets Tours (with idents) Presets per Tour Mimic Tours...
- Page 33 Owners Operation & Installation Guide Orbiter Gold / Lite External Gold Gold Gold Gold X Gold Line Lock Facility Sector Idents Wide Dynamic Range X Wave Technol- Scanning Chapter 3 System NTSC Scanning System Line Resolu- tion NTSC Line Resolu- tion PAL Pixels 768(H) x...
- Page 34 Orbiter Gold / Lite Owners Operation & Installation Guide External Gold Gold Gold Gold X Gold Teleme- Coax / Tiwsted Pair Options Control Twisted Pair or In Coax Signal Video 1V pk-pk Output Illumina- tion (lux) 0.4 / 0.01 0.4 / 0.01 0.1 / 0.02 Chapter 3 Illumina-...
- Page 35 Owners Operation & Installation Guide Orbiter Gold / Lite External Gold Gold Gold Gold X Gold Recom- VCEXT24PSU mended Mounting Wall, Pole, Soffit Options Chapter 3 © Video Controls Limited 2001 MNGLXXXX0901UK Page 29...
- Page 36 Orbiter Gold / Lite Owners Operation & Installation Guide Chapter 3 Page 30 © Video Controls Limited 2001 MNGLXXXX0901UK...
-
Page 37: Equipment Returns Procedure
Orbiter Gold / Lite Equipment Returns Procedure VCL prides itself on the quality and reliability of all of its’ products. However, faults can occur and so to ensure that any faults cause a minimum of fuss or disturbance, you are advised to follow the returns procedure outlined below. -
Page 38: For Credit
Orbiter Gold / Lite Owners Operation & Installation Guide For Credit THE COMPANY WILL ACCEPT PRODUCT BACK FOR CREDIT WITHIN 30 DAYS OF ITS ORIGINAL PURCHASE UNDER OUR 30 DAY NO WORRY GUARANTEE IF YOU WISH TO RETURN SUCH PRODUCT FOR CREDIT PLEASE CONTACT OUR CUSTOMER SERVICES TEAM DI- RECT ON 01928 754010... - Page 39 Owners Operation & Installation Guide Orbiter Gold / Lite PLEASE NOTE ALL RETURNING PRODUCT FOR CREDIT IS ASSESSED ON ITS ARRIVAL. IF THE PRODUCT IS MARKED OR DAM- AGED, MISSING PACKAGING, ACCESSORIES OR INSTRUC- TION MANUAL. A HANDLING CHARGE WILL BE APPLIED TO THE CREDIT NOTE RAISED Chapter 4 ©...
- Page 40 Video Controls Limited (Head Office) - 3, 4, 8 & 9 Aston Fields Road, Whitehouse Industrial Estate, Runcorn, Cheshire. WA7 3DL Telephone : 01928 754040 Fax : 01928 754041 Video Controls Limited (Southern Office) - Unit 9, York Way, Lancaster Road, Cressex Business Park, High Wycombe, Buckinghamshire.
Need help?
Do you have a question about the Orbiter Gold Microspheres and is the answer not in the manual?
Questions and answers