Advertisement
Quick Links
Advertisement

Subscribe to Our Youtube Channel
Summary of Contents for Trueview T18132
- Page 1 Solar PT Camera T18132 Please read the Quick Guide carefully before...
- Page 2 Solar Panel Mount x 1 no Certificate Quick Operation QR Card Fixtures x1 set x 1 no x 1 no T18132 Dome Camera x 1 no Solar Panel x 1 no Quick Operation QR Card x no1 Hoops x 2 no Fixtures x1 set Certificate x1...
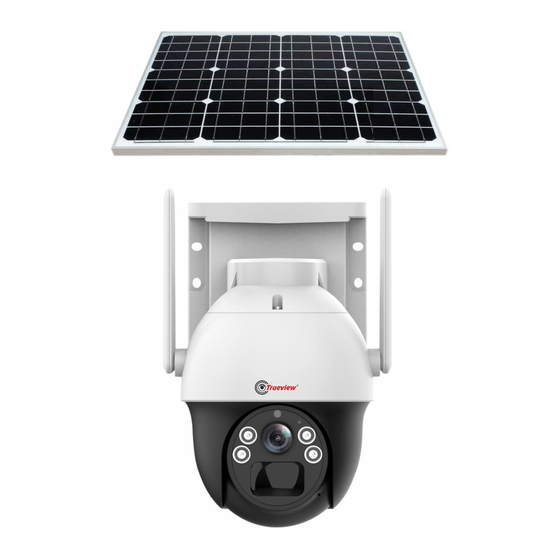
- Page 3 Solar Panel Antenna Indicator Light Photosensitive Lens Base Speaker Human Infrared Sensor (PIR) Reset Button - SD Card Slot - USB Charging Port T18132 Solar Panel Base Infrared & Spot Light Antenna Power output Photosensitivity Sensor Indicator Light Human Infrared Speaker...
-
Page 4: App Installation And Login
LED Indictations • G een ight flashes for 2s and turn out : The device is powered on and connecting to the network • Green light + Red light is always on : Amber The camera is being previewed remotely (privacy light) •... -
Page 5: Installing The Sim Card
3.2 Account Login : On the Login interface, input account /phone number/email, & the corresponding password, and click the "OK" button to log in. Third-party login: TrueCloud app supports third-party login. Click Local experience icon to jump to the TrueCloud app and complete the authorization and log in. - Page 6 Adding the Camera in App 1. Open the APP and click 2. Scan the QR code on the “+” icon on the upper available on the camera. right corner to enter the scan code interface. 3. On the search device 4.
- Page 7 When the QR code on the device is not available or does not work follow the below instructions. 1. Select “Add by ID/IP” in 2. Enter the deivce ID and “Other ways to add” Password, And click Finish in the upper right corner to add...
-
Page 8: Installation Method
To add the camera using wired connectivity Note: Please remove the 4G SIM card before using the above configuration method. 1. Power ON the device. 2. After setting the name Connect it to a router with and password for the device, internet access using a it will be added successfully. - Page 9 1. Ceiling Installation / Wall Installation 1. Camera installation - Use the installation positioning guide sticker to make holes in the wall. Use the plastic plugs for cement walls and install the camera. 2. Solar holder installation - Appropriately install the solar panel outdoors using the metal stand only and connect the same to the camera.
- Page 10 www .true view.co.in...
Need help?
Do you have a question about the T18132 and is the answer not in the manual?
Questions and answers