Table of Contents
Advertisement
Quick Links
1
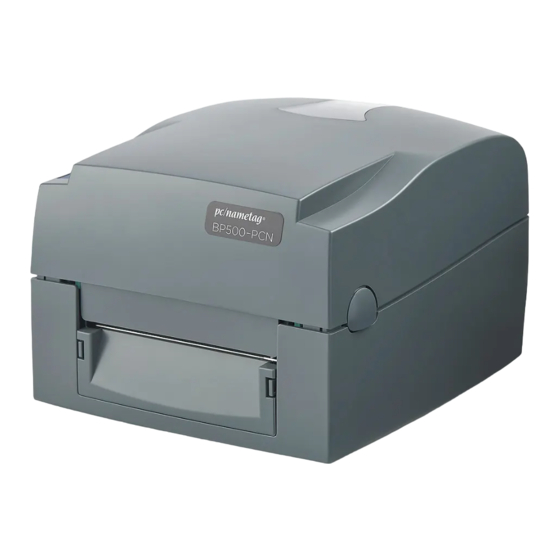
UPCN: pc/nametag BP500 Thermal Nametag Printer
Contents
Printer Quick Start Guide ............................................................................................................................ 1
Step 1: On your PC, Download and Install the Printer Driver Package ................................................. 1
Step 2: Load the Badge Paper into the Printer and Plug It In ................................................................ 1
Step 3: Configure the Printer Driver Settings ......................................................................................... 2
Step 4: Open Your Word Template and Try Printing a Badge ............................................................... 3
Quick Start Guide for pc/nametag label designer ...................................................................................... 3
Step one: Installing and Setting Up Printer ............................................................................................ 3
Step two: Setting up a new badge size: .................................................................................................. 5
Step three: Setting up Badge: ................................................................................................................. 6
Step four: setting up variables: .............................................................................................................. 7
UPCN Troubleshooting Guide ..................................................................................................................... 8
Printer Quick Start Guide
Step 1: On your PC, Download and Install the Printer Driver Package
IMPORTANT: Do not connect the printer to your computer until prompted by the driver
•
installer.
•
To do so, either run the CD that came with the printer or visit
for "UPCN" in the top search bar. Then select the UPCN printer and navigate to the "Templates
& Downloads" section to download the driver file.
Download driver file and run the EXE file. The installer program will then walk you through the
•
steps of installing the driver.
Step 2: Load the Badge Paper into the Printer and Plug It In
•
Open the top of the printer by pressing the circular gray buttons on
the left and right sides of the printer. Then, as shown to the right,
press the two green buttons to release the roller module.
www.pcnametag.com
and search
Advertisement
Table of Contents

Summary of Contents for pc/nametag BP500
-
Page 1: Table Of Contents
Step 3: Configure the Printer Driver Settings ..................2 Step 4: Open Your Word Template and Try Printing a Badge ............... 3 Quick Start Guide for pc/nametag label designer ..................3 Step one: Installing and Setting Up Printer .................... 3 Step two: Setting up a new badge size: .................... -
Page 2: Step 3: Configure The Printer Driver Settings
Windows 7 users: • Click the Start Menu and select “Devices & Printers”. You should see the “pc/nametag BP500 PCN” icon in the window. Right click on the icon and select “Printer Properties”. Windows 10 users: • Click the Start Menu and select the gear icon right above the Start Menu button. -
Page 3: Step 4: Open Your Word Template And Try Printing A Badge
Select “Badge Printer Stock” on the left hand side of the page and then click “Download Template” under the “pc/nametag BP500” option. Addendum for UPRINT4X3DRSB stock: In order to avoid misreads while using this stock, push the sensor pictured below to the left about a quarter of an inch, enough so that the lanyard slot does not feed over the sensor. - Page 4 4. Next, connect the printer to the Label Designer. There usually will be a prompt that comes up automatically, confirming whether a printer is connected that can be used by the software: 5. To connect the printer later, access the Printer setup by clicking on the ‘Printer Setup’...
-
Page 5: Step Two: Setting Up A New Badge Size
7. Once a printer connects, there should be details available on the “Printer Setup’ screen. This includes the printer model and many of the relevant settings for badges: Step two: Setting up a new badge size: 1. On the main screen, click ‘New’ in the top left corner. 2. -
Page 6: Step Three: Setting Up Badge
3. Once the label characteristics are set, either save the badge as a template, or click OK to open the label. Step three: Setting up Badge: 1. With the bar on the left of the screen, decide which features to put on the name badge. -
Page 7: Step Four: Setting Up Variables
Note: Later, instructions will detail loading a template onto the printer that can be used in standalone mode. In that mode, the only text that can be put in as a variable is ‘Printer Text’. The other items will stay the same if used. 3. -
Page 8: Upcn Troubleshooting Guide
4. On the main Text Setup page, the variable should now be present in the Text data box, and in the display, it will show a row of zeros, depending on how long the variable max is. Click OK and see how the variable will be displayed on the badge. 5. - Page 9 If the printer is calibrated correctly (i.e. it feeds out one badge when you press the “Feed” button on the printer), then it’s most likely a Word template issue. Try downloading and printing a fresh template from the pc/nametag website. You can also try •...
- Page 10 If that doesn’t work, it’s possible the paper is either past its shelf-life or is defective. Try testing • another stack of paper if possible. Otherwise contact pc/nametag for replacement. Text on badges is fine, but the attached image is grainy/pixelated.