Table of Contents
Advertisement
Quick Links
Advertisement
Table of Contents

Summary of Contents for Reprint Mantis
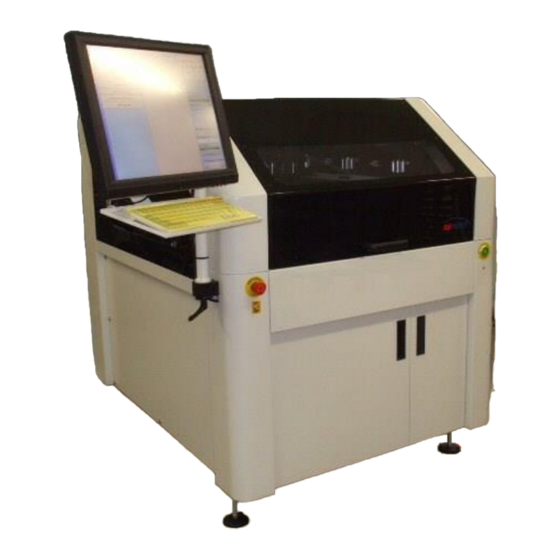
- Page 1 Reprint Mantis Stencil Printer Version release date: 15.11.2010...
- Page 2 Reprint Limited. Unit 10 Enterprise Park, Piddlehinton, Dorset. United Kingdom ® You have opted for Reprint equipment. We thank you for this decision. Your device was manufactured according highest quality standards and was tested thoroughly before shipment. It is very easy in operation; nevertheless we suggest that you read this manual before operating the machine. If you have any...
-
Page 3: Table Of Contents
................................................10 3.5. Initialising the Printer ......................11 3.6. Main Window Layout ......................12 3.7. Closing Down 4. Setting Up a Product File the MANTIS ....................13 ................14 4.1. Introduction ........................14 4.2. Create a New Product 4.3. - Page 4 ......................Production ....................47 6.1. Product Details ........................47 6.2. Counters ..........................47 6.3. Utilities ..........................48 Setting Up the MANTIS (Machine Set-up) ............49 7.1. Introduction ........................49 7.2. Machine Set-up ........................49 7.3. Product Transfer ........................ 49 7.4.
-
Page 5: Ce-Declaration Of Conformity
If there are any changes on the machine as also on their options by the user/customer, this declaration will expire immediately. Typ: Mantis Serial number: Date of manufacture: Applied/used harmonised european norms: DIN EN 292-1, 292-2, 294, 954-1, EN50081-1, EN50082-1, EN61000-3-2, EN62000-4-2, EN61000-4-2, EN60204 REPRINT LIMITED Reprint Mantis Version: 1.1 15.11.2010 Page 5 of 65... - Page 6 Piddlehinton, _______________ Martin A. Ziehbrunner Director Reprint Mantis Version: 1.1 15.11.2010 Page 6 of 65...
-
Page 7: Safety Information
1.3. Notice Reprint AG shall not be liable for errors contained within this document or for incidental consequential damages in connection with the furnishing, performance or use of this material. Reprint Mantis Version: 1.1... - Page 8 No part of this document may be reproduced, transmitted in any form or means, electronically or mechanically, including photocopying and recording, for any purpose without the express permission of Reprint AG. The information contained within this document is subject to change without prior notice. Reprint Mantis Version: 1.1 15.11.2010 Page 8 of 65...
-
Page 9: Installation
Once Windows has finished loading, the MANTIS User Interface (UI) program should automatically start. If it does not start automatically, double click the MANTIS UI shortcut icon on the Windows desktop. After an initial introduction screen, the Log On User dialog screen will appear. -
Page 10: System Power
You will now be asked if you wish to initialise the machine. Selecting ‘Yes’ will automatically take you to the Initialisation form. Selecting ‘No’ will take you straight to the Main Menu. 3.5. Initialising the Printer Reprint Mantis Version: 1.1 15.11.2010 Page 10 of 65... - Page 11 Click ‘Initialise’ to proceed and initialise the selected stages. If System Power is off, it may be turned on from this form. Press ‘Close’ when finished. Reprint Mantis Version: 1.1 15.11.2010 Page 11 of 65...
-
Page 12: Main Window Layout
7. Conveyor Control and Status Indicator: PCBs present on the conveyor stage will be clearly indicated by a green square symbol. Control buttons allow PCBs to be loaded and removed from the conveyor stage as required. 3.7. Closing Down the MANTIS Reprint Mantis Version: 1.1 15.11.2010 Page... -
Page 13: Setting Up A Product File
The processes involved with all three options are very similar with only the creation of a new file requiring an addition step. Note that depending on the printer options fitted, not all set-up options may be available. Reprint Mantis Version: 1.1 15.11.2010 Page 13 of 65... -
Page 14: Product Information
Reprint Mantis Version: 1.1 15.11.2010 Page 14 of 65... -
Page 15: Product Details
Set the value in ‘Soft Stop Over-run’ to be about 10mm greater than this true over-run distance. The board stop then will Reprint Mantis Version: 1.1 15.11.2010 Page... -
Page 16: Set Conveyor / Tooling / Additional Data
Note: This is only for well trained and skilled personnel! Select the desired tooling options and click the checkbox if the board has underside components Press ‘Continue’ to change to the next tab ‘Conveyor’. 4.9.1 Auto Conveyor Width Set-up Reprint Mantis Version: 1.1 15.11.2010 Page 16 of 65... - Page 17 When done, press ‘Clamp Rear Rail’ to securely lock the rail position. When you click ‘Save’, the system will move to measure the rail separation distance you have set. Reprint Mantis Version: 1.1 15.11.2010 Page...
- Page 18 ‘Tooling to Product’ the table moves upward, the support pins touch the PCB ‘Tooling Post Under test if no support pins are beneath the Board Sensor Test’ stop pin Reprint Mantis Version: 1.1 15.11.2010 Page 18 of 65...
- Page 19 To set-up the tooling, check the box ‘Edit Tooling’ and select the appropriate tooling post. Press ‘Add’ to add it to the layout. Move it by using the mouse to the desired position. Double click the tooling post to delete it. 4.9.6. Additional Data Reprint Mantis Version: 1.1 15.11.2010 Page 19 of 65...
-
Page 20: Setting Print Parameters
4.10.2. Printing Speeds and Pressure Selecting the ‘Same Profile’ option automatically sets speed and pressure values to be the same. Otherwise it is possible to set independent values for both ‘To Front’ and ‘To Rear’ print directions. Reprint Mantis Version: 1.1 15.11.2010 Page... - Page 21 For the print stroke from rear to front, the rear squeegee will start 30mm into the board from the rear edge and finish the print stroke 10mm past the front edge of the board. 4.10.4. Printing Modes and Deposits Reprint Mantis Version: 1.1 15.11.2010 Page...
- Page 22 At this point the board is in approximately the correct printing position. The next step is to align the board very accurately to the stencil. This is achieved by moving Reprint Mantis Version: 1.1 15.11.2010 Page...
- Page 23 Fiducial select controls. Click on site number button to move camera to required fiducial position. The ‘Move Camera’ button allows the operator to adjust the camera position and therefore repositions the image of the fiducials within the field of view. Reprint Mantis Version: 1.1 15.11.2010 Page 23 of 65...
- Page 24 If using an adaptor to hold the stencil in the printer, ensure that the stencil is fitted squarely and securely inside the adaptor. Bad stencil/adaptor set-ups can cause problems if the stencil and board fiducials cannot be shown simultaneously in their respective camera images. 4.11.5. Image Settings Reprint Mantis Version: 1.1 15.11.2010 Page 24 of 65...
- Page 25 However, in circumstances where none exist, it is possible with careful selection to use component pads on the board as reference marks. Therefore, where references and actions to fiducials are made, the text can also apply to component pads. Reprint Mantis Version: 1.1 15.11.2010 Page...
- Page 26 In applications having dedicated fiducial markings, having a full size search area and correlation box set to ‘Auto Learn’ will produce acceptable results for teaching and locating fiducials. The next section on teaching the system a fiducial will explain how to alter any of these settings if required. Reprint Mantis Version: 1.1 15.11.2010 Page...
- Page 27 The ‘Zoom Image’ feature allows the operator to enlarge the camera image. This may help when selecting a small fiducial within the image. Reprint Mantis Version: 1.1 15.11.2010 Page 27 of 65...
- Page 28 Click the ‘Set Area’ button and draw a new search area in the image to exclude other similar objects whilst trying to produce the largest search area possible. With ‘Auto Learn’ selected, re-learn the required shape as before and check the results. Reprint Mantis Version: 1.1 15.11.2010 Page...
- Page 29 If satisfactory results cannot be obtained, consider learning a new fiducial mark. 4.11.11. Test Align Only when all board/stencil fiducial site locations have been learned a test align can take place. To start the align sequence click on the ‘Utilities’ tab. Reprint Mantis Version: 1.1 15.11.2010 Page 29 of 65...
-
Page 30: Board To Stencil Calibration
(zero pressure) with the top surface of the stencil. The zero pressure calibrations are used by the printer as a reference starting point when applying the required squeegee pressure during the printing process. Reprint Mantis Version: 1.1 15.11.2010 Page 30 of 65... - Page 31 Should the stencil be cleaned automatically or manually during production? When cleaning, which cleaning modes should be applied: - wet, dry or wet and dry? How often should the cleaning should take place? Reprint Mantis Version: 1.1 15.11.2010 Page 31 of 65...
- Page 32 This option is not normally selected for the Wet Cycle as it can interfere with the effectiveness of the applied cleaning solvent. Wet Paper Duration – Duration that the solvent pump is active to wet the Reprint Mantis Version: 1.1 15.11.2010 Page 32 of 65...
- Page 33 The frequency of cleaning varies between stencils and is heavily dependent on the size of apertures. In general, the smaller apertures, the greater the clean frequency. Reprint Mantis Version: 1.1 15.11.2010 Page 33 of 65...
-
Page 34: Is1 2D Paste And Stencil Inspection
2 or more regions thereby adding flexibility to the inspection sequence when in production. Reprint Mantis Version: 1.1 15.11.2010 Page... - Page 35 The action of adding a new inspection site is done using the ‘Train Site’ button. However, there are a few things to do before adding a new site. Reprint Mantis Version: 1.1 15.11.2010 Page...
- Page 36 Once the ROI is drawn on the stencil image and you have set the correct inspection parameters as described above, you are know ready to add (train) the new site. This is done by simply clicking ‘Train Site’. Reprint Mantis Version: 1.1 15.11.2010 Page...
- Page 37 The ‘Move to Site’ operation is only available when a single site is selected. A short cut to selecting all sites is to simultaneously press Alt-A on the keyboard. Pressing the same keys again will deselect all sites. 5.3.11. Return to Region Setup Reprint Mantis Version: 1.1 15.11.2010 Page 37 of 65...
-
Page 38: Global Settings
The inspection rate can vary from ‘Disabled’ (inspection turned off) up to ‘Every 20th Print’. In the example shown only every 2nd printed board will be inspected. Reprint Mantis Version: 1.1 15.11.2010 Page... -
Page 39: Inspection Actions
Use the options available in both the Warning and Alarm drop down boxes to determine what action is required when an inspection failure is detected. The action options are:- No action required. Reprint Mantis Version: 1.1 15.11.2010 Page 39 of 65... -
Page 40: Log Files
Full – Includes the same as the summary option plus a comprehensive log is saved where all inspection site defect information, down to pad and aperture level is reported. Use the ‘Browse’ button to select where the log files are to be saved. 5.7. Advanced 5.7.5. General Reprint Mantis Version: 1.1 15.11.2010 Page 40 of 65... - Page 41 If a site in the ‘Available Sites’ drop down box is colored green then it is both trained and calibrated. Yellow indicates that it is only trained and would require calibrating before an inspection could happen. Reprint Mantis Version: 1.1 15.11.2010 Page...
-
Page 42: Inspection In Production
‘Skip Calibrated Sites’. Sites that fail to calibrate will automatically be omitted from the inspection sequence. If a non-calibrated site is required during inspection, then exit the production form and return to 2d Set-up. 5.8.2. Global Settings Reprint Mantis Version: 1.1 15.11.2010 Page 42 of 65... -
Page 43: Running Production
The colour coding for the results are the same as mentioned in the 2d Set-up section. Reprint Mantis Version: 1.1 15.11.2010 Page 43 of 65... -
Page 44: Production
Using the ‘Save Image’ button will create bitmap files for both the current stencil and board images. Production Select “Production – Run Production” from the main menu. 6.1. Product Details Reprint Mantis Version: 1.1 15.11.2010 Page 44 of 65... -
Page 45: Counters
Table Down Delay – Print Gap – Product Offsets: – XXXX – XXXX L – XXXX Product Details / Production Notes: Customer specific specifications. 6.2. Counters Batch Count: Attention Message: 6.3. Utilities Reprint Mantis Version: 1.1 15.11.2010 Page 45 of 65... - Page 46 Stencil: Release Stencil – XXXX Load/Unload Stencil – XXXX Under Stencil Cleaner: Clean Stencil – XXXX Solder Paste: View Paste – Print Carriage: Move to Front – Move to Rear - Reprint Mantis Version: 1.1 15.11.2010 Page 46 of 65...
-
Page 47: Setting Up The Mantis (Machine Set-Up)
Setting Up the MANTIS (Machine Set-up) 7.1. Introduction Before printing with the MANTIS, the machine has to be configured to suite its required operation. It may also be necessary to carry out some important calibrations. 7.2. Machine Set-up Before using the MANTIS, the machine has to be configured to operate to your requirements. -
Page 48: Language Options
If fitted, an additional siren sound can accompany each beacon state. Select the appropriate check box to enable 7.5. Language Options Reprint Mantis Version: 1.1 15.11.2010 Page 48 of 65... - Page 49 All available languages for the MANTIS are shown on this form. Simply click on the required language and wait while the whole UI program reads and then configures itself with the new language. Contact Reprint AG or your local printer supplier if your particular language is not displayed.
- Page 50 Settings for both parameters will largely depend on the composition of paper roll fitted to the USC. Select if you wish to see a warning message displayed when the USC is out of cleaning solvent. Reprint Mantis Version: 1.1 15.11.2010 Page...
-
Page 51: Working With Product Files (File Manager)
You cannot delete the current active product file or the file named TEMPLATE. This file is used when creating new product files from the Product Set-up menu. See section ‘Setting Up a Product File’ on how this is done. Reprint Mantis Version: 1.1 15.11.2010 Page... - Page 52 8.3. Log On Users 8.3.4. Introduction: The MANTIS UI program requires users to Log On with a unique Log On name and password; collectively known as a user account. To view a complete list of all-available user accounts select ‘Log On Users’...
- Page 53 The lists of available privileges are: - Create New Product Files Edit Product Files Delete Product Files Configure Log On Users Access Machine Set-up Menu Access Maintenance Menu Access Service Menus 8.3.6. Edit User Settings: Reprint Mantis Version: 1.1 15.11.2010 Page 53 of 65...
-
Page 54: Backup Product Files
Should product files already exist in the folder, you will be prompted with options to over- write the files as required. On completing the backup operation, the form will automatically close. Reprint Mantis Version: 1.1 15.11.2010 Page 54 of 65... -
Page 55: Restore Product Files
The restore feature cannot over-write the printer’s currently active product file. Change the active file for another if you require updating that particular file. Reprint Mantis Version: 1.1 15.11.2010 Page 55 of 65... -
Page 56: Maintenance / Services
Loosen the the Allen screws of the holding ring on both paper rolls. Remove the ring (see picture). Deploy the used paper roll and exchange it with a new one Reattach the rings and tighten the Allen screws. Reprint Mantis Version: 1.1 15.11.2010 Page 56 of 65... - Page 57 Reel up the paper a few revolutions. If necessary, adjust the friction (see picture) to take up a possible paper slack. Refill Cleaner Solvent: Refill the cleaner solvent as shown on the picture. Reprint Mantis Version: 1.1 15.11.2010 Page 57 of 65...
-
Page 58: Maintenance ........................................................................................................... 60 10. Printing Basics
Annually – Complete six monthly and monthly checks as above Printing Basics Although the MANTIS printer can be used in many applications including the printing of inks and glues, its main role is that of printing solder paste. What follows is a brief introduction and description of the three main factors that can affect solder paste printing. -
Page 59: Working With Solder Paste
When the print stroke is complete, the printer lowers the board away from the stencil ready for removal from the printer. The MANTIS is a robust, high performance machine that uses advanced technology to deliver accurate results. If you take the time to learn the basics of the printing process, you will get the best possible results from your equipment. -
Page 60: The Three-Ball Rule
11.4. The Three-Ball Rule To determine which grade of paste is suitable for your stencil, apply the Three Ball rule, a rule derived from experience. The rule has two parts. It states that: Reprint Mantis Version: 1.1 15.11.2010 Page 60 of 65... -
Page 61: Understanding Viscosity
You can measure viscosity using a viscometer. The required viscosity for solder paste printing is 800 kcps. If a viscometer is not available, there is a practical way to check the viscosity of the paste • Stir the paste for about 30 seconds with a spatula. Reprint Mantis Version: 1.1 15.11.2010 Page 61 of 65... - Page 62 If the paste falls back as a continuous stream, its viscosity is too low • If the paste remains on the spatula, its viscosity is too high • If the paste slides and then shears off in blobs, its viscosity is correct. Reprint Mantis Version: 1.1 15.11.2010 Page 62 of 65...
-
Page 63: Working With Stencils
Good separation qualities. Good sealing qualities. 11.8. Stencil Design For an in-line machine such as the MANTIS, it is recommended that the board image be frontjustified, but in most cases the machine can also handle centre-justified images. Reprint Mantis Version: 1.1 15.11.2010 Page... -
Page 64: Stencil Cleaning
If stencils built to different specifications are to be used or if you intend to use a stencil adaptor for frames sizes less than 29”x29”, please contact Reprint AG or your local printer supplier to check suitability. WARNING: The underside of the stencil must be in line with the stencil holder rails otherwise this will affect vision height and PCB on-contact calibrations. -
Page 65: Squeegee Types
The MANTIS uses two squeegees, one for the forward print stroke, the other for the backward print stroke.
Need help?
Do you have a question about the Mantis and is the answer not in the manual?
Questions and answers