Advertisement
Quick Links
Please give us a chance to make it right and do better !
Contact our friendly customer service department for help first.
Replacements for missing or damaged parts will be shipped ASAP !
US office: Fontana
UK office: Ipswich
DE office: Hamburg
FR office: Saint Vigor d'Ymonville
Contact Us!
Do NOT return this item.
AU office: Truganina
PL office: Gdańsk
US:cs.us@costway.com
UK:cs.uk@costway.com
AU:cs.au@costway.com
CB10392BK/CB10392GR
THIS INSTRUCTION BOOKLET CONTAINS IMPORTANT SAFETY INFORMATION. PLEASE READ AND KEEP FOR FUTURE REFERENCE.
USER'S MANUAL
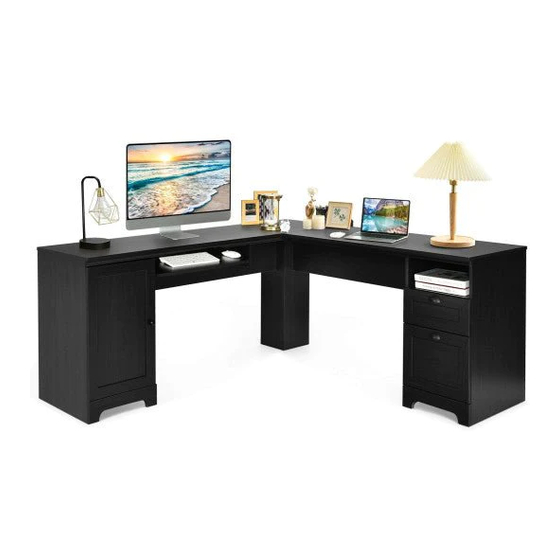
L-Shaped Desk
/CB10392CF
Advertisement

Summary of Contents for Costway CB10392BK
- Page 1 DE office: Hamburg FR office: Saint Vigor d'Ymonville PL office: Gdańsk USER’S MANUAL L-Shaped Desk Contact Us! CB10392BK/CB10392GR US:cs.us@costway.com Do NOT return this item. /CB10392CF UK:cs.uk@costway.com AU:cs.au@costway.com THIS INSTRUCTION BOOKLET CONTAINS IMPORTANT SAFETY INFORMATION. PLEASE READ AND KEEP FOR FUTURE REFERENCE.
-
Page 2: Board Identification
Board Identification Not actual size Board x1 Left side board x1 Right side board x1 Before You Start Left vertical board x1 Right vertical board x1 Left door board x1 Please read all instructions carefully. Retain instructions for future reference. Right door board x1 Lower apron x1 Side board trim strip x1... - Page 3 Board x1 Left side board x1 Right side board x1 Right vertical board x1 Left vertical board x1 Right vertical board x1 Left door board x1 Right door board x1 Lower apron x1 Side board trim strip x1 Vertical board trim strip x1 Bottom board x1 Small layer board x1 Large layer board x1...
-
Page 4: Hardware List
Hardware List Actual size M4 X 12mm BOLT METAL SLIDE METAL SLIDE 6x34mm 17-1 17-2 CAM BOLT CAM LOCK HEX KEY METAL SLIDE HANDLE HANDLE WIRE GROMMET SCREW WOOD DOWEL WOOD DOWEL WOOD DOWEL How To SEPARATE BALL BEARING SLIDE. 1. - Page 5 Insert the hardware to A\C\D\E\F\G\H\I\J\L\N\P\Q\R\T1\T part Screw the hardware to A\B\C\F\H\O\V\W part...
- Page 6 Install the part to the XiY board with the hardware and Install the part to the S board with the hardware and Install the part 17-2 to the Z1\Z2 board with the hardware Install the part 17-1 to the F\E board with the hardware and Install the part to the D\R board with the hardware FINISHED EDGE...
- Page 7 Fix the L part to the D part with the hardware Fix the C part to the L part with the hardware Fix the C\D part to the O part with the hardware Fix the C\D\O part to the K part with the hardware...
- Page 8 Fix the H part to the G part Fix the C\D\K part to the I\R part with the hardware with the hardware Fix the G\H part to the I\R part with the hardware Fix the l part to the R part with the hardware...
- Page 9 Fix the A part to the T part with Fix the E part to the N\P\Q part with the hardware the hardware Fix the E\N\P\Q part to the F part with the hardware Fix the G\H\I\R\C\D\K part to Fix the E\N\P\Q\F part to the O part with the hardware the A\T part with the hardware...
- Page 10 Fix the E\N\P\Q\F\O part to the K part with the hardware Fix the B part to the T1 part with the hardware Fix the E\N\P\Q\F\O\K part to the J part with the hardware Fix the B\T1 part to the Z7 part with the hardware 8 22...
- Page 11 Fix the E\N\P\Q\F\O\K\J part to the B\T1 part with the hardware Fix the E\N\P\Q\F\O\K\J\B\T1 part to the G\H\I\R\C\D\K\A\T part with the hardware 8 21 22...
- Page 12 Fix the Z part to the X\Y part with the hardware Fix the Z\X\Y part to the Z4 part. Fix the ZXXIY\Z4 part to the V part with the hardware Install the part 18 to the V board with the hardware...
- Page 13 Insert the hardware to Z1\Z2\Z3 part. Fix the Z3 part to the Z1\Z2 part with the hardware Fix the Z1\Z2\Z3 part to the Z5 part. Fix the Z1\Z2\Z3\Z5 part to the W part with the hardware Install the part to the W board with the hardware...
- Page 14 Fix the D/R part to the S part . Fix the E/F part to the Z1\Z2\Z3\Z5\W\Z\X\Y\Z4\V part . Install the part to the U board with the hardware Install the part to the U board with the hardware Fix the U part to the C part with the hardware...
- Page 15 Plug the hardware into the C\D part and then install M part inside t he middle. plug the hardware into the A pare. To adjust the vertical helght. Loosen the four screws "A" on both hinges. Two of them are usually in slotted holes which allows you to adjust up or down by a few mm.
- Page 16 Maximum Loads Care and Maintenance Use a soft, clean cloth that will not scratch the surface when dusting. Use of furniture polish is not necessary. Should you choose to use polish, test first in an inconspicuous area. Using solvents of any kind on your furniture may damage the finish. Never use water to clean your furniture as it may cause damage to the finish.


Need help?
Do you have a question about the CB10392BK and is the answer not in the manual?
Questions and answers