
Summary of Contents for COMPOLOGY R13
- Page 1 Compology Camera (R13/R13S) Installation Guide (Screw Mount & Tape Mount System) www.compology.com...
- Page 2 NOTICE: Changes or modifications made to this equipment not expressly approved by Compology may void the FCC authorization to operate this equipment. As in FCC / ISED RSS-102 standards, to comply with FCC RF exposure requirements for mobile transmitting devices, this device shall be installed to provide a separation distance of 20cm (~8 inches) or more from all persons And the transmitters on this device do not transmit simultaneously.
- Page 3 Compology Conduct As a Compology Technician, it is important to be a positive representative of Compology and the companies we work with. The following are rules you must follow when performing any work on behalf of Compology Attire, grooming ●...
- Page 4 ○ Maintain a polite & positive attitude ○ Contact Compology and let them know you were unable to complete the install, the circumstances and whom you dealt with on location Unable to install & reporting ●...
- Page 5 On-site Behavior (continued) Complaints As a Technician, you will visit businesses and residences to service Compology equipment, and there can be times when you receive a complaints from them. ● A complaint is any of the following scenarios: ○ Does not want sensor installed/did not approve installation ○...
- Page 6 Compology Tech App...
- Page 7 Main Menu 1. Login 2. Click Icon 3. Main Menu...
- Page 8 Tasks Start here to complete maintenance tasks or installs ● List View – View of maintenance tasks in a list ● Map View – View of maintenance tasks on a map ● New Install – Create a new bin and assign a sensor List View Map View New Install...
- Page 9 Sensor Tools Tap phone to sensor to interact and get info ● Logs – View diagnostic info on a sensor ● On/Off – Turn sensor on or off ● Verify Image – See the latest image from a sensor Logs On/Off Verify Image...
- Page 10 New Install...
- Page 11 1. ENTER BIN INFORMATION ● ID – Enter number/name on outside of bin ● Size – Enter the size of bin in cubic yards ● Organization – Select the organization for this bin ● Content – Select the type of material in container IMPORTANT: You will need to select an organization if you are assigned to multiple.
- Page 12 If new image does not appear within 15 minutes: Restart the current sensor by tapping sensor to turn off and then on Wait for new image If no new image appears, try new sensor ID of the sensor waiting to be assigned to the bin.
- Page 13 Turning Sensor On/Off...
-
Page 14: Turning Off
On/Off will be used to turn a sensor TURNING ON on or off when not in a task. You can use it to restart a sensor you want to Wait 5-10s, blue light will check. blink slowly 5X, and then flash a blue light every 2s during startup sequence Position flat... - Page 15 Checking Sensor Logs...
- Page 16 Position flat over sensor’s Position flat “DING!” over angled camera sensor’s label surface as shown surface as shown Green = Good Red = Error Most common errors: Logs should be used to identify root issues when a ● MODEM_CONNECT (cannot sensor is not uploading an get cell signal).
-
Page 17: Verify Image
Verify Image Verify Image should be used after a sensor is restarted to check to see if an image was uploaded successfully SENSOR ID Position flat over “DING! sensor’s ” label surface as shown VERIFY GREEN IMAGE & NO ERRORS... - Page 18 Physical Install Overview...
- Page 19 Safety Safety is extremely important. Always wear proper protective equipment required on job sites. The links below are OSHA regulations on proper ladder and power tool use and safety. Ladders: https://www.osha.gov/laws-regs/regulations/standardnumber/1926/1926.1053 Power Tools: https://www.osha.gov/laws-regs/regulations/standardnumber/1926/1926.302...
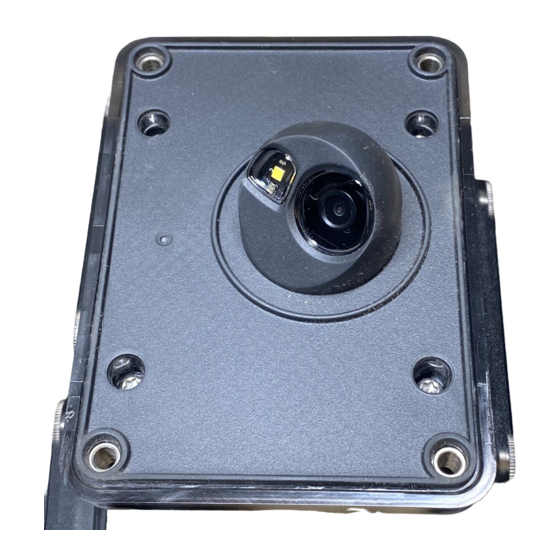
- Page 20 Camera Types ● R13S - Inside dumpster mounted camera (used primarily for front loads) ● R13 - Outside dumpster mounted camera (used primarily for roll offs)
- Page 21 Drill template (shipped with cameras*) ● 1/8" drill bit ● 1/8"- 1/2" step bit ● 44mm hole saw (R13 Installation only) ● 3/8" tri-groove socket ● Washers, bolts & nuts for mounting (shipped with cameras*) *Additional parts can be shipped/emailed by request via support@compology.com...
- Page 23 Install Instructions...
- Page 25 1. COMPLETE ‘NEW INSTALL’ WITH COMPOLOGY TECHNICIAN APP 2. POSITION TEMPLATE BELOW BIN’S TOP BOX BEAM 3. DRILL FIVE 3/16” HOLES (ALL CORNERS PLUS TURRET CENTER) See ‘Mounting Locations’ document for positioning...
- Page 26 4. OPEN UP CORNER HOLES USING STEP BIT...
- Page 27 5. DRILL OUT CENTER HOLE WITH HOLE SAW...
- Page 28 6. REMOVE TAPE LINERS AND PLACE SHIELD ON INSIDE OF BIN. STUDS SHOULD ALL PENETRATE HOLES...
- Page 29 7. PLACE CAMERA ON STUDS (OUTSIDE OF BIN) 8. SECURE USING LOCK WASHERS AND SECURITY NUTS...
- Page 30 R13S Camera Installation (Bolts Mount)
- Page 31 How to Install the R13S Compology Camera (Bolts) Consult the container placement guide and find the optimal location for camera. Peel tape covers on the back of the Cardboard Template (in box on top of camera). Place template in correct location on dumpster exterior surface Drill two holes where indicated using 1/4”...
- Page 32 Remove and compost (or recycle) the template Mount camera using screws and lock washers. Hand tighten securely with Pin-Torx T25 driver. Do not over-tighten www.compology.com...
- Page 33 R13S Camera Installation (Adhesive Mount)
- Page 34 How to Install the R13S Compology Camera (Adhesive) If the camera and bracket are separate, remove screw covers on camera using a flat head screwdriver. Attach bracket using 2x M5 screws (included in adhesive kit). Replace screw covers.
- Page 35 3. Prepare bin surface using scour pad, making sure to remove any loose paint, rust or grime in mounting location. Ideally the surface should be clean, painted metal. 4. Take the alcohol swab and clean off any dust from the scouring process.
- Page 36 5. Open the primer tube by piercing the seal with the point on the lid. Spread a liberal amount of primer onto the mounting surface. Take care not to get any primer on your skin or in your eyes, and keep away from open flames. 6.
- Page 37 7. Peel off adhesive cover on template 8. Press firmly into place, exerting as much force as you can. Hold for at least 30 seconds.
-
Page 38: General Information
General Information Compology Contacts Compology HQ Blake Miller 40 Boardman Place blake@compology.com San Francisco, CA 94103 Reggie Williams 415-848-9169 reggie@compology.com Dana Beck dana@compology.com Operations ops@compology.com...
Need help?
Do you have a question about the R13 and is the answer not in the manual?
Questions and answers