
Related Manuals for Burster 9180

Summary of Contents for Burster 9180
- Page 1 ULTIFUNCTION IGITAL ANEL NSTRUMENT TYP 9180 MODBUS PROTOCOL COMPATIBLE INSTRUCTIONS MANUAL Valid for instruments from Firmware BM2.00...
- Page 2 E U - K o n f o r m i t ä t s e r k l ä r u n g (nach EN ISO/IEC 17050-1:2010) EU-Declaration of conformity (in accordance with EN ISO/IEC 17050-1:2010) Name des Ausstellers: burster präzisionsmesstechnik gmbh & co kg Issuer’s name: Anschrift des Ausstellers: Talstr. 1-5 Issuer’s address:...
- Page 3 INTRODUCTION TO THE SERIES TYP 9180 Custom CONFIGURATION for specific applications can be This catalogue does constitute formal made quickly and easily through five front panel keys, agreement. following structured choice menus aided by display prompts All information given in this manual is subject to at each programming step.
-
Page 4: Table Of Contents
DIGITAL PANEL INSTRUMENT MODEL TYP9180 Index 1 - TYP9180 model overview ............................6 - 7 1.1 Mode RUN: front-panel description ........................8 1.2 Mode PROG: front-panel description ........................9 2 - Getting started ................................10 2.1 Power and connectors..........................11 - 12 2.2 Programming instructions.......................... - Page 5 DIGITAL PANEL INSTRUMENT MODEL TYP9180 4 - Programming module 20. Display configuration diagram ..................34 - 35 4.1 Scaling. Menus 21 and 22..........................36 - 45 4.2 Integrator. Menu 23............................ 46 - 48 4.3 Display options, Filters and Round ........................49 4.3.1 Display options.
-
Page 6: Typ9180 Model Overview
BCD PARALLEL OUTPUT OPTION RS232C/ RS485 OUTPUT OPTION ANALOG OUTPUT RELAY/ OPTO OPTION OUTPUT OPTION MULTI-INPUT CARD DISPLAY AND KEYBOARD MODULE CASE WITH FIXING CLIPS POWER FILTER FRONT CIRCUIT COVER MAIN CIRCUIT... - Page 7 1. MODEL TYP9180 The TYP9180 model incorporates new technical and Standard features of the basic instrument include the reading functional characteristics including more filtering of the input variable plus a selectable second variable in the options, software lockout, a variety of programmable lower display, max and min readings detection, remote hold, remote inputs and many other performance capabili- tare operation and a full complement of programmable logic...
-
Page 8: Mode Run: Front-Panel Description
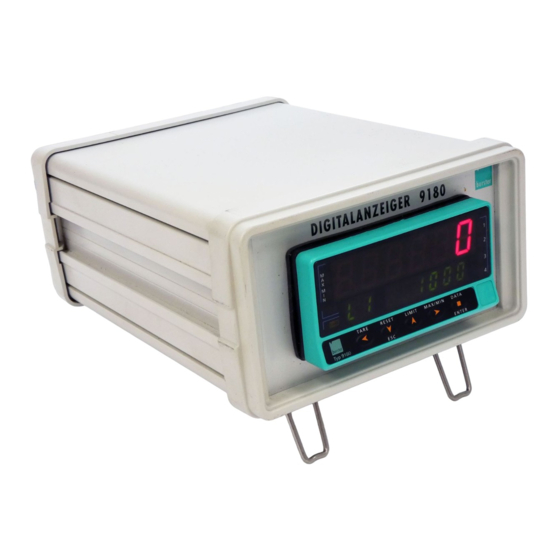
1.1 - RUN MODE: FRONT-PANEL FUNCTIONS MAIN DISPLAY LED MAX Reads the variable being measured Indicates detection of a max reading LED MIN Indicates detection of a min reading LED HOLD Indicates display hold LED TARE Indicates non-zero HOLD tare value in memory TARE KEYBOARD IN RUN MODE TARE... -
Page 9: Mode Prog: Front-Panel Description
1.2 - PROG MODE: FRONT-PANEL FUNCTIONS MAIN DISPLAY Reads the value of the parameter being programmed SECOND DISPLAY Indicates which parameter is being programmed AUXILIARY DISPLAY Shows the current program step number HOLD TARE TARE RESET LIMIT MAX/MIN DATA LABEL KEYBOARD IN PROG MODE ENTER Engineering units... -
Page 10: Getting Started
2. GETTING STARTED Packing contents Programming instructions (pages 13, 14 & 15) Instructions manual in English, including Declaration of The software is divided into several independently Conformity. accessible modules for configuration of the input, the Digital panel meter model TYP9180. display, the setpoint outputs, the analog output, the Accessories for panel mounting (sealing gasket and fixing communication output and the logic inputs. -
Page 11: Power And Connectors
2.1 - Power supply and connector To access hardware configuration, remove the meter from the case as shown in figure 11.1. 115/230 V AC: The instruments with 115/230 V AC power are shipped from the factory for 230V AC (USA market 115V AC), see figure 11.2. - Page 12 POWER CONNECTION - CN1 INSTALLATION To meet the requirements of the directive EN61010-1, where the unit is permanently connected to the mains supply it is obligatory to install a circuit breaking device easy reachable to the operator and clearly marked as the disconnect device. WARNING In order to guarantee electromagnetic compatibility, the following guidelines for cable wiring must be followed:...
-
Page 13: Programming Instructions
2.2 - Programming Instructions Access to the programming mode When power is applied to the instrument, the display briefly illuminates all HOLD segments and LED's then shows the software version and finally enters in the TARE normal mode. Press to enter in the programming mode. The second display ENTER TARE RESET... - Page 14 The programming instructions are composed by a general description and a series of step-by-step instructions to be followed sequentially. Each menu step is represented by an illustration of the display and keyboard module with indications (displays and LED's), reference [page number. figure number] and a text describing the action of each key at current step. [page nº/figure nº] Mnemo In the step-by-step instructions, you are given the action of the three buttons mainly used to program data.
-
Page 15: Programming Guide
2.3 - Programming guide The steps listed here below should be followed to properly configure the indicator according to desired input. Steps are marked depending on whether they are mandatory (M), recommended (R) or optional (op). Process indicator: Thermocouple meter: Input programming, pages. -
Page 16: Programming Module 10. Input Configuration Diagram
3. INPUT CONFIGURATION C n F I n P - P r o C - - L o A d - V o L t A M P 3 0 0 - mV 6 0 - mV 3 0 - mV 1 5 - mV - I n P u t - - I n P u t -... - Page 17 MODULE 10 - INPUT CONFIGURATION ("CnFInP") The figure shows the complete input configuration module which is divided into five menus. Each menu corresponds to a specific configuration of the meter. You may only need to program the parameters of the desired configuration (process, load cell, thermocouple, Pt100 or potentiometer).
-
Page 18: Program Process Input. Menu 11
Fig. 18.1: Input configuration module To have access to the input configuration module, press to pass from the run mode to the programming mode ENTER and press to make the lower displays show the indication "10 CnFInP" (fig. 18.1). HOLD TARE TARE RESET... - Page 19 Menu 11 - PROCESS This menu configures the meter as a process indicator. Programmable parameters are the input type (volts or milliamperes), input range and transducer's excitation. [19.1] Access to menu 11 Figure 19.1 shows the indication corresponding to the access stage to process input configuration.
- Page 20 [20.1] Excitation Supply Menu 11 SuPPLY. Select excitation voltage. The meter provides two software selectable excitation voltages [10-V and 24-V] that alternate on the display by pressing the key. To set the excitation supply to 5V DC, select the option '10-V' and place the jumper shown in figure 18.2. HOLD Validate changes, exit from this menu and return to the -Pro- stage.
-
Page 21: Connections (V, Ma)
3.1.1 - Signal wiring (V, mA) PROCESS input in volts Refer to wiring instructions in page 12. Instrument's rear view PIN 6 = −EXC [excitation supply (−)] PIN 5 = +EXC [excitation supply (+)] PIN 4 = [input mA (+)] PIN 3 = −IN [input V (−) or mA (−)]... - Page 22 PROCESS indicator with mA input EXCITATION SUPPPLIED BY TYP9180...
-
Page 23: Program Load Cell Input. Menu 12
3.2 - Program load cell input Refer to the cell manufacturer's documentation, particularly with Software configuration requires selection of the input range respect to the cell sensitivity and supply voltage specifications. which may be selected high enough for the maximum input signal to avoid overloads. - Page 24 Menu 12 - LOAD CELL This menu configures the meter as a load cell indicator and allows selecting the input range. Available excitation voltages for this configuration are 10 and 5V DC which are selected by a plug-in jumper (see fig. 25.1). [24.1] Access to menu 12 Figure 24.1 shows the indication corresponding to the input level to load cell input configuration.
-
Page 25: Connections (Mv/ V)
3.2.1 - Load cell wiring connections (mV/ V) Refer to wiring instructions page 12. Instrument's rear view PIN 6 = −EXC [excitation supply (−)] PIN 5 = +EXC [excitation supply (+)] Fig. 25.1: Excitation jumper PIN 4 = Not connected PIN 3 = −mV [input signal mV (−)] PIN 2 = Not connected PIN 1 = +mV [input signal mV (+)]... -
Page 26: Program Pt100 Input. Menu 13
Example: 3.3 - Program Pt100 input The instrument is used to control the temperature of a Please refer to your sensor documentation. baking oven, but the sensor is located at a distance from the oven where the temperature is 2 degrees below. To correct When configuring the meter for Pt100 input, the temperature from this deviation, the offset should be programmed to +2 ranges are set automatically depending on temperature units... - Page 27 [27.1] Units Menu 13 -Pt100. Select temperature units. to select desired units ["ºC" = Celsius, "ºF" = Fahrenheit]. Validate changes and pass to the next program step. ENTER Exit from this routine and return to the "-Pro-" stage. HOLD TARE TARE RESET LIMIT...
-
Page 28: Connections
3.3.1 - Pt100 sensor connection Refer to wiring instructions in page 12. Instrument's rear view PIN 6 = Not connected PIN 5 = Pt100 COMM PIN 4 = Not connected PIN 3 = Pt100 PIN 2 = Not connected PIN 1 = Pt100 Input wiring schematic for Pt100 sensor with 3 wires. -
Page 29: Program Thermocouple Input. Menu 14
Example: 3.4 - Program thermocouple input The instrument is used to control the temperature of a Please refer to your thermocouple documentation. baking oven, but the sensor is located at a distance from the oven where the temperature is 2 degrees below. To correct When configuring the meter for thermocouple input, the from this deviation, the offset should be programmed to –2 temperature ranges are set automatically according to sensor... - Page 30 Menu 14 - THERMOCOUPLE METER The thermocouple meter configurarion provides a choice of six TC types: J, K, T, R, S and E. Other selectable parameters include temperature units, resolution and offset. [30.1] Access to menu 14 Figure 30.1 shows the indication corresponding to the thermocouple input selection. Press one of the following keys: Access to the thermocouple input configuration menu.
- Page 31 [31.1] Resolution Menu 14 -tc-. Select resolution. Press to switch between the indications "0.1º" (resolution to tenths of degree) and "1º" (resolution to degrees). Validate changes and advance to the next program step. ENTER Exit from this routine and return to the "-Pro-" stage. HOLD TARE TARE...
-
Page 32: Connections (J, K, T, R, S, E)
3.4.1 - Thermocouple wiring connections Refer to the wiring instructions given in page 12. Instrument's rear view PIN 6 = Not connected PIN 5 = Not connected PIN 4 = Not connected PIN 3 = − TC PIN 2 = Not connected PIN 1 = + TC Signal wiring schematic for Thermocouples J, K, T, R, S and E with 2 wires... -
Page 33: Program Potentiometer Input. Menu 15
3.5 - Program potentiometer input Please refer to the potentiometer manufacturer's documentation. When setting the indicator for potentiometer input, no input configuration parameter is required by software. The excitation supply voltage is selected by a jumper (see fig.18.2). This output voltage is applied between the potentiometer HI and LO ends while the cursor position determines the signal level applied to the meter input. - Page 34 4. DISPLAY CONFIGURATION CnFdSP -SCAL- -tEACH -IntEG -dSP- ±88.888 ±88.888 -on- -oFF- -HI- -Lo- InP-01 tCH-01 -IntEG -IntEG brIGHt brIGHt ±88888 ±88888 -no- -YES- dSP-01 dSP-01 tbASE tbASE tbASE tbASE LFt-0 LFt-0 ±88.888 ±88.888 -dECP- -dECP- 00000.0 -rAtE- -rAtE- -rAtE- ±88888 ±88888 00001...
- Page 35 -FILt- -round -VoL- tYP 1 tYP 2 tYP 3 tYP 4 FILt-P -round SHAPE SHAPE SHAPE SHAPE SHAPE 02.000 02.000 02.000 02.000 FILt-E dIAM-1 dIAM-1 dIAM-1 dIAM-1 00000. 06.000 06.000 06.000 AVErAG dIAM-1 LEn-1 LEn-1 LEn-1 00000. 00000. 03.000 LEn-1 LEn-1 dIAM-2 00.000...
- Page 36 4.1. Scaling When the instrument is configured as a process, load cell or For non-linear processes it is possible to set up to 30 pairs potentiometer indicator, the display must be scaled to fit a input-display. Each two consecutive points are linked by a particular application.
- Page 37 The meter offers two methods to scale the display; SCAL (menu 21) and tEACH (menu 22). The diagram represents the program routine for the SCAL menu, but both routines are the same except that in the tEACH menu, the input CnFdSP values are denoted by tCH in the second display.
- Page 38 Menu 21 - SCAL (process, load cell and potentiometer) This menu allows entering the input values and corresponding display values necessary to scale the meter. The decimal point location helps to read the indication in the desired units. [38.1] Access to menu 21 Figure 38.1 shows the indication corresponding to the access level to the SCAL menu.
- Page 39 [39.1] Decimal point Menu 21 dECP. Decimal point position. At this step, the decimal point goes in flash. Press the key to rotate it to the right until it gets desired position. If no decimal point is required, it must be located to the rightmost digit as shown in figure 39.1.
- Page 40 From the programming phase of the display 2, press and hold for 3 seconds to get access to the linearization routine. ENTER From the point nº3, the progress through the routine is made by pressing the key after programming each value. ENTER At any program step, a press of reverts to the previous point except for the programming phase of point 3, where the...
- Page 41 A push of from the programming of the display nº29 gives access to the programming of the scaling point nº30 and last ENTER of the routine. The key reverts to the previous point. The programming routine is terminated by a press of after programming the display 30.
- Page 42 Menu 22 - TEACH (process, load cell and potentiometer) This menu allows scaling the display by applying input signal values and keying-in corresponding display values. The decimal point location completes the scaling sequence in the desired units. [42.1] Access to the Menu Figure 42.1 shows the indication corresponding to the access level to the tEACH menu.
- Page 43 [43.1] Decimal Point Menu 22 dECP. Decimal point position. At this step, the decimal point goes in flash. Press the key to move it to the right until it gets desired position. If no decimal point is required, it must be located to the rightmost digit as shown in figure 43.1.
- Page 44 From the programming phase of the display 2, press and hold for 3 seconds to get access to the linearization routine. ENTER From the point nº3, the progress through the routine is made by pressing the key after programming each value. ENTER At any program step, a press of reverts to the previous point except for the programming phase of point 3, where the...
- Page 45 A push of from the programming of the display nº29 gives access to the programming of the scaling point nº30 and last ENTER of the routine. The key reverts to the previous point. The programming routine is terminated by a push of after programming the display 30.
- Page 46 4.2. Integrator The integrator is enabled by setting the option -on- in the menu 23 IntEG. When activated, the logic function nº 30 is inhibited. (NOTE: It is not possible to activate the integrator when the -IntEG automatic volume calculation option is programmed, see page 57, menu 27 -Vol-).
- Page 47 Menu 23 - INTEGRATOR (for process and potentiometer) This menu allows enabling the integrator option and configuring the function parameters; time base, decimal point, scaling factor and low-cut display. This menu appears only in process and potentiometer configurations. [47.1] Access to the menu The figure 47.1 shows the indication "-IntEG"...
- Page 48 [48.1] Decimal Point The totalizer decimal point is programmed in the second display and can be located in any of its 8 digits. In this step, the main display shows the indication "dP" and the second display shows the decimal point in flash. Press repeatedly the key to move it to the desired location.
-
Page 49: Display Options, Filters And Round
4.3. Display Options, Filters and Round CnFdSP -SCAL- -tEACH -IntEG -dSP- -FILt- -round -VoL- -HI- -Lo- brIGHt brIGHt FILt-P -round -no- -YES- LFt-0 LFt-0 FILt-E -rAtE- -rAtE- -rAtE- AVErAG The round option allows eliminating display jitter by rounding off the meter display by increments of 1, 2, 5, 10, 20, 50 or The instrument has several types of digital filtering to provide 100 counts. - Page 50 Menu 24 - DISPLAY OPTIONS This menu allows configuring various options related to the display visualization; the digit brightness, left zeros and display update rate. [50.1] Access to the Menu Figure 50.1 shows the indication corresponding to the entry level to display options menu.
- Page 51 [51.1] Reading Rate Menu 23 -rAtE-. Select reading rate. The reading rate determines the rate at which the display is updated. This parameter affects the display, the setpoints, the analog output and the BCD output. Available values are 18, 4 and 1 per second. Press to select desired rate.
- Page 52 Menu 25 - DIGITAL FILTERS If the display reading is unstable due to small signal variations or noise, the use of digital filters may help to reduce these effects and eliminate display jittering. The filter-E parameter only appears for process, load cell or potentiometer inputs. [52.1] Access to the Menu The figure 52.1 represents the access level to menu 25 -FILt-.
- Page 53 [53.1] Average Filter Menu 24 AVErAG. Program nº of readings to average. This value represents the number of readings that are summed up together and averaged before the display is updated. Use the (change value) and (change digit) keys to program the desired value from 1 to 200.
- Page 54 Menu 26 - ROUND (process, load cell and potentiometer) This menu allows selection among six levels of display rounding. When resolution is not critical, a rounding increment other than 1 may help stabilize the display. [54.1] Access The figure 54.1 shows the indication corresponding to the access to the round menu. Press one of the following keys: To get access to this menu.
-
Page 55: Automatic Volume Calculation. Menu 27
4.4. Display Volume based on Pressure Automatic Volume Calculation There are several methods to calculate the volume of a fluid The instrument has most common tank geometry functions in a tank. pre-programmed to calculate volume; spherical, horizontal If a pressure sensor is placed in the bottom of the tank, the cylinder, horizontal cylinder with spherical ends and conical display may be scaled to convert the sensor's pressures into bottom vertical cylinder. - Page 56 Programming Diagram Programming Procedure to Readout Volume When using this method to display volume, a pressure sensor must be placed at the bottom of the tank to drive a signal -VoL- proportional to fluid level. tYP 1 tYP 2 tYP 3 tYP 4 The first scaling phase is to convert the input signal to display SHAPE...
- Page 57 Menu 27 - AUTOMATIC VOLUME CALCULATION This menu appears exclusively for process and potentiometer configurations. It is not possible to enable this option if the integrator is active (menu 23). The automatic volume calculation facility can be only used when the tank's shape is one of the pre-programmed shapes shown in page 55.
- Page 58 [58.1] Length 1 If you selected the spherical shape (tYP 1), this item does not appear. Please, go to the phase represented by figure 58.2. For the other shapes program the length L1 (see figures in page 55) by using to increment digit value and to move to next digit until completing the desired value in meters (the decimal point notation marks the position of whole meters).
- Page 59 5. FRONT-PANEL AND LOGIC INPUT FUNCTIONS 5.1 - Front-panel functions The meter provides the following function keys: TARE, RESET, LIMIT and MAX/MIN. The functionality of each one in the "RUN" mode is described below. TARE key LIMIT key A push of the TARE key causes the current display to be During the RUN mode, this key is only operative in case that stored in the tare memory.
- Page 61 DIGITAL PANEL INSTRUMENT MODEL TYP9180 Index 1 - Beta-M model overview ............................6 - 7 1.1 Mode RUN: front-panel description........................8 1.2 Mode PROG: front-panel description........................9 2 - Getting started................................10 2.1 Power and connectors ..........................11 - 12 2.2 Programming instructions ..........................13 - 14 2.3 Programming guide............................
- Page 62 DIGITAL PANEL INSTRUMENT MODEL TYP9180 4 - Programming module 20. Display configuration diagram ..................34 - 35 4.1 Scaling. Menus 21 and 22..........................36 - 45 4.2 Integrator. Menu 23............................ 46 - 48 4.3 Display options, Filters and Round ........................49 4.3.1 Display options.
- Page 63 MAX/MIN key TO RESET PEAK, VALLEY, TOTAL or BATCH : Recalls the following parameters to the second display : first RESET key push recalls peak, second push recalls valley, third push Press until desired parameter appears on the second MAX/MIN recalls tare (or offset).
- Page 64 5.2 - Logic Functions The rear connector CN2 provides 4 user programmable opto-coupled inputs that can be operated from external contacts or logic levels supplied by an electronic system. Four different functions may be added to the functions available from the front- panel keys.
- Page 65 5.2.1 - Table of programmable functions Definition of the column "Action" Edge : The function is active when a negative edge is applied to the corresponding pin referred to common. Level : The function is active as long as the corresponding pin is held at a low level with respect to common. (*) Factory configuration.
- Page 66 13 to 16 : FUNCTIONS ASSOCIATED TO THE ANALOG OUTPUT Nº Name Function Action ANA GROSS The analog output follows the gross value (measured value + tare). Level ANA ZERO Puts the analog output to the zero state (0V or 4mA) Level ANA PEAK The analog output follows the peak value...
- Page 67 26 to 36 : SPECIAL FUNCTIONS (cont.) Nº Name Function Action ASCII Send the display last four digits to a Micra-S indicator Edge SETS INHIBIT Suspends setpoint operations and keeps the outputs to their OFF state Level BATCH Adds the current display value to the totalizer and increments the batch Edge counter in one unit.
- Page 68 5.2.2 - Program the logic functions Press to enter in the programming mode (-Pro- level) and press repeatedly ENTER until the indication shown in figure 70.1 appears on the display. From this stage press to access the logic inputs configuration. The key rotates ENTER HOLD...
- Page 69 6. PARAMETER LOCKOUTS The instrument is supplied with all software programming TOTAL LOCKOUT parameters accessible to operator's modifications. After The access to the programming routines to read data is completing the software configuration, it is recommended to allowed even if all parameters are locked out, but it won’t take the following steps: be possible to enter or modify data.
-
Page 70: Lockout Routine
6.1 - Lockout programming routine 88888 The lock-out programming routine is entered by depressing SEt1 key for 3 seconds and introducing a security code. ENTER This gives access to either the parameter list or to change the code if desired. SEt2 - - - - If the user opts for changing the code, the unit asks for the... -
Page 71: Output Options
: Communication, data transmission remote • COMMUNICATION programming via serial interface. 9180-Vxx1x Serial RS232C 9180-Vxx2x Serial RS485 For more detailed information on characteristics, applications, 9180-Vxx3x BCD 24V/TTL mounting and programming, please refer to the specific CONTROL manual supplied with each option. - Page 72 - 2 RELAYS, 4 RELAYS or 4 NPN or 4 PNP outputs (one of them). The 9180-Vxx3x output is exclusive and it does not allow any of the others. This option is attached to the main circuit board by means of a 18-pin FLAT cable.
-
Page 73: Technical Specifications
8. TECHNICAL SPECIFICATIONS INPUT SIGNAL Temperature input • Cold junction compensation....-10 ºC to +60 ºC • Configuration ......differential asymmetrical • Cold junction ......±(0.05 ºC/ ºC +0.1 ºC) Pt100 excitation current ........ < 1 mA DC • Max. cable resistance ....40 Ω/ cable (balanced) Process input Voltage Current... - Page 74 ELECTRICAL SAFETY ENVIRONMENTAL • Installation category ..........II (indoor use) • Degree of pollution ............2 • Operating temperature....... -10 ºC to +60 ºC • Storage temperature......-25 ºC to +85 ºC FUSES (DIN 41661) - Not supplied Relative humidity .........<95 % at 40 ºC •...
-
Page 75: Dimensions And Mounting
8.1 - Dimensions and mounting To mount the instrument into the panel, make a cutout of FIXING CLIPS SEALING GASKET 92x45mm. Slide the sealing gasket over the instrument's case to the bezel and insert the instrument through the panel cutout from the front. PANEL CUTOUT 92 mm PANEL... -
Page 76: Warranty
9. WARRANTY All products are warranted against defective material and workmanship for a period of three years from date of delivery. If a product appears to have a defect or fails during the normal use within the warranty period, please contact the distributor from whom you purchased the product. - Page 80 ANNEXES MODEL TYP9180 Index SECTION Page ANNEXE A. SETPOINTS ANNEXE B. SERIAL OUTPUTS RS232C AND RS485 B.1. List of Commands 84 to 85 B.2. Address of the Variables in the memory 86 to 103 ANNEXE C. c1. TARE MODE 105 to 106 c2.
- Page 81 ANNEXE A. SETPOINTS The option ‘MAX’ is for non-filtered peak values and the option ‘MAX-F’ is for filtered values. The setpoint configuration options (latch, HI-LO mode, delay-hysteresis, blink) The following functions have been added: are programmed as for a standard setpoint but some have different meanings in this case, the setpoint value is the display value from which the unit begins 1.
- Page 82 ANNEXE B. SERIAL OUTPUT RS232C or RS485 B.1. List of Commands REQUEST OF DATA ASCII Information Logic inputs status Peak value Valley value Tare/Offset value Display value Totalizer value Batch counter value Value of the setpoint1 Value of the setpoint2 Value of the setpoint3 Value of the setpoint4 Bit 0=input overfow, bit 1= scale overflow, bit 2= Sensor break...
- Page 83 COMMANDS ASCII MODBUS Command Reset latched outputs Reset peak Reset valley Reset tare Tare the display Reset totalizer Reset batch counter Activate setpoint1 Activate setpoint2 Activate setpoint3 Activate setpoint4 Deactivate setpoint1 Deactivate setpoint2 Deactivate setpoint3 Deactivate setpoint4...
- Page 84 B.2. Address of the Variables in the Memory PROGRAMMING DATA (READ/WRITE) MODBUS Variable Description = +,A INPUT POINT 1 Sign 0 digit 4 digit 3 digit 2 digit 1 digit 0 INPUT POINT 2 sign digit 4 digit 3 digit 2 digit 1 digit 0 INPUT POINT 3...
- Page 85 INPUT POINT 6 sign digit 4 digit 3 digit 2 digit 1 digit 0 INPUT POINT 7 sign digit 4 digit 3 digit 2 digit 1 digit 0 INPUT POINT 8 sign digit 4 digit 3 digit 2 digit 1 digit 0 INPUT POINT 9 sign...
- Page 86 INPUT POINT 12 sign digit 4 digit 3 digit 2 digit 1 digit 0 INPUT POINT 13 sign digit 4 digit 3 digit 2 digit 1 digit 0 INPUT POINT 14 sign digit 4 digit 3 digit 2 digit 1 digit 0 INPUT POINT 15 sign...
- Page 87 INPUT POINT 18 sign digit 4 digit 3 digit 2 digit 1 digit 0 INPUT POINT 19 sign digit 4 digit 3 digit 2 digit 1 digit 0 INPUT POINT 20 sign digit 4 digit 3 digit 2 digit 1 digit 0 INPUT POINT 21 sign...
- Page 88 INPUT POINT 24 sign digit 4 digit 3 digit 2 digit 1 digit 0 INPUT POINT 25 sign digit 4 digit 3 digit 2 digit 1 digit 0 INPUT POINT 26 sign digit 4 digit 3 digit 2 digit 1 digit 0 INPUT POINT 27 sign...
- Page 89 INPUT POINT 30 sign digit 4 digit 3 digit 2 digit 1 digit 0 DISPLAY POINT 1 sign digit 4 digit 3 digit 2 digit 1 digit 0 DISPLAY POINT 2 sign digit 4 digit 3 digit 2 digit 1 digit 0 DISPLAY POINT 3 sign...
- Page 90 DISPLAY POINT 6 sign digit 4 digit 3 digit 2 digit 1 digit 0 DISPLAY POINT 7 sign digit 4 digit 3 digit 2 digit 1 digit 0 DISPLAY POINT 8 sign digit 4 digit 3 digit 2 digit 1 digit 0 DISPLAY POINT 9 sign...
- Page 91 DISPLAY POINT 12 sign digit 4 digit 3 digit 2 digit 1 digit 0 DISPLAY POINT 13 sign digit 4 digit 3 digit 2 digit 1 digit 0 DISPLAY POINT 14 sign digit 4 digit 3 digit 2 digit 1 digit 0 DISPLAY POINT 15 sign...
- Page 92 DISPLAY POINT 18 sign digit 4 digit 3 digit 2 digit 1 digit 0 DISPLAY POINT 19 sign digit 4 digit 3 digit 2 digit 1 digit 0 DISPLAY POINT 20 sign digit 4 digit 3 digit 2 digit 1 digit 0 DISPLAY POINT 21 sign...
- Page 93 DISPLAY POINT 24 sign digit 4 digit 3 digit 2 digit 1 digit 0 DISPLAY POINT 25 sign digit 4 digit 3 digit 2 digit 1 digit 0 DISPLAY POINT 26 sign digit 4 digit 3 digit 2 digit 1 digit 0 DISPLAY POINT 27 sign...
- Page 94 DISPLAY POINT 30 sign digit 4 digit 3 digit 2 digit 1 digit 0 SETPOINT 1 digit 7 / sign digit 6 digit 5 digit 4 digit 3 digit 2 digit 1 digit 0 SETPOINT 2 digit 7 / sign digit 6 digit 5 digit 4...
- Page 95 digit 1 digit 0 DELAY / HYSTERESIS digit 4 SETPOINT 1 digit 3 digit 2 digit 1 digit 0 DELAY / HYSTERESIS digit 4 SETPOINT 2 digit 3 digit 2 digit 1 digit 0 DELAY / HYSTERESIS digit 4 SETPOINT 3 digit 3 digit 2 digit 1...
- Page 96 DELAY-HYST SETPONT 3 0=delay, 1=hysteresis-1, 2=hysteresis-2 DELAY-HYST SETPONT 4 0=delay, 1=hysteresis-1, 2=hysteresis-2 LATCH SETPOINT 1 0=no, 1=yes LATCH SETPOINT 2 0=no, 1=yes LATCH SETPOINT 3 0=no, 1=yes LATCH SETPOINT 4 0=no, 1=yes BLINK SETPOINT 1 0=LED, 1=LED+blink BLINK SETPOINT 2 0=LED, 1=LED+blink BLINK SETPOINT 3 0=LED, 1=LED+blink...
- Page 97 digit 1 digit 0 DIAMETER 2 (VOLUME) digit 4 digit 3 digit 2 digit 1 digit 0 LENGTH 2 (VOLUME) digit 4 digit 3 digit 2 digit 1 digit 0 DIAMETER 3 (VOLUME) digit 4 digit 3 digit 2 digit 1 digit 0 LENGTH 3 (VOLUME) digit 4...
- Page 98 FILTER P 0 to 9 FILTER E 0 to 9 READINGS AVERAGE digit 2 digit 1 digit 0 BRIGHT = HI, 1 = LO LEFT ZEROS 0=no, 1=yes RATE 0=16/s, 1=4/s, 2=1/s ROUND 0=001, 1=002, 2=005, 3=010, 4=020, 5=050, 6=100 PRINT DATE AND TIME 0=off, 1=on INTEGRATOR...
- Page 99 SOFT LOCK 2 bit 0 = input bit 1 = scaling+integrator+volume bit 2 = filters+display+round bit 3 = - SOFT LOCK 3 bit 0 = analog output bit 1 = serial communication output bit 2 = logic inputs bit 3 = direct programming of setpoint values SOFT LOCK 4 bit 0 = tare key function bit 1 = -...
- Page 100 DINAMIC VARIABLES (READ ONLY) MODBUS Variable Description Format Peak Value Internal peak value Long Valley value Internal valley value Long Tare value Internal tare value Long Batch counter Internal batch counter Integer (1 word) Totalizer Internal totalizer counter Float Net value Net value on display (with filters, round and hold) Long Gross value...
- Page 101 MODBUS Variable Description Format Options installed bit 0 = 2RE Byte (0=not installed, 1=installed) bit 1 = 4RE bit 2 = RS2 bit 3 = RS4 bit 4 = - bit 5 = BCD bit 6 = ANA bit 7 = - Digits of the main display digit 0 (LSB) Byte...
- Page 103 TARE MODE On tArE1 mode at one press of the key, the instrument stores the value shown on display at this TARE moment, if it is not on overflow, the TARE LED lights and from this moment the shown value is net value (the measured minus the stored).
- Page 104 Programming: If have selected input Process or Potentiometer, on the menu 20 “CndSP” after submenu 27 “–VoL-“ and with another push of key you get the submenu ModTA. If have selected input “Load Cell” on the menu 20 “CndSP” after the submenu 26 and pushing key you get the submenu ModTA.
- Page 105 SENSOR BREAK This function allows detecting any broken wire that connect the sensor “Load Cell” to the instrument. The analysis to detect the broken wires is done every 1,5 seconds and the response of Relays and ANA options (if used) will be the same if it were a overflow (oVFLo) situation, input signal greater than allowed.
- Page 106 FAIL SAFE Function that allows detecting the power supply fault or an instrument fault and in this way can be informed the PLC or another general system of supervision using the relay option programmed in this way. This function can be programmed on any of the activated relay, in the submenu 31, 32, 33, 34 after the programming parameter “–Hi-Lo-“...
- Page 107 r.o.C. Function (rate of Change) The function r.o.C is useful to detect the changing speed of display value, depending on programmed setpoint polarity we detect the increasing or decreasing. In mode r.o.C., if the setpoint values is, for example = 1000, that means that the alarm will be activated when the display value increase more than 1000 points per second.
- Page 108 doSE THERMOCOUPLE and Pt100 If has been programmed input “Load Cell, Potentiometer or Process”, only in the submenu 31 is possible to select the function “doSE” PEAK WAY of WORKING of SETPOINT1 in MODE "doSE" When the function “doSE” is selected on the setpoint 1 menu, can not choose the comparison value, since it will be on the net value of the display. Nor can choose HI or LO mode as this will depend on whether the setpoint is positive (HI) or negative (LO) and the numerical value of setpoint will have to be mandatory to program on the direct programming of setpoint values routine (keys ENTER and LIMIT).
- Page 109 trAC MENU 34 trAC...
Need help?
Do you have a question about the 9180 and is the answer not in the manual?
Questions and answers