Table of Contents
Advertisement
Quick Links
041216_AW1007_EC10001-OpIns_JW_RevA
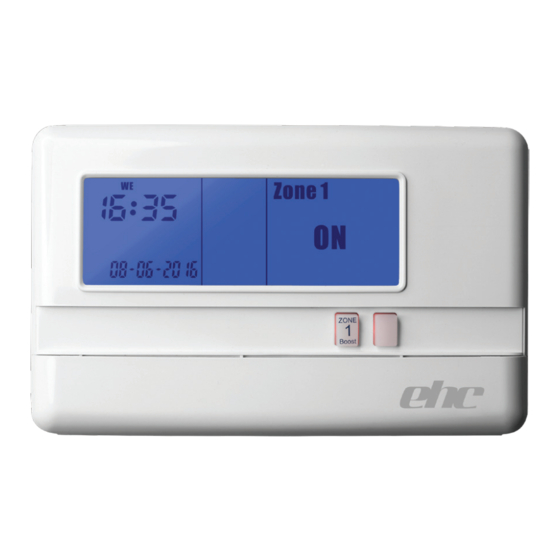
EC10001 - 1 Zone Timeswitch
Contents
1.)
Factory default settings
2.)
Factory program settings
3.)
Resetting the timeswitch
4.)
Setting the date and time
5.)
ON/OFF period selection
6.)
Adjusting the program settings
7.)
Reviewing the program settings
8.)
Boost function
9.)
Holiday mode
10.) Backlight mode selection
12.) Frost protection
Important: Keep this document
This 1 zone timeswitch is designed to provide ON/OFF control for 1 zone, with the value added application of in built frost protection.
Program:
5/2D
Backlight:
On
Keypad:
Unlocked
Frost Protection:
O
Automatic Winter / Summer change over
2.) Factory program settings
P1 ON
P1 OFF
Mon-Fri
6:30
8:30
Sat-Sun
7:30
10:00
All
P1 ON
P1 OFF
7 days
6:30
8:30
Every
P1 ON
P1 OFF
day
6:30
8:30
3.) Resetting the timeswitch
It is necessary to press the RESET button prior to initial programming.
This button is located behind the cover on the front of the unit.
4.) Setting the date & time
Lower the cover on the front of the unit. Move the
selector switch to the CLOCK SET position.
+
-
Press the
or
buttons to select the day.
+
-
Press the
or
buttons to select the month.
+
-
Press the
or
buttons to select the year.
+
-
Press the
or
buttons to select the hour.
+
-
Press the
or
buttons to select the minute.
+
-
Press the
or
buttons to select 5/2D, 7D or 24H
The date, time and function are now set. Move the selector switch
to the RUN position to run the program, or to the PROG SET position
to change the program setting.
5.) ON/OFF period selection
There are 4 modes available on this programmer for users to choose for their
individual application.
AUTO
- The timeswitch operates 3 - ON/OFF periods per day.
ALL DAY
- The timeswitch operates 1- ON/OFF period per day.
This operates from the rst ON time to the third OFF time.
ON
- The timeswitch is permanently on. **ON**
- The timeswitch is permanently o . **OFF**
OFF
Lower the cover on the front of the unit. By pressing the
button, you can change between AUTO - ALL DAY - ON - OFF for Zone 1.
The Electric Heating Company Ltd. Unit 40, Block 5, Third Road, Blantyre Industrial Estate, Blantyre, Glasgow G72 0UP
Tel: 01698 820533 - Fax: 01698 825674 - Mail: info@electric-heatingcompany.co.uk - Web: www.electric-heatingcompany.co.uk
5/2D
P2 ON
P2 OFF
P3 ON
12:00
12:00
16:30
12:00
12:00
17:00
7D
P2 ON
P2 OFF
P3 ON
12:00
12:00
16:30
24H
P2 ON
P2 OFF
P3 ON
12:00
12:00
16:30
Press
Press
Press
Press
Press
Press
ZONE 1 SELECT
6.) Adjusting the program settings
Lower the cover on the front of the unit.
Move the selector switch to the PROG SET position.
You can now program zone 1.
+
Press the
or
+
Press the
or
Repeat this process to adjust the ON & OFF times for P2 & P3.
When completed, move the selector switch to the RUN position.
P3 OFF
22:30
23:00
7.) Reviewing the program settings
Lower the cover on the front of the unit.
P3 OFF
Move the selector switch to the PROG SET position.
22:30
By pressing
ok
When completed, move the selector switch to the RUN position.
P3 OFF
22:30
8.) Boost function
This function allows the user to extend the ON period for 1, 2 or 3 hours.
If the zone that you wish to Boost is timed to be OFF, you have the
facility to switch it ON for 1, 2 or 3 hours.
Zone
Press
once, twice or three times respectively.
1
Boost
To cancel the boost function, simply press the
9.) Holiday mode
ok
Lower the cover on the front of the unit.
ok
Move the selector switch to the RUN position.
ok
Press the
ok
+
Press the
or
ok
The programmer is now switched OFF for the selected number of days.
ok
By pressing
ok
the programmer to the normal settings
10.) Backlight mode selection
There are two settings for selection. The factory default setting is ON.
ON - The backlight is permanently ON.
AUTO - On pressing any button the backlight stays on for 10 seconds.
To adjust the backlight setting, lower the cover on the front of the unit.
Move the selector switch to the RUN position.
Press the
button for 5 seconds.
ok
Press either the
Operating Instructions Page 1 of 2
Caution!
Before commencing, disconnect the
device from the mains. There are parts
that carry mains voltage behind the cover.
Never leave unsupervised when it is open.
(Prevent non specialists and especially
children from gaining access to it.)
Never remove this product from the
electrical baseplate.
Disconnect from mains supply in the
event of any damage to any buttons.
Do not use sharp tools to push any
button.
-
buttons to adjust the P1 ON time.
-
buttons to adjust the P1 OFF time.
this will review each of the ON/OFF times for P1 to P3.
Zone
1
Boost
button.
-
buttons to adjust the holiday period required. Press
again, this will cancel the holiday mode, thereby returning
.
+
-
or
buttons to select the ON or AUTO mode. Press
Press
ok
Press
ok
button again.
ok
On
ok
Advertisement
Table of Contents

Summary of Contents for EHC EC10001
- Page 1 Operating Instructions Page 1 of 2 041216_AW1007_EC10001-OpIns_JW_RevA EC10001 - 1 Zone Timeswitch Caution! Contents Before commencing, disconnect the Factory default settings device from the mains. There are parts Factory program settings that carry mains voltage behind the cover. Never leave unsupervised when it is open.
- Page 2 Operating Instructions Page 2 of 2 EC10001 - 1 Zone Timeswitch 11.) Keypad lock and unlock Unlocked Features: Pre-set Clock To lock the keypad, press and hold the buttons for 5 seconds. Holiday 3 On / O Periods will appear on the screen. The keypad is now locked.
- Page 3 Installation Instructions Page 1 of 2 041216_AW1007_EC10001-InsIns_JW_RevA EC10001 - 1 Zone Timeswitch For use in normal environments. Before commencing any work on the electrical connections, you must rst disconnect the device from the mains. None of the 230V connections must be live until the installation has been completed and the housing is closed.
- Page 4 Installation Instructions Page 2 of 2 EC10001 - 1 Zone Timeswitch Caution! Contents Before commencing, disconnect the 1.) Factory default settings device from the mains. There are parts 2.) Speci cations & wiring that carry mains voltage behind the cover.
Need help?
Do you have a question about the EC10001 and is the answer not in the manual?
Questions and answers