
Summary of Contents for HEDECO Lime TWO
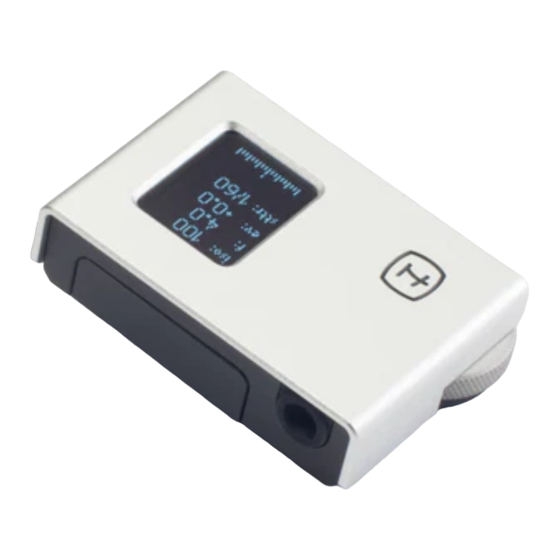
- Page 1 USER MANUAL MANUAL V2.0 - 05.01.2023 PRODUCT NAME: LIME TWO MODEL NUMBER: H-LM020 HEDECO GMBH NÜRNBERG...
-
Page 2: Table Of Contents
Contents Introduction Basics ....First steps ....Battery ....Mounting/adapters . - Page 3 4.3 User calibration ... . 5 General advice Exposure advice ... . 5.2 Exposure compensation ..22 6 Technical data 7 Service/Cleaning Cleaning .
-
Page 6: Introduction
1 Introduction 1.1 Basics This manual contains a detailed description of all the functionality and operation of the Lime Two light me- ter. For most experienced photographers the separate quick guide and the general advice section (section 5) are probably enough to get the most relevant information. -
Page 7: First Steps
1.2 First steps The first steps assume default settings which can be achieved by resetting the meter by reinserting the bat- tery. Step by step first use: Attach the light meter to your camera via the acces- sory shoe. Power the meter on by pressing the push button . -
Page 8: Battery
1.3 Battery The Lime Two is designed to work with a CR 2032 coin cell. Similar coin cells like the CR2025 could also work, as long as they output 3V and have the 20mm diame- ter, though because of their thinner size, they have a shorter battery life. - Page 9 The battery indication is displayed as a percentage on the menu screen (BAT:). This is only an estimate: It uses the cell voltage as a way to gauge the battery level, which is affected by a lot of different factors, so the following behaviour is expected: •...
-
Page 10: Mounting/Adapters
ter powering on, going down to a more realistic level after a moderate amount of use Battery life should be at least 6 months with moderate to high use. 1.4 Mounting/adapters The light meter can be mounted on any accessory shoe mount, be it a cold or a hot shoe. - Page 11 bottom of the meter-mount can then improve the fric- tion fit. When using the optional 3D printed adapters: When storing the adapters for more than a couple of days: remove any devices attached to the adapter and re- move it from the camera if there is a tight fit. Since plastic can creep, leaving it stressed may decrease the clamping force of the integrated spring elements!
-
Page 12: Adaptive Behaviour
1.5 Adaptive behaviour • The meter is dimming down the brightness of the display automatically in low light • If either the range of the sensor or the calcu- lated parameters is reached or exceeded, "range" will blink on the main display. Examples: sen- sor reading below -3.0 EV or the calculated aper- ture f-number lies below 0.7 •... -
Page 13: Menu
2 Menu 2.1 Structure The menu allows the setting of the exposure modes (MODE), the ISO (ISO), the aperture/shutter stop reso- lution (A/S STOP), the button modes (BUTTON), the cal- ibration offset (CALIB) as well as the display of the ver- sion screen (VERS.) The menu is entered and exited by pressing button two times in short succession (like a double click on... -
Page 14: Stop Resolution
second parameter selectable in the menu. For long exposures of more than a couple of seconds, please look up and account for the reciprocity failure of the specific film/emulsion. 2.3 Stop resolution Camera shutters and lens apertures are adjustable in fixed increments called stops. -
Page 15: Button Behaviour
By default the stop increments are set to the finest setting: stop increments. Having all settings in a finer setting can help to get more of a feel for the scene, so one can decide in the moment if "rounding up" or "rounding down"... -
Page 16: Exposure Modes
3 Exposure modes For displaying and calculating the exposure parame- ters, there are four modes available: 3.1 A: aperture priority (default) You choose the aperture f-number, the light meter then calculates the appropriate shutter speed. Aperture priority is probably the most popular mode. By choosing a small aperture (big f-number e.g. -
Page 17: S: Shutter Priority
3.2 S: shutter priority With shutter priority, you set the desired shutter speed and let the light meter calculate the corresponding f- number to set on the aperture. This is helpful for example when shooting sports or fast moving subjects, when a manually selected fast shutter speed results in reduced motion blur in the pic- ture. -
Page 18: Ev: Exposure Value
the current settings is displayed on the scale usually used for displaying the exposure compensation. Dis- playing the current over- or underexposure in real time makes it easy to “scope out” a scene. This way it is easier to judge if areas will be over or underexposed. 3.4 EV: exposure value The exposure value (german “Lichtwert”) can be inter- preted as a combination of a camera's shutter speed... -
Page 19: Exposure Compensation
3.5 Exposure Compensation All modes (except manual) allow the setting of the ex- posure compensation. This means that you can set over or under exposure in stop increments up to 3 stops over/under exposed. See “Basic exposure ad- vice” in section 5.2 on page 22 for more information on when and how to use this feature. -
Page 20: Measurement And Calibration
4 Measurement and calibration 4.1 Introduction The light meter uses photo diodes to measure the in- coming light. The direction dependency of the photo sensor follows a Gaussian bell curve. Combined with the cone shaped aperture, it results in a field of view of roughly 35°. -
Page 21: User Calibration
bration screen “CALIB”, the current calibration offset (most likely 0.0) is displayed. 4.3 User calibration User Calibration using a reference camera: Any camera that has working metering, be it digital or analog, can be used as a reference for the light meter. Using a ‘... - Page 22 CALIB menu Be careful when trying to use incident/spot meters for calibration. The Lime Two uses reflective metering like most cameras do, so the opportunity of error in- creases using a dissimilar metering method.
-
Page 23: General Advice
5 General advice Use a preferred contact point when operating the wheel: Either interact from the left (recommended) or from the bottom. Since the wheel increases values counter clock wise, it is more intuitive increasing values by mov- ing "up" than moving from right to left. If you have problems with accidentally set parameters by unintentional rotations of the wheel, for example when packing away the meter, either use the provided... -
Page 24: Exposure Advice
On a bright sunny day the display may be difficult to read: lock the measurement with the button and move the device to a shaded orientation, don't shade the sen- sor during measurement! At this point it is also a good indication that you can simply use the sunny 16 rule ;) 5.1 Exposure advice While the light meter will measure and calculate the... -
Page 25: Exposure Compensation
Sometimes slightly underexposing a frame can be ad- vised, if blown out highlights would be problematic. 5.2 Exposure compensation The Lime Two offers exposure compensation settings (see section 3.5). While most of the time a neutral ex- posure is sufficient, here are some situations in which... - Page 26 tion: Go into “EV” mode and find a neutral wall with consistent brightness to direct the light meter at. Take a reading with and without holding the filter directly in front of the sensor. The difference between these two values amounts to the over exposure needed. Challenging lighting Since the light meter takes an average across the frame, having bright elements in the background results in an...
- Page 27 There also are situations where multiple exposures can make sense. Example: a portrait shot with the sun at sunset: If you want to capture the deep colors of the sunset while having only the silhouette of the person visible, underexpose by one stop. If instead the skin tones should still be visible, overexpose by two stops.
-
Page 28: Technical Data
0.5 ... 12800 stepsize 1/3, 1/2 and full stops dynamic range * -3 ... 20 EV *: Below 0 EV: lower resolution, more noisy signal This device conforms to European (CE), US (FCC) and Canadian (IC) EMC directives. See hedeco.de for con-... -
Page 29: Service/Cleaning
formity delcarations. 7 Service/Cleaning 7.1 Cleaning With normal use the light meter should not need any servicing. If parts require cleaning, use solvent free cleaning solutions. If this is not sufficient, using small amounts of isopropanol alcohol is also fine. 7.2 Dismantling If more serious servicing is needed and there is some experience with camera care, the provided 1.5mm hex... -
Page 30: Problems
7.3 Problems Please check the website hedeco.de for the latest up- dated version of this manual. The sprung ball can't work in configurations where cam- eras only grips the sides of the shoe mount (old Leica cameras for example). If those mounts are worn or lost their clamping force it can result in a loose grip. - Page 31 30 seconds, keeping the controller in a faulty state. A true "reset" then will only occur when removing the battery for a longer period of time. If there still are problems, errors or faulty calibration, please contact hello@hedeco.de MADE IN GERMANY WITH GLOBAL COMPONENTS...
- Page 32 HEDECO GmbH Josephspl. 8 90403 Nürnberg Represented by: Johannes Heberlein Register entry Entry in: Handelsregister Register Number: HRB 37837 Register Court: Nürnberg Twitter/Instagram: @hede_co_ Youtube: HEDECO email: hello@hedeco.de hedeco.de...
Need help?
Do you have a question about the Lime TWO and is the answer not in the manual?
Questions and answers