
Summary of Contents for FUJI TECOM PL-AP
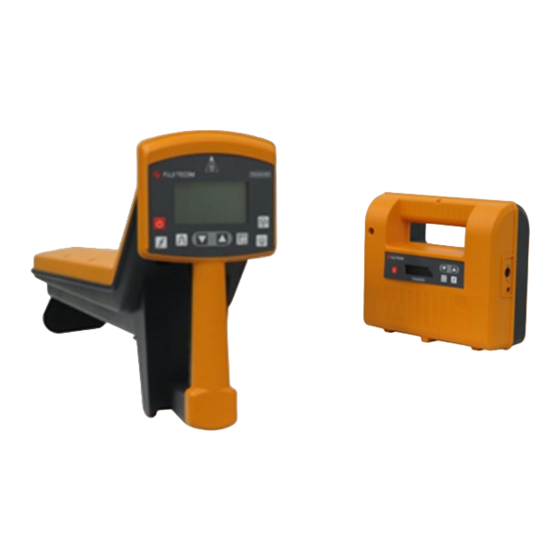
- Page 1 Application of Data Collection for PL series pipeline & cable locator PL-AP OPERATION MANUAL FOR THE PL-G PIPE LOCATOR FOR ANDROID 9 AND BELOW PL-G MAX Receiver...
- Page 2 Wi-Fi: Wi-Fi is used for reading data Bluetooth: Bluetooth is used for reading data Once the PL-AP Application has been installed on an Android Device, the Device can Pair with the PL-G-MAX Receiver . PL-G-MAX Operating Instructions Detailed Operating Instructions for the PL-G-MAX...
-
Page 3: Table Of Contents
………………...…..10 3-1. How to connect and use a device with the PL-G receiver …….….… 10 3-2. How to access collected data within the PL-AP app ……………..…. 12 3-3. How to delete collected data within the PL-AP app ………………..3-4. How to create reports of collected data ……………………...……….. 14 Modifying Report Files On Android ….………………..…...….….. - Page 4 7-1. PL-AP app GPS error message ………………………………..….…. 7-2. PL-AP app Bluetooth error message ……………………………..… 7-3. PL-AP app not showing any receiver ID’s in reports/delete .……… 7-4. PL-G receiver not appearing in Bluetooth search ………….………. 7-5 PL-G receiver keeps saying failed connection …………...….………...
-
Page 5: Understanding The Basics
○ - The SIM card tray is where you can insert a SIM card for the device. is not necessary to have a SIM card installed to use the PL-AP app. ○ - The audio jack is used for external audio devices such as a headset. -
Page 6: Understanding Android Os
1-2. UNDERSTANDING ANDROID OS This section of the manual will briefly go over the Android operating system (OS) and how to use it. Navigating Android Most Android devices use three buttons for navigation. These buttons are usually found at the bottom of the screen. The order and design may vary. The button in the center is the home button. -
Page 7: Installing The Pl-Ap App
2. INSTALLING THE PL-AP APP 2-1. INSTALLING THE PL-AP APP The PL-AP app is pre-installed on Tablets supplied directly by Fuji Pipe Locators. Those using their own Android devices will need to download and install the PL-AP application (app). In order to download the app, you will need to have access to a Google account (e.g. -
Page 8: Enabling Pl-Ap App Permissions
The PL-AP requires access to certain permissions for it to function correctly. Please ensure you perform the following instructions accurately. When opening the app for the first time, you will be prompted to give PL-AP access to your device’s location. Select Allow. -
Page 9: Understanding The Pl-Ap App
The manual will explain how to fully use the app in later sections. Please refer to the contents page for more details. The PL-AP app is the companion app to the PL-G-MAX receiver. This app allows the collection of data from the PL-G-MAX Receiver when Connected/ Paired, and lets the user share this data via Reports that can be created within the app. -
Page 10: Using The Pl-Ap App And Pl-G Receiver
“PL-G.MAX” as soon as it appears. If prompted, confirm the connection by selecting PAIR or OK. Quickly find and open the PL-AP app and select “PL-G”. Quickly Select the “Data Transfer” button. This button should then turn into a “Stop Transfer” button The PL-G receiver will now say “Established Connection”, and you will... - Page 11 Android device, follow these instructions: Directly after your first measurement using Bluetooth (page 9), ensure the PL-AP app is open and still on the PL-G screen, and the button still displays “Stop Transfer”. Restart the PL-G receiver by pressing the power button to turn it off and then on again.
-
Page 12: How To Access Collected Data Within The Pl-Ap App
3-2. HOW TO ACCESS COLLECTED DATA WITHIN THE PL-AP APP To find where the data is stored in the app, find and open the PL-AP app and select the “REPORT” button. You will then see the screen below. Ensure this is set to “PL-G”. This ensures correct formatting of the report when generated. -
Page 13: How To Delete Collected Data Within The Pl-Ap App
3-3. HOW TO DELETE COLLECTED DATA WITHIN THE PL-AP APP To DELETE data collected, find and open the PL-AP app and select the “DELETE” button. The screen below will be displayed. Ensure Model is set to either “ALL” or “PL-G”. -
Page 14: How To Create Reports Of Collected Data
3-4. HOW TO CREATE REPORTS OF COLLECTED DATA To find where the data is stored in the app, find and open the PL-AP app and select the “REPORT” button. You will then see the screen below. Ensure this is set to “PL-G”. This ensures correct formatting of the Report when generated. -
Page 15: Modifying Report Files On Android
4. MODIFYING REPORT FILES ON ANDROID 4-1. HOW TO ACCESS REPORT FILES ON ANDROID This section will show you where to find the generated Report files on your Android Device. To learn what these files are, please refer to section (6). Every Android device has a File Manager app. -
Page 16: How To Transfer/Share Report Files On Android
4-2. HOW TO TRANSFER / SHARE REPORT FILES ON ANDROID This section will show you how to transfer/share report files on an Android device. To learn how to access these files, refer to section (4-1 Pg.15) of manual. To learn what these files & contents are, refer to section (6 Pg. 24) of manual. -
Page 17: How To Rename Report Files On Android
4-3. HOW TO RENAME REPORT FILES ON ANDROID This section will show you how to rename report files on an Android device. To learn how to access these files, refer to section (4-1 Pg.15) of manual. After following the instructions in section (4-1 Pg.15), you will be able to see the report files, such as the screenshot below. -
Page 18: How To Delete Report Files On Android
4-4. HOW TO DELETE REPORT FILES ON ANDROID This section will show you how to delete the report files on an Android Device. To learn how to access these files, refer to section (4-1 Pg.15) of manual. After following the instructions in section (4-1 Pg.15), you will be able to see the report files, such as the Keep in mind that different device brands have different types of android, so... -
Page 19: Modifying Report Files On Pc
5. MODIFYING REPORT FILES ON PC 5-1. HOW TO ACCESS REPORT FILES ON PC This section will show you where to find the generated report files on your Android device using a Windows PC. To learn what these files are, please refer to section (6 Pg.24). - Page 20 In the file explorer, select “This PC” on the left sidebar, then open your Android device. This manual uses a Samsung Galaxy Tab A tablet. first second Open the first inner folder, and then find and open the “PL_AP” folder. The first inner folder will vary in name due to different devices/brands.
-
Page 21: How To Transfer/Share Report Files On Pc
5-2. HOW TO TRANSFER/SHARE REPORT FILES ON PC This section will show you how to transfer/share report files from an Android device to a Windows PC. To learn what these files and its contents are, refer to section (6 Pg. 24) of manual. After following the instructions in section (5-1 Pg.19), you will be able to see the report files in the file explorer, such as the screenshot below. -
Page 22: How To Rename Report Files On Pc
5-3. HOW TO RENAME REPORT FILES ON PC This section will show you how to rename report files from a Windows PC. To learn what these files and its contents are, refer to section (6 Pg.24) of manual. If your files are only on your Android device, refer to section (5-2 Pg.21) to learn how to transfer them to your PC. -
Page 23: How To Delete Report Files On Pc
5-4. HOW TO DELETE REPORT FILES ON PC This section will show you how to delete report files from a Windows PC. To learn what these files and its contents are, refer to section (6 Pg.24) of manual. If your files are only on your Android device, refer to section (5-2 Pg.21) to learn how to transfer them to your PC. -
Page 24: Understanding The Report Files
6. UNDERSTANDING THE REPORT FILES 6-1. UNDERSTANDING THE TYPES OF REPORT FILES This section of the manual will only go over the types of files created when generating a report, and the naming of those files. Please refer to the Table of Contents Pg.3 for more information regarding Reports. -
Page 25: Understanding The Contents Of Report Files
6-2. UNDERSTANDING THE CONTENTS OF REPORT FILES This section of the manual will go over the contents of the report files under the assumption that PL-G was selected as the model when creating a report. If the default report file name does not start with “PLG” then the content may differ slightly. - Page 26 CSV Report File Above is an example of a CSV report file with 5 measurements opened in Microsoft Excel. In a CSV report file, the data is separated using the grids, similar to the PNG report file. Unlike the PNG report file, the CSV report file does not contain a QR code for each measurement.
-
Page 27: Troubleshooting
If you can’t find your problem here, please contact your nearest distributor. PL-AP APP CAN ONLY FUNCTION ON ANDROID 9 OR LOWER AT THE TIME OF THIS PUBLICATION. UPDATED ANDROID VERSIONS CAN BE FOUND IN THE APP STORE AS THEY BECOME AVAILABLE. -
Page 28: Ap App Not Showing Any Receiver Id's In Reports/Delete
7-3. PL-AP APP NOT SHOWING ANY RECEIVER ID’S If your PL-AP application is not displaying any receiver ID’s in the reports or delete section of the app, similar to the screenshot below, please follow the following instructions. This issue is likely due to the range of dates not being correctly selected. -
Page 29: G Receiver Keeps Saying Failed Connection
Keep in mind that pairing with the PL-G receiver through only the Bluetooth settings on your Android device is not all the steps. As mentioned in section (3-1 Pg. 10), you must pair via Bluetooth AND open the PL-AP app with Data Transfer enabled.
Need help?
Do you have a question about the PL-AP and is the answer not in the manual?
Questions and answers