
Summary of Contents for eQuality 506DN
- Page 1 506DN Vital Signs Monitor Service Manual Cat. No. 1557 Part No. 39184B101 Date 01/09 Revision 0...
-
Page 2: Copyright
PROPERTY OF CRITICARE SYSTEMS, INC. ALL RIGHTS RESERVED eQuality™ Vital Signs Monitor, DOX™ Digital Oximetry, ComfortCuff™ NIBP and Multi-Site™ SpO Sensors are trademarks of Criticare Systems, Inc. Page ii eQuality™... -
Page 3: Table Of Contents
Test Menu ......................2-3 Default Setups....................2-4 Board Setups ..................... 2-5 NIBP Calibration Menu ....................2-6 Setting User Defaults ....................2-7 Setting User Defaults ..................2-7 Power Up in Service Mode................. 2-7 Criticare Systems, Inc. eQuality™ 506DN Service Manual Page iii... -
Page 4: Contents
Height .......................2-17 Respiration .......................2-17 Pain ........................2-17 Section 3 – Theory of Operation System Architecture ......................3-1 Module Architecture ......................3-2 Main Board ......................3-2 NIBP Module ......................3-2 DOX SpO Module .....................3-2 Block Diagram .......................3-3 Page iv eQuality™ 506DN Service Manual Criticare Systems, Inc. - Page 5 Communication Testing ....................6-3 Equipment Required ..................6-3 Pinout Chart ....................... 6-3 Procedure......................6-3 Nurse Call ......................6-4 DOX SpO Performance Testing .................. 6-5 Programming the SmartSat Analyzer..............6-5 Test Procedure....................6-5 Criticare Systems, Inc. eQuality™ 506DN Service Manual Page v...
- Page 6 Section 8 – Troubleshooting Troubleshooting Guide ....................8-1 Section 9 – Drawings and Schematics List of Drawings......................9-1 Assembly Parts Lists ..................9-1 PCB Drawings List....................9-1 506DN Final Assembly....................9-2 NIBP Module .........................9-3 506DN Monitor ......................9-3 Page vi eQuality™ 506DN Service Manual Criticare Systems, Inc.
-
Page 7: Warranty
Criticare Systems, Inc., or the 506DN Patient Monitor is not used in accordance with the instructions for use, or the electrical installation of the relevant room does not comply with... -
Page 8: Service Return Policy
If a discrepancy to these inspection items is observed, do not use the instrument and immediately report the discrepancy to the CSI Service Department. Page viii eQuality™ 506DN Service Manual Criticare Systems, Inc. -
Page 9: Ec Declaration Of Conformity
9 Clarendon Place Leamington Spa Warwickshire CV 32 5QP – United Kingdom T: 0044 (0) 1926 886688 F: 0044 (0) 1926 885588 For the Attention of: Ref. 45 (or) Mr. L. A. Heizler Criticare Systems, Inc. eQuality™ 506DN Service Manual Page ix... -
Page 11: Section 1 - Introduction
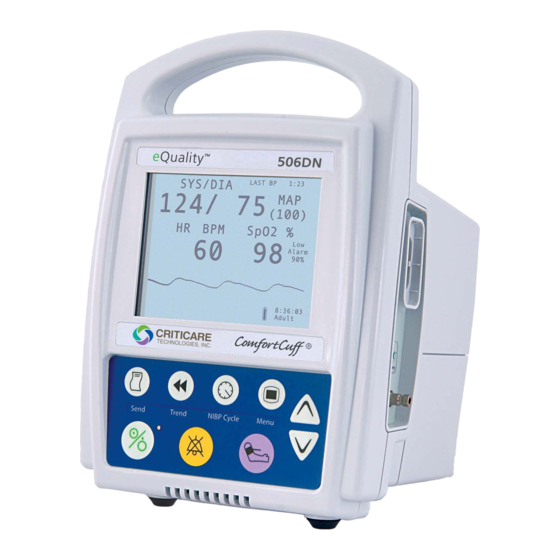
Section 1 — Introduction Description The 506DN patient monitor is a compact vital signs monitor that measures heart rate, blood oxygen saturation (SpO ) and non- invasive blood pressure (NIBP). Heart rate is measured primarily by the plethysmographic waveform but when the oximeter is not is use, heart rate is determined from the blood pressure data using an oscillometric method that measures during inflation. -
Page 12: Non-Invasive Blood Pressure (Nibp)
Section 1 —Introduction Non-Invasive Blood ® The 506DN monitor uses ComfortCuff technology to determine non-invasive blood pressure by means of oscillometry. The Pressure (NIBP) oscillometric method detects volume displacements within the artery and senses pressure variations within the blood pressure cuff during inflation. -
Page 13: Nibp Clinical Testing And Accuracy
Section 1 —Introduction NIBP Clinical Testing This device was clinically tested per the requirements of EN 1060 and AAMI SP-10. The NIBP module as installed in the 506DN patient and Accuracy monitor has been tested to meet the performance specifications listed in this manual. -
Page 14: Heart Rate
The monitor continues to look for valid SpO based heart rate measurements and attempts a second NIBP measurement if the first attempt fails. Page 1-4 Service Manual Criticare Systems, Inc. eQuality™ 506DN... -
Page 15: Dox™ Pulse Oximetry Measurement (Spo 2 )
Section 1 —Introduction DOX™ Pulse Oximetry The 506DN patient monitor comes with Digital Oximetry (DOX) technology to measure blood oxygen saturation (SpO Measurement (SpO Definition Hemoglobin exists in the blood in several forms: • Oxygenated (Oxyhemoglobin) • Reduced (Deoxyhemoglobin) • Dsyhemoglobins (Carboxyhemoglobin and Methemoglobin) - Page 16 Physical characteristics and skin tone were by chance with a mix from slight to stout and light to dark. Clinical testing for neonatal participants was conducted per U.S. FDA recommended clinical protocols. Page 1-6 Service Manual Criticare Systems, Inc. eQuality™ 506DN...
-
Page 17: Specifications
Less than ±6.93 mmHg Static Transducer Accuracy: ±2 mmHg Heart Rate Source: Plethysmograph or oscillometric NIBP data Accuracy Range: 30 to 240 (for all parameters) Accuracy: ±1 bpm or 1% (for all parameters) Criticare Systems, Inc. Service Manual Page 1-7 eQuality™ 506DN... - Page 18 Trend Report Length: 24 hours max; selectable intervals Review Mode: On-panel review of trend reports Interval (Review Mode): Every valid NIBP measurement Data Types: NIBP (Systolic, Diastolic, Mean), percent, Heart Rate Page 1-8 Service Manual Criticare Systems, Inc. eQuality™ 506DN...
- Page 19 5% to 95%, non-condensing Medical Device: Class II Equipment Electrical Protection: Class I Equipment Degree of Protection: CF, Defibrillator-Proof Protection against ingress: IPX1 rating, Drip-Proof Equipment All specifications are subject to change without notice. Criticare Systems, Inc. Service Manual Page 1-9 eQuality™ 506DN...
-
Page 20: Symbols
Type CF Equipment, defib proof Do not dispose of in municipal waste. Wheeled bin symbol indicates separate collection for electrical and electronic equipment (WEEE Directive 2002/96/EEC) Alternating Current (AC) Fuse Technical Support Phone Number Page 1-10 Service Manual Criticare Systems, Inc. eQuality™ 506DN... - Page 21 Not a Sensor Connection Alarm Port (Nurse Call) Serial Number Part Reference Number Placement of cuff over the brachial artery. (Blood Pressure Cuff) Single use device only. Do not reuse. Recycle cardboard/paper packaging. Criticare Systems, Inc. Service Manual Page 1-11 eQuality™ 506DN...
-
Page 22: Safety
• Risk of electrical shock! Do not remove cover. Refer servicing to qualified personnel. • U.S. Federal law restricts this device to sale by or on the order of a physician. Page 1-12 Service Manual Criticare Systems, Inc. eQuality™ 506DN... - Page 23 The functional tester can then measure how accurately a particular pulse oximeter monitor is reproducing that calibration curve. Criticare Systems, Inc. Service Manual Page 1-13 eQuality™ 506DN...
-
Page 24: Potential Interference
MAGNETIC FIELDS Use of the monitor in an MRI environment may interfere with MRI image quality. Use of MRI may interfere with the monitor. The 506DN patient monitor is not intended for use in MRI environments. RADIO FREQUENTLY INTERFERENCE The monitor conforms with IEC 61000-4-3 for radio frequency interference, and will operate with negligible effects. -
Page 25: Voltage Fluctuations
All Criticare Systems, Inc., products currently shipping are free of DBP and DEHP in any areas that would be intended for patient contact with blood, mucous membranes, or continuous skin and/or tissue contact. Criticare Systems, Inc. Service Manual Page 1-15 eQuality™ 506DN... -
Page 27: Section 2 - Service Menus
NIBP START/STAT/STOP key at power up and takes the monitor into NIBP Calibration Mode. These service software tools allow downloading of software upgrades for the 506DN operating system and for calibration of the NIBP module in the field. -
Page 28: Service Menus
MENU key. The monitor will return to the main service menu. REVISIONS 506CN/506DN SERIES REVISION 1.0H APP. CS.: 31ED AUG 21 2008 SN 999999999 SPO2 DOX 1.3A HW REV. 00 Figure 2-2: 506DN Revisions Menu Page 2-2 Service Manual Criticare Systems, Inc. eQuality™ 506DN... -
Page 29: Test Menu
The TEST MENU contains the monitor’s NIBP Seal self test. TEST MENU NIBP SEAL Figure 2-3: 506DN Test Menu To perform the NIBP SEAL self test: 1. Press the MENU key to shift the cursor to OFF. 2. Press the either arrow key to change OFF to ON. -
Page 30: Default Setups
STORE USER CONFIRM AUDIO OFF LINE FREQ Figure 2-4: 506DN Defaults Setup Menu CONFIG USER This selects the which type of configuration defaults are restored following a MENU power up. Choices are USER, HOSP. (hospital), and ALT C. (alternate care). -
Page 31: Board Setups
BOARD SETUPS SPO2 NIBP 1020 DOWNLOAD NONE Figure 2-5: 506DN Board Setups Menu SPO2 Selects which type of SpO module is installed in the monitor. Choices are DOX and SEQL (SEQUEL). NIBP Selects which type of NIBP module is installed in the monitor. -
Page 32: Nibp Calibration Menu
To enter the NIBP Calibration mode: 1. Press the POWER key and the NIBP/START/STAT/STOP key at the same time. 2. The 506DN monitor attempts to connect to extended NIBP calibration tools through the external serial port, identifying itself as a 506DN monitor. -
Page 33: Setting User Defaults
To power up the monitor in Service Mode: 1. While holding the DOWN arrow key, press the ON/OFF (power) key. 2. Continue holding the DOWN arrow key until SERVICE DISPLAY menu appears on the LCD display. Criticare Systems, Inc. Service Manual Page 2-7 eQuality™ 506DN... - Page 34 The CONFIRM submenu item now becomes active. Use the arrow keys to select YES and press the MENU key to confirm the new User Default settings. 6. The new User Default settings are now saved on the monitor. Page 2-8 Service Manual Criticare Systems, Inc. eQuality™ 506DN...
-
Page 35: Factory Defaults
40 (Neonate) OFF * (Neonate) ‡ Th e monitor returns a minimum low value of 85 on power up. * Mean values only appear if MAP is enabled in the main menu. Criticare Systems, Inc. Service Manual Page 2-9 eQuality™ 506DN... -
Page 36: Configuration Menu
1, 2, 5, 10, 15, 30, 60 minutes 2, 4, 8, 12, 24 hours; OFF Patient Data ON, OFF Print To Serial, OFF Serial Serial Text, CSV, CUSP, OFF Text Baud Rate 2400, 4800, 9600, 19200, 38400 19200 Page 2-10 Service Manual Criticare Systems, Inc. eQuality™ 506DN... -
Page 37: Patient Data Menu
NOTE: The NIBP CYCLE menu is accessed using the NIBP CYCLE key located on the front panel. All other default settings are accessed using the MENU key with the UP/DOWN keys. Criticare Systems, Inc. Service Manual Page 2-11 eQuality™ 506DN... -
Page 38: Main Menu
The pulse volume can be set from 1 to 10 and off. The pulse volume setting will remain if the monitor is power cycled. Enable MAP The NIBP MAP display can be turned on and off in the main menu. Page 2-12 Service Manual Criticare Systems, Inc. eQuality™ 506DN... -
Page 39: Alarm Menu
98%, the High SpO alarm may not be changed from the off setting. The Low SpO setting returns to a minimum value of 85% after a power cycle. Criticare Systems, Inc. Service Manual Page 2-13 eQuality™ 506DN... -
Page 40: High Systolic
25 through125 mmHg and off. The factory hospital default value is 50 for Adult and Pediatric modes and 40 for Neonate mode. The factory alternate care default value is off for all patient size modes. Page 2-14 Service Manual Criticare Systems, Inc. eQuality™ 506DN... -
Page 41: Configuration Menu
The monitor has language settings available in English and Spanish. The monitor must be restarted before the language setting change activates. NOTE: This setting is only available after a MENU power up. Criticare Systems, Inc. Service Manual Page 2-15 eQuality™ 506DN... -
Page 42: Communication Menu
The choices are Text, CSV, CUSP, and Off. The factory default value is Text. Baud Rate Sets the baud rate of the monitor. The choices are 2400, 4800, 9600, 19200, and 38400. The factory default value is 19200. Page 2-16 Service Manual Criticare Systems, Inc. eQuality™ 506DN... -
Page 43: Patient Data
MENU key to save the setting. Weight Sets the patient’s weight. Height Sets the patient’s height. Respiration Sets the patient’s respiration rate. Pain Sets the patient’s pain level. Criticare Systems, Inc. Service Manual Page 2-17 eQuality™ 506DN... -
Page 45: Section 3 - Theory Of Operation
Section 3 — Theory of Operation System Architecture The 506DN monitor’s circuitry consists of a Main Board, LCD Module, Module, and NIBP Module. The Main Board, SpO Module and NIBP Module are considered the Main Module. This module is located in the monitor’s font bezel. The LCD display mounts to the main board, which in turn mounts to the front bezel. -
Page 46: Module Architecture
Section 3 —Theory of Operation Module Architecture Main Board The hardware design of the 506DN monitor relies on multiple serial communication channels wherein the Main Board functions (pn 91410A001) as the hub. Signal and display processing is off-loaded to the various vital signs technology modules, the Display Board, and the LCD Module. -
Page 47: Block Diagram
The diagram below shows the system module interconnections. Sensor DOX SpO2 Nurse Call Speaker NIBP Module MAIN BOARD Membrane 12V Input DISPLAY BOARD RS232 Battery Communication Figure 3-3: 506DN Board Interconnect Block Diagram Criticare Systems, Inc. Service Manual Page 3-3 eQuality™ 506DN... -
Page 49: Section 4 - Cleaning And Disinfecting
The SpO sensor may be disinfected by placing the paddles and cable in a 2% glutaraldehyde solution. Place only the sensor paddles and cable in the solution. Criticare Systems, Inc. Service Manual Page 4-1 eQuality™ 506DN... -
Page 50: Blood Pressure Cuffs
Wash the cuff in warm, soapy water. Rinse the cuff thoroughly. After cleaning the cuff, allow the cuff to air dry, then insert the inflation bag in the cuff. Page 4-2 Service Manual Criticare Systems, Inc. eQuality™ 506DN... -
Page 51: Accidental Wetting
Time is critical! The longer any liquid remains in the monitor, the more damage it can do. It is important to service the monitor immediately after any liquid is spilled into it. Criticare Systems, Inc. Service Manual Page 4-3 eQuality™ 506DN... -
Page 53: Section 5 - Preventative Maintenance
Alternately, the monitor and its accessories may be returned to Criticare Systems, Inc., for safe disposal. The shipping address is: Criticare Systems, Inc. 20925 Crossroads Circle Waukesha, WI 53186 Criticare Systems, Inc. Service Manual Page 5-1 eQuality™ 506DN... -
Page 54: Service Checks
Technical Service (US): (800) 458-2697 International Customer Service: (262) 798-8282 Calibration No periodic calibration of the monitor is necessary. It is recommended to perform an NIBP calibration verification as part of the annual safety testing. Page 5-2 Service Manual Criticare Systems, Inc. eQuality™ 506DN... -
Page 55: Serviceable Components
• The used battery is a potential environmental hazard and must be disposed of properly. Dispose the old battery in accordance with local and federal laws. Do not incinerate. Criticare Systems, Inc. Service Manual Page 5-3 eQuality™ 506DN... - Page 56 Figure 5-1: Remove Screws 3. Remove the battery (P/N MISC10004) from the monitor. Disconnect Battery Figure 5-2: Remove Battery 4. Label and remove the cables connected to the battery. NOTE: Printing faces inward. Page 5-4 Service Manual Criticare Systems, Inc. eQuality™ 506DN...
-
Page 57: Fuse Removal/Replacement
1. With a flat blade screwdriver, turn the fuse cover(s) out. 2. Gently pull the fuse cover(s) with fuse(s) out of the fuse assembly. 3. Gently pull the fuse(s) out of the fuse cover(s). 4. Reassemble in reverse order. Criticare Systems, Inc. Service Manual Page 5-5 eQuality™ 506DN... -
Page 58: Annual Testing
Withstanding Voltage (Hi-Pot) b. Electrical Leakage 2. Functional Tests a. System Check b. Speaker Performance and Alarm Verification c. Power Supply Performance 3. Vital Sign Modules Verifications a. NIBP b. Oximeter (SpO Page 5-6 Service Manual Criticare Systems, Inc. eQuality™ 506DN... -
Page 59: Equipment And Tools
• Serial cable with null modem (P/N 87016B002) • AC (Mains) Power cord • 700 cc factory test block • Cat 511SD finger sensor (or equivalent) with optical load (foam packing peanut) Criticare Systems, Inc. Service Manual Page 5-7 eQuality™ 506DN... -
Page 60: Test Fixtures
SPO2 LEAKAGE TEST FIXTURE NURSE CALL BOX Alligator clips to 3.5 mm stereo plug connect to battery +12V Batt. Pos. J11 pins 1 and 2 +12V Batt. Neg. J11.4 CON1 CON2 Page 5-8 Service Manual Criticare Systems, Inc. eQuality™ 506DN... - Page 61 Section 5 —Preventative Maintenance HOT/NEUTRAL TO GROUND HI-POT FIXTURE NURSE CALL HI-POT FIXTURE Criticare Systems, Inc. Service Manual Page 5-9 eQuality™ 506DN...
-
Page 62: Electrical Safety Tests
• Arc Fail = OFF • Arc Sense = 5 • Ramp Hi = Off • Charge Lo = 0.0 uA • Ramp Time = 1 second • Dwell Time =1 second • AC/DC =DC Page 5-10 Service Manual Criticare Systems, Inc. eQuality™ 506DN... -
Page 63: Hi-Pot Performance Test
Section 5 —Preventative Maintenance Hi-Pot Performance Test NOTE: Do not power up the 506DN monitor during the Hi-Pot steps. 1. Connect the 506DN monitor to the measurement receptacle of the Hi-Pot tester. Test “Hot/Neutral” to “Ground” at 2500VDC. 2. Install a screw into the roll stand-mounting insert located on the rear of the enclosure. -
Page 64: Leakage Procedure
DB9 shell of the monitor. Record measurements on the check sheet for the following: • Normal Polarity (<50uA)(<100uA) • Reverse Polarity (<50uA)(<100uA) • Normal Polarity, Open Ground (<250uA)(<500uA) • Reverse Polarity, Open Ground (<250uA)(<500uA) Page 5-12 Service Manual Criticare Systems, Inc. eQuality™ 506DN... - Page 65 Configure the leakage tester to measure patient isolation. (Dynatech 232D: MODE = ECG, LEADS =ISOLATION TEST) • Normal Polarity (<50uA) Press the isolation button. Criticare Systems, Inc. Service Manual Page 5-13 eQuality™ 506DN...
-
Page 66: Functional Tests
The monitor displays the following messages: CRITICARE SYSTEMS INC. 506DN SERIES REVISION x.x (C) 200X 2. Hold the MENU key while you restart the monitor. The reset to defaults message appears. Depending on configuration of the unit, this message may appear as USER DEFAULTS, HOSPITAL DEFAULTS, or ALT. -
Page 67: Speaker Performance, Alarms Verification
AC inlet. 2. Verify the monitor powers up on AC only. 3. Verify the monitor powers up on DC only with a battery. Criticare Systems, Inc. Service Manual Page 5-15 eQuality™ 506DN... -
Page 68: Monitoring Module Verification
Monitoring Module Verification NIBP Verification The NIBP verification requires Dynatech Nevada NIBP Analyzer. Connect the 506DN monitor to a Dynatech Nevada NIBP Analyzer set for the following operation. NIBP Analyzer Settings Adult 120/80 (90); Heart Rate 120 bpm Pressure Adjustments: Gain 100%; Shift 4 Use a tee connection with an adult dummy cuff. -
Page 69: Nibp Seal Test
3. Connect the “tee” connector to the NIBP connector on the monitor. PROCEDURE The 506DN monitor has a simple test mode for checking the seal and pressure transducer. The instructions are as follows: 1. Press the POWER key while holding the DOWN arrow key. -
Page 70: Spo 2 Verfication
SpO sensor detector. 4. Disconnect the DOX SpO sensor from the unit after power up. 5. Verify a SPO2:NO SENSOR displays on the LCD. Page 5-18 Service Manual Criticare Systems, Inc. eQuality™ 506DN... -
Page 71: Functional And Safety Testing Checklist
Leakage Case Reverse Polarity Open Ground (<250/<500uA) _____uA _____uA DOX SpO LEAKAGE Normal Polarity (<5/<10uA) _____uA _____uA DOX SpO LEAKAGE Normal Polarity Open GND (<25/<50uA) _____uA _____uA Isolation test DOX SpO (<25/<50uA) _____uA _____uA Criticare Systems, Inc. Service Manual Page 5-19 eQuality™ 506DN... - Page 72 Take SPO2 & HR readings _____ _____ Verify LED Bargraph _____ _____ Sensor symbol operation _____ _____ Verify SPO2: LOST condition _____ _____ CERTIFICATION THAT THE UNIT IS CALIBRATED AND FUNCTIONING PROPERLY NAME COMMENTS Page 5-20 Service Manual Criticare Systems, Inc. eQuality™ 506DN...
-
Page 73: Section 6 -Service Testing & Calibration
The pre-assembly testing of printed circuit boards (PCBs) is not covered in this manual. Disassembly of surface mounted components on PCBs in not recommended. Tests provided here are only for the identification of damaged or degraded PCBs. Criticare Systems, Inc. Service Manual Page 6-1 eQuality™ 506DN... -
Page 74: Equipment And Tools
At the beginning of each test special equipment may be listed. A variety of customized cables, clips, and test fixtures may also be needed to complete all the tests. Contact Criticare Service for additional information. Page 6-2 Service Manual Criticare Systems, Inc. eQuality™ 506DN... -
Page 75: Communication Testing
PC. Settings: 19200 bps, 8-N-1, or Auto Detect. Figure 6-2: PC HyperTerminal 5. Press the SEND key on the monitor to initiate a print of data. 6. Ensure data prints to the computer. Criticare Systems, Inc. Service Manual Page 6-3 eQuality™ 506DN... -
Page 76: Nurse Call
NOTE: Wile in the 2 minute Alarm Silence, if the alarm states change, the Nurse Call fixture lights will come back on. While in permanent alarm silence, the lights on the Nurse Call fixture should remain off regardless of changing alarm states. Page 6-4 Service Manual Criticare Systems, Inc. eQuality™ 506DN... -
Page 77: Dox Spo Performance Testing
The SmartSat can be used for spot checking SpO values using the manual settings. The manufacturer recommends using a timed and SmartSat Analyzer programmed sequence to ensure that there is optimal performance. Auto Seq: Model 506DN Oximeter Level SPO2 Limits... -
Page 78: Nibp Calibration
Ports and reassign the alternate port or the USB to Serial Adapter to COM1, COM3 or COM4. For laptops using a USB adapter, select COM 4 or an alternate COM port as necessary. Page 6-6 Service Manual Criticare Systems, Inc. eQuality™ 506DN... -
Page 79: Setup
7. Plug the monitor back to the AC (Mains) source. 8. Power up the unit while holding the NIBP START/STAT/ STOP key. 9. On the display of the unit, verify that the message CHECKING FOR NIBP TOOLS…. appears. Criticare Systems, Inc. Service Manual Page 6-7 eQuality™ 506DN... - Page 80 Figure 6-4: Select Open in Service Mode 11.If communication has been established, the following screen should appear. When this message appears, communication with the PC is established. Figure 6-5: Communication Established Page 6-8 Service Manual Criticare Systems, Inc. eQuality™ 506DN...
-
Page 81: Calibrate
1. Select Calibrate from the service tool screen on the PC. Figure 6-6: Select Calibrate 2. A box appears as shown. Verify that the pressure at the cuff is “0mmHg” ±2mmHg. Figure 6-7: Verify Cuff Pressure Criticare Systems, Inc. Service Manual Page 6-9 eQuality™ 506DN... - Page 82 5. When Manometer and cuff match, select Finish. Figure 6-9: Finish Calibration 6. The cal information will be downloaded into the E2 and “Calibration Complete” should appear. Page 6-10 Service Manual Criticare Systems, Inc. eQuality™ 506DN...
-
Page 83: Safety Test
1. Using the mouse, click on the Safety test button. Figure 6-10: Select Safety 2. A High Pressure Safety Test window opens. Click on Start. Figure 6-11: High Pressure Safety Test window Criticare Systems, Inc. Service Manual Page 6-11 eQuality™ 506DN... - Page 84 Verify that the Pass box for Adult contains a checkmark. Figure 6-12: Adult Test Pass 4. Click on the Test Infant Mode. A checkmark should appear in the box before it. Click Start. Figure 6-13: Test Infant Mode Page 6-12 Service Manual Criticare Systems, Inc. eQuality™ 506DN...
- Page 85 Figure 6-14: Test Infant Mode Pass 6. Click Done if a checkmark appears in the Pass box. The main screen displays checkmarks indicating a Pass of the Safety tests. Figure 6-15: Safety Test Pass Criticare Systems, Inc. Service Manual Page 6-13 eQuality™ 506DN...
-
Page 86: Speed Test
Section 6 —Service Testing & Calibration Speed Test 1. Click on Speed. Figure 6-16: Select Speed 2. A Factory Speed Test window opens. Click on Start. Figure 6-17: Factory Speed Test Window Page 6-14 Service Manual Criticare Systems, Inc. eQuality™ 506DN... - Page 87 4. If each Pass box has a checkmark, click on the Done button. 5. The main screen displays checkmarks indicating a Pass of the Speed tests. Figure 6-19: Speed Test Pass Criticare Systems, Inc. Service Manual Page 6-15 eQuality™ 506DN...
-
Page 88: Leak Test
Leak Test 1. Click on the Leak test button. Figure 6-20: Select Leak 2. A Leak and High Time Test window appears. Click Start. Figure 6-21: Leak and High Time Test Window Page 6-16 Service Manual Criticare Systems, Inc. eQuality™ 506DN... - Page 89 Test by having a checkmark next to it in the box. Figure 6-22: Leakage Test Pass 4. Verify that the High Time Test indicates a Pass for Adult with a checkmark in the box. Figure 6-23: High Time Test, Adult Criticare Systems, Inc. Service Manual Page 6-17 eQuality™ 506DN...
- Page 90 6. After approximately 60 seconds, the box next to Pass should contain a checkmark in front of it. Figure 6-25: Infant High Time Test Pass 7. If each Pass box has a checkmark, click on the Done button. Page 6-18 Service Manual Criticare Systems, Inc. eQuality™ 506DN...
- Page 91 Section 6 —Service Testing & Calibration 8. The main screen displays checkmarks indicating a Pass of the Leak tests. Figure 6-26: Leak Test Pass Criticare Systems, Inc. Service Manual Page 6-19 eQuality™ 506DN...
-
Page 92: Accuracy Test
Section 6 —Service Testing & Calibration Accuracy Test 1. Click on Accuracy. Figure 6-27: Select Accuracy 2. A Pressure Accuracy Test window appears. Click Start. Figure 6-28: Pressure Accuracy Test Window Page 6-20 Service Manual Criticare Systems, Inc. eQuality™ 506DN... - Page 93 Figure 6-30: Pressure Accuracy Test, 140 mmHg Figure 6-31: Pressure Accuracy Test, 280 mmHg 5. Click Done if the test passes after the 280 mmHg test. 6. Turn off power and remove serial cable and manometer fixture. Criticare Systems, Inc. Service Manual Page 6-21 eQuality™ 506DN...
-
Page 95: Section 7 - Disassembly
PCB assemblies. These procedures are not intended to be used for component-level troubleshooting and repair of the PCB assemblies. The repair procedures for the 506DN monitor are included here for the determination of damaged or unusable assemblies. The manufacturer does not recommend attempting field repair of the printed circuit boards. -
Page 96: Tools Needed
Never store electronic boards directly in cardboard boxes. Tools Needed The following is a list of tools needed for disassembly and reassembly of the eQuality 506DN monitor. • Set of hand tools • Up to 7 in. torque screwdriver with accessories • #10 socket •... -
Page 97: Disconnect And Remove Battery
This will damage the wires. • Do not allow the battery cable ferrites to coil on the main board. Reassemble the monitor and perform the “Completion of Service” procedure at the end of this section. Criticare Systems, Inc. Service Manual Page 7-3 eQuality™ 506DN... -
Page 98: Bezel Disassembly
Figure 7-1: Reinsert Speaker 6. Connect the speaker cable to the main board at J4. Reassemble the monitor and perform the “Completion of Service” procedure at the end of this section. Page 7-4 Service Manual Criticare Systems, Inc. eQuality™ 506DN... -
Page 99: Replace Lcd Display
15.Lift the display shield (P/N 83401B002) from the bezel. 16.Remove and replace the LCD display (81521B001). 17.Reassemble in reverse order. See assembly drawings for torque instructions. Perform the “Completion of Service” procedure at the end of this section. Criticare Systems, Inc. Service Manual Page 7-5 eQuality™ 506DN... -
Page 100: Replace Membrane
9. Reassemble in reverse order. Perform the “Completion of Service” procedure at the end of this section. Page 7-6 Service Manual Criticare Systems, Inc. eQuality™ 506DN... -
Page 101: Replace Main Board
8. Detach the insulator board (P/N 42740B001) by breaking the solder point between the insulator and main boards. (See 506DN assembly drawing in Section 9.) 9. Detach the PCB/NIBP assembly from the bezel by removing the four (4) screws (PHMS SEMS #4-40 X .25 LG;... - Page 102 Section 7 —Disassembly 16.Obtain a new main board (P/N 91410A001). 17.Reassemble in reverse order. Refer to 506DN assembly drawing in Section 9 for solder point when connecting the main and insulator boards. NOTE: When reassembling, after the NIBP module and SpO board are mounted, route the NIBP tube as shown below.
-
Page 103: Replace Dox Spo 2 Board
NIBP tube as shown below. It must be around the sensor and valves. Figure 7-3: NIBP Tubing Perform the “Completion of Service” procedure at the end of this section. Criticare Systems, Inc. Service Manual Page 7-9 eQuality™ 506DN... -
Page 104: Replace Nibp Module
NIBP tube as shown below. It must be around the sensor and valves. Figure 7-4: NIBP Tubing Perform the “Completion of Service” procedure at the end of this section. Page 7-10 Service Manual Criticare Systems, Inc. eQuality™ 506DN... -
Page 105: Housing Disassembly
8. Obtain a new power supply (P/N PWRS10000). 9. Reassemble in reverse order. See assembly drawings for torque instructions. Perform the “Completion of Service” procedure at the end of this section. Criticare Systems, Inc. Service Manual Page 7-11 eQuality™ 506DN... -
Page 106: Completion Of Service
2. Reconnect the battery (See “Disconnect and Remove Battery” on page 7-3). 3. Perform the functional tests in “Functional and Safety Testing” in Section 5. 4. Perform the electrical safety tests in “Electrical Safety Tests” in Section 5. Page 7-12 Service Manual Criticare Systems, Inc. eQuality™ 506DN... -
Page 107: Section 8 - Troubleshooting
Check pins on NIBP Board & reconnect • Failed pump motor Replace pump • Bad Main Board Replace Main Board and software • Bad NIBP Board Replace NIBP Board and software Criticare Systems, Inc. Service Manual Page 8-1 eQuality™ 506DN... - Page 108 • Bad Main Board Replace Main Board No communications • Serial settings not correct Check MENU settings • Bad serial cable (external) Replace external serial cable • Bad Main Board Replace Main Board Page 8-2 Service Manual Criticare Systems, Inc. eQuality™ 506DN...
-
Page 109: Section 9 -Drawings And Schematics
Section 9 —Drawings and Schematics List of Drawings Assembly Parts Lists Title Drawing Number FINAL AY 506DN DOX 93987A001 NIBP MODULE 6 PIN CONN 95597A005 506DN MONITOR CAT 506DN-X PCB Drawing List PCB AY DIG SPO2 91391A002 PCB AY DIG SPO2 SCHEMATIC... - Page 110 Section 9 —Drawings and Schematics 506DN Final Assembly 93987A001 FINAL AY 506DN DOX Item # CSI Part # Description 91410A001 PCB AY, 506CN MAIN BOARD 42742B001 STANDOFF M/F #4-40 X .375 LG NYLON 42743B001 HEX NUT #4-40 NYLON 42744B001 P.H.M.S. #4-40 X .25 LG NYLON...
-
Page 111: Nibp Module
CABLE TIE 4.0 506DN Monitor 506DN-X MONITOR SPO2/NIBP (DOX) Item # CSI Part # Description 93987A001 FINAL AY 506DN DOX 95795A001 LBL SET 506 DN/CN (ENGLISH) 95795A005 LBL SET 506 DN/CN (SPANISH) 46426B001 LBL MAIN PRODUCT REV 1 46158B002 LABEL QUAL SEAL OVAL WHT Criticare Systems, Inc. - Page 113 INFORMATION AND MAY NOT BE COPIED OR DIVULGED XX: +/- .020 XXX: +/- .005 WITHOUT WRITTEN CONSENT OF CRITICARE SYSTEMS, INC. ANGLES: +/- 1 DEGREE TITLE: PART NO.: REV. FINAL ASSEMBLY 93987A001 506DN released Document DIST: SHEET CSI #0385 Rev. 0...
- Page 114 OTHERWISE SPECIFIED: INFORMATION AND MAY NOT BE COPIED OR DIVULGED XX: +/- .020 XXX: +/- .005 WITHOUT WRITTEN CONSENT OF CRITICARE SYSTEMS, INC. ANGLES: +/- 1 DEGREE TITLE: PART NO.: REV. FINAL ASSEMBLY 93987A001 506DN DIST: SHEET CSI #0385 Rev. 0...
- Page 115 REVISIONS REV. DATE DESCRIPTION (3-PL) 5 IN-LBS (4-PL) 5 IN-LBS 7 IN-LBS SEE DETAIL -A- FOR WIRING FUSE (2-PL) BEND CUT 2" LONG TERMINALS X .5" WIDE UP AS SHOWN CUT 2" LONG (2-PL) (2-PL) 5 IN-LBS 3 IN-LBS (2-PL) 3 IN-LBS NOTES: 1.
- Page 116 OTHERWISE SPECIFIED: INFORMATION AND MAY NOT BE COPIED OR DIVULGED XX: +/- .020 XXX: +/- .005 WITHOUT WRITTEN CONSENT OF CRITICARE SYSTEMS, INC. ANGLES: +/- 1 DEGREE TITLE: PART NO.: REV. FINAL ASSEMBLY 93987A001 506DN DIST: SHEET CSI #0385 Rev. 0...
- Page 117 REVISIONS REV. DATE DESCRIPTION CONNECTOR VALVE AY HOUSING (2-PL) RED - PUMP + BLK - PUMP - WHT V1 WHT V2 PUMP AY (3,4) CONNECTOR CONNECTOR WIRING DETAIL HOUSING 87283B003 (JST PHR-6) FINISHED ASSEMBLY (5,6) TO V1 TO V2 RED (1) (2-PL) BLK (2) 1.00"...
- Page 118 REVISIONS REV. DATE DESCRIPTION 1/14/09 SEE ECN #10359 LABEL MODEL/SERIAL NO. LABEL LABEL FRONT LOGO COUNTRY OF ORIGIN LABEL LABEL NIBP/SPO2 MODEL LABEL ELEC. RATING LABEL 2L LABEL REGULATORY LANGUAGE MENU (NOT USED ON ENGLISH VERSION) LABEL BATTERY INSTALL NOTES: 1.
- Page 119 released Document...
- Page 120 '$7( '$7( '$7( (&1 (&1 (&1 :5)/6+ /(''5 -803(5 -803(5 & & & & ,QVWDOO MXPSHU IRU HPXODWLRQ PRGH & & & & & & & & /(' &XUUHQW a & & 00%7 00%7 3ODFH FU\VWDO FORVH WR 8 & & 02'B5;...
- Page 121 & & & & 95() 287) 2876 & & 6+'1 X) 9 X) 9 9287 & & %<3 90,' $'& $'& & & & & X) 9 X) 9 ([WHUQDO UHIHUHQFH LV TXLHWHU WKDQ LQWHUQDO JLYHV /,1. /,1. 3RUW ,2 3RUW ,2 ELW QRLVH IUHH UDQJH ZLWK [ RYHUVDPSOLQJ...
- Page 122 released Document...
- Page 123 127( 8 0867 %( 352*5$00(' '$7( '(6&5,37,21 (;7B,2 6(( 5() 21 %20 )25 &255(&7 62)7:$5( $1' 5(9,6,21 /(9(/ )LUVW SURWRW\SH OD\RXW VRXUFH $& $& 72 3,1 &5$ &5$ 6HFRQG SURWRW\SH OD\RXW VRXUFH & & DQG 3UH 3URGXFWLRQ 0$> $OO FRPSRQHQWV DQG WUDFHV 72 3,1 &...
- Page 124 6(( 6+((7 )25 5(9,6,21 +,6725< 9B%$77 %'< %'< %$77B3/86 ,1387 $&B/(' 9'& 120,1$/ %'< %'< & & %$77B&+* & & -03 LPSOHPHQWHG DV D 9ROWV 9ROWV & & WUDFH EHWZHHQ ODQGV RI 4 RQ ERWWRP VLGH 02/(; 02/(; /2: (65 /2: (65 (;7B*1' /2: (65...
- Page 125 3803 & & 9B$1/ +& +& 3803 /9& /9& /9& /9& & & &/. ($58 ($58 & & & & & & & & 1,%3B6$)(7<B&75/ & & & & & & 95() %'< %'< 95() & & 7/& 7/& &' &' &...
Need help?
Do you have a question about the 506DN and is the answer not in the manual?
Questions and answers