Vmac VR70 Installation Manual
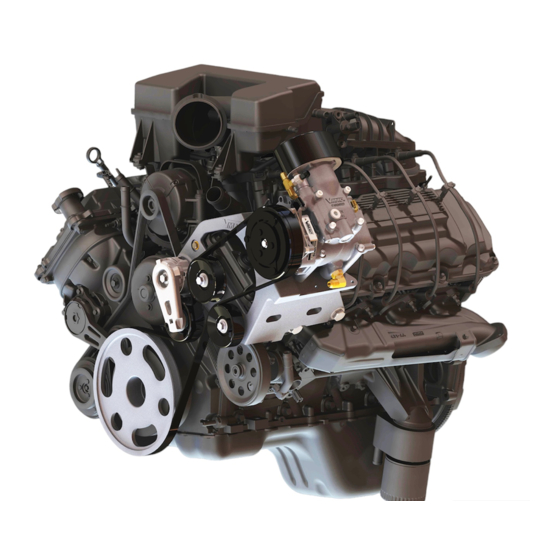
Underhood air compressor
Hide thumbs
Also See for VR70:
- Installation manual (80 pages) ,
- Owner's manual (48 pages) ,
- Information sheet (12 pages)
Table of Contents

Related Manuals for Vmac VR70


Summary of Contents for Vmac VR70
- Page 1 V R 7 0 U N D E R H O O D A I R C O MP R E S S O R I N S T A L L A T I O N MA N U A L S y s t e m V 9 0 0 0 9 4 2 0 0 9 - 2 0 0 7 D o d g e 2 5 0 0 - 3 5 0 0 5 .
-
Page 3: Table Of Contents
6.1 Before Starting the Engine Checklist........28 6.2 After Starting the Engine Checklist ........28 6.3 Setup, Performance Testing and Adjustments ....29 6.4 Auxiliary Air Receiver ............30 Accessory Products from VMAC ..........31 VMAC – Vehicle Mounted Air Compressors Toll Free: 1-888-241-2289 Fax: 1-250-740-3201... -
Page 4: Installation Manual For Vmac System V900094
If you have difficulty with the installation, contact VMAC. The VMAC warranty form must be completed and mailed or faxed to VMAC at the time of installation for any subsequent warranty claim to be considered valid. -
Page 5: General Information
Use of hoses other than those supplied or recommended by VMAC may cause compressor damage and may void your warranty. Please contact VMAC for replacement hoses and further information. -
Page 6: Part 1: Warranty And System Id
Complete the warranty form. The VMAC warranty form is located at the back of this manual. This warranty form must be completed and mailed or faxed to VMAC at the time of installation for any subsequent warranty claim to be considered valid. - Page 7 Figure 1.1 VMAC – Vehicle Mounted Air Compressors Toll Free: 1-888-241-2289 Fax: 1-250-740-3201...
- Page 8 Thoroughly clean the selected area before affixing the label (figure 1.2) Figure 1.2 To order parts, contact your VMAC dealer. Your dealer will ask for the VMAC serial number, part number, description and quantity. To locate your nearest dealer, call 1-888-241-2289.
-
Page 9: Part 2: Preparing For Installation
Remove the upper alternator mount and lifting lug, remove the lower alternator mount bolt and set the alternator aside. □ Remove the OEM crank pulley and scrape off the clear coat from the front face. VMAC – Vehicle Mounted Air Compressors Toll Free: 1-888-241-2289 Fax: 1-250-740-3201... - Page 10 Face the tee fitting towards the passenger side of the truck, and install the hose barb in the tee. Remove this plug Figure 2.1 VMAC – Vehicle Mounted Air Compressors Toll Free: 1-888-241-2289 Fax: 1-250-740-3201...
-
Page 11: Part 3: Installing The Tank
18 inches from the weld. □ Place the two L-shaped tank strap mounts under the C-clamps with the right-angle ends facing you and hanging over the edge of the work bench. VMAC – Vehicle Mounted Air Compressors Toll Free: 1-888-241-2289 Fax: 1-250-740-3201... - Page 12 Check tank alignment then tighten the C-clamp bolts. □ Slide the tank all the way up on the tank mount brackets (away from you) and tighten the mounting bolts. Figure 3.2 VMAC – Vehicle Mounted Air Compressors Toll Free: 1-888-241-2289 Fax: 1-250-740-3201...
-
Page 13: Installing The Tank Assembly
Install a 3/8 inch nut and washer on each cable, adjust the tank for best fit between the cab mounts and tighten the nuts. Install and tighten a second 3/8 inch nut on each cable as a lock. VMAC – Vehicle Mounted Air Compressors Toll Free: 1-888-241-2289 Fax: 1-250-740-3201... -
Page 14: Part 4: Installing The Cooler And Compressor
Tab on cooler will be bolted to the top of the body lift tab above passenger side frame. The cooler tab faces forward with oil ports facing up (Figure 4.2). VMAC – Vehicle Mounted Air Compressors Toll Free: 1-888-241-2289 Fax: 1-250-740-3201... - Page 15 Once coolant is seen coming out of the hose and/or port on the radiator, re- connect the hose and finish filling the reservoir to the marked level. VMAC – Vehicle Mounted Air Compressors Toll Free: 1-888-241-2289 Fax: 1-250-740-3201...
-
Page 16: Installing The Main Bracket And Compressor
Apply Loctite and install the M8 x 30 mm hex head bolt with flat washer through the bracket and into the front passenger side hole on the compressor. Torque the fasteners to specifications. VMAC – Vehicle Mounted Air Compressors Toll Free: 1-888-241-2289 Fax: 1-250-740-3201... -
Page 17: Connecting The Hoses
Route the tubes through the frame up to the compressor and connect them to the matching fittings on the compressor inlet valve. VMAC – Vehicle Mounted Air Compressors Toll Free: 1-888-241-2289 Fax: 1-250-740-3201... -
Page 18: Completing The Installation
Ensure the ribbed idler is installed with the narrow shoulder towards the bracket. Torque all fasteners to specifications. □ Install the VR belt (Figure 4.5). Figure 4.5 □ Install the fan spacer. VMAC – Vehicle Mounted Air Compressors Toll Free: 1-888-241-2289 Fax: 1-250-740-3201... - Page 19 Lay the supplied replacement fan in the centre of the shroud and pass the fan wire harness and steel sheath through the new hole in the shroud (Figure 4.5 - viewed from the front). VMAC – Vehicle Mounted Air Compressors Toll Free: 1-888-241-2289 Fax: 1-250-740-3201...
- Page 20 OEM fan shroud bracket. The spacer on the attachment bracket should face forward and sit below the locator (Figure 4.7). Use the OEM fastener. VMAC – Vehicle Mounted Air Compressors Toll Free: 1-888-241-2289 Fax: 1-250-740-3201...
- Page 21 Install the two OEM fasteners holding the fan shroud and the radiator to the radiator support. One of these fasteners also holds the radiator expansion tank. □ Install the upper radiator hose and intercooler tube. VMAC – Vehicle Mounted Air Compressors Toll Free: 1-888-241-2289 Fax: 1-250-740-3201...
-
Page 22: Adding Oil To The System
Secure them with nylon ties and use plastic loom as required. 4.5 Adding Oil to the System You must use the VMAC supplied and approved compressor oil in this system. Failure to use this special oil will result in damage to the compressor and will void your warranty. - Page 23 Install the fill plug in the inlet control valve and tighten it securely. Do not overfill the system. Overfilling the system with oil can flood the sight glass window and make the system appear empty. VMAC – Vehicle Mounted Air Compressors Toll Free: 1-888-241-2289 Fax: 1-250-740-3201...
-
Page 24: Part 5: Installing The Control Components
Part 5: Installing the Control Components Main Wiring Diagram VMAC – Vehicle Mounted Air Compressors Toll Free: 1-888-241-2289 Fax: 1-250-740-3201... -
Page 25: Installing The Control Box And Throttle Control
Unplug the cable from the foot pedal assembly and connect it to the throttle control box. Connect the throttle control box cable to the foot pedal assembly. □ Connect the interface harness to the matching connector from the control box. VMAC – Vehicle Mounted Air Compressors Toll Free: 1-888-241-2289 Fax: 1-250-740-3201... - Page 26 Connect the white wire with the bullet connector to the compressor clutch. □ Attach the relay to the truck with the supplied bracket and fasteners (Figure 5.1). Relay Ground Figure 5.1 VMAC – Vehicle Mounted Air Compressors Toll Free: 1-888-241-2289 Fax: 1-250-740-3201...
- Page 27 Locate fuse #33 in the fuse box on the driver side above the fender. □ Remove the fuse and install the fuse tap so that it connects to the hot side of the fuse (the bottom tab) VMAC – Vehicle Mounted Air Compressors Toll Free: 1-888-241-2289 Fax: 1-250-740-3201...
- Page 28 Figure 5.3 5.2.2 Manual Transmission □ Cut the long blue wire to about 6 inches, strip the end and connect it to the short blue wire with the crimp connector. VMAC – Vehicle Mounted Air Compressors Toll Free: 1-888-241-2289 Fax: 1-250-740-3201...
-
Page 29: Completing And Testing The Installation
If the truck fails the test, check the wiring to make sure that all the connections are correct and secure. If you require additional assistance, contact your local VMAC dealer. Call 1-888-241-2289 or 250-740-3200. VMAC – Vehicle Mounted Air Compressors... -
Page 30: Part 6: Finishing The Installation
□ Repeat this test in all gear selector positions to make sure that the engine does not idle up unless the selector is in Park or Neutral. VMAC – Vehicle Mounted Air Compressors Toll Free: 1-888-241-2289 Fax: 1-250-740-3201... -
Page 31: Setup, Performance Testing And Adjustments
(Figure 6.1). Figure 6.1 1. Install the test tool in the tank outlet fitting. If you are using the VMAC test tool, use the correct orifice fitting (small hole for VR70, large hole for VR150). VMAC – Vehicle Mounted Air Compressors... -
Page 32: Auxiliary Air Receiver
The line from the VMAC tank to the auxiliary air receiver must have a one-way check valve installed (part #3600078) to prevent blow back from the auxiliary tank and to stop moisture from entering the VMAC tank (Figure 6.2). -
Page 33: Accessory Products From Vmac
Accessory Products from VMAC The following accessory products for your VR compressor system are available from VMAC. For more information or to order these products, call toll free 1-888-241-2289 or local 250-740-3200. Eliminator Aftercooler Part Number A800070 Removes up to 80% of moisture from compressed air. - Page 34 This page intentionally left blank...
- Page 35 VMAC Product Warranty Registration This form must be fully completed and returned to VMAC at the time of installation. Warranty will be void if this form is not received by VMAC within 30 days of installation. VMAC Dealer Information Company Name: ______________________________________...
- Page 36 This page intentionally left blank...
- Page 37 This page intentionally left blank...
- Page 38 This page intentionally left blank...
- Page 40 Ma n u f a c t u r e d b y P H 2 5 0 - 7 4 0 - 3 2 0 0 F X 2 5 0 - 7 4 0 - 3 2 0 1 T F 1 - 8 0 0 - 7 3 8 - 8 6 2 2 1 3 3 3 K i p p R o a d , N a n a i mo , B C , V 9 X 1 R 3 C a n a d a w w w .
Need help?
Do you have a question about the VR70 and is the answer not in the manual?
Questions and answers