Table of Contents
Advertisement
Quick Links
Advertisement
Table of Contents

Related Manuals for Norcent DP5000

Summary of Contents for Norcent DP5000
- Page 1 DVD RECEIVER DP5000...
-
Page 2: Warning
TO PREVENT FIRE OR SHOCK HAZARD, DO NOT USE THIS PLUG WITH AN EXTENSION CORD, RECEPTACLE OR OTHER OUTLET UNLESS THE BLADES CAN BE FULLY INSERTED TO PREVENT BLADE EXPOSURE. TO REDUCE THE RISK OF FIRE OR ELECTRIC SHOCK, DO NOT EXPOSE THIS APPARATUS TO RAIN OR MOISTURE. -
Page 3: Precaution
PRECAUTIONS Do not block the vents Do not operate the DVD system in an enclosed cabinet, allow about 10cm (4 inches) of free space all around the player for adequate ven- tilation. Care of disc To clean a CD, wipe it in a straight line from the center to- wards the edge using a soft, lint-free cloth. -
Page 4: Precaution
PRECAUTIONS Recommended Measures for Optimum Picture Excellence This unit is a precision device that is constructed using extremely accurate technology. Soiling or friction affecting the pickup lens or disc drive can impair the image quality. At the worst, neither video nor audio will be played back. To obtain optimum picture quality, the player should be checked (cleaning and replacement of some parts) every 1,000 hours. -
Page 5: Table Of Contents
TABLE OF CONTENTS Warning ... 2 Precaution ... 3~4 General Information ... 7 Unpacking ... 7 Disc terminology ... 7 DVD region code ... 7 Disc handling and cleaning ... 7 Control and Function ... 8~10 Front panel ... 8 Back panel ... - Page 6 Record the model and serial numbers for this unit while it is easy to see them. These numbers are located on the back of the unit’s cabinet. Retain this information for future reference. Model No.: DP5000 Serial No.: Retain this information for future reference.
-
Page 7: General Information
General Information Unpacking Your Norcent DP5000 receiver carton should contain the following items: • One DVD receiver. • Five satellite speakers and a subwoofer. • Five speaker cables and a subwoofer cable. • One RCA cable with red/white/yellow color-coded connectors. -
Page 8: Control And Function
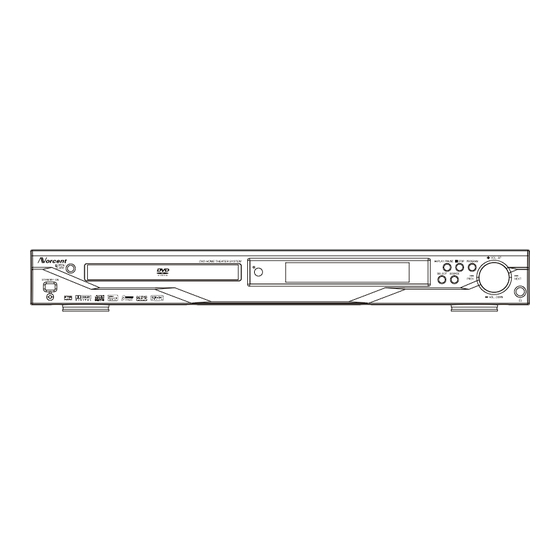
Controls and FRONT PANEL STANDBY-ON Press to power on (LED lights off) or off (LED lights on). OPEN/CLOSE Press to open or close the disc tray. DVD DOOR SELECT Press to select audio channel to view its level. SOURCE Press to select the relevant active mode: DVD, FM/AM, TV or AUX. -
Page 9: Remote Control
Controls and Functions REMOTE CONTROL OPEN/CLOSE Press to open or close the disc tray. SOURCE Press to select the relevant active mode: DVD, FM/AM,ATV or AUX. SETUP Press to enter or exit setup menu. TUNING + / - ( In disc mode, press to play a disc in fast reverse/forward mode. -
Page 10: Control And Function
Controls and 16 DISPLAY Press to display the information about the play- ing disc. 17 POWER Press to power on and off. 18 NUMBER (0~9) Press to select the items or settings directly. 19 P/I Press to activate or deactivate progressive function. -
Page 11: Connections
CONNECTIONS Placing the Speakers and Subwoofer The best surround effect will be achieved by placing each speaker at the same distance from the listening position. It is recommended to ar- range the speakers as shown below. Notes: • If speakers cannot be placed at equal dis- tances, refer to “Setting the Speaker setup”... -
Page 12: Connections
CONNECTIONS Connecting your player to the TV You can connect a TV to the DVD system in order to use this DVD system. You can connect other audio and audio/visual components to the DVD system in order to use the Home Cinema Audio system’s surround sound capabilities. -
Page 13: Playback Functions
BASIC PLAYBACK BASIC PLAYBACK CAUTION! • Do not move the unit during playback. Doing so may damage the DVD system. • Do not push on the disc tray or put any objects other than disc on the disc tray. Doing so may cause the unit to malfunc- tion. -
Page 14: Slow Motion Play
BASIC PLAYBACK Slow motion play Press the MEMORY/SLOW( back in slow motion. SF(slow forward) SR (slow reverse) For DVD discs: Press it repeatedly to select one of the follow- ing slow motion speeds: SF x 2 SF x 8 SR x2 PLAY Note •... -
Page 15: Repeat A-B
BASIC PLAYBACK For MP3 repeat track/album/disc: Press the REPEAT button repeatedly to select one of the following repeat modes: MENU ON: REPEAT ONE REPEAT ALBUM DISC REPEAT OFF MENU OFF: REPEAT ONE REPEAT DISC Notes • When operating this function, the OSD will display the operating information. -
Page 16: Setup Menu
BASIC PLAYBACK Setup Menu Press SETUP button to display SETUP MENU on TV screen. it enables you to customize the DVD system to suit your particular requirement. If the preferred options selected are not available on a disc, then the disc’s own preference will be used. IMPORTANT! To access the Preferences Setup menu, playback must be entirely stopped. -
Page 17: Setting The Speaker Setup
BASIC PLAYBACK Video Output Setting Video output selection enables you to choose the type of video output suitable for your DVD system. The default setting is S-VIDEO. S-VIDEO Select S-VIDEO if you have connected the S- VIDEO output to your TV using S-VIDEO jack. PR PB Y Select PR PB Y if you have connected the Pr Pb Y output to your TV using Pr Pb Y jack. -
Page 18: Setting The Audio Setup
BASIC PLAYBACK Setting the Audio Setup D.R.C D.R.C(Dynamic range control) Select the dynamic range compression to fit the individual listening situation of the audi- ence. The default setting is OFF. The variable range is from FULL, 7/8~1/8 or OFF. • FULL: Audio with fully compressed dy- namic range. -
Page 19: Setting The Preferences Setup
BASIC PLAYBACK • 48K: Playback a disc recorded at the sam- pling rate of 48kHz. • 96K: Playback a disc recorded at the sam- pling rate of 96kHz. Note: • Most discs are recorded at the sampling rate of 48kHz. •... -
Page 20: Password Changing
BASIC PLAYBACK Notes: • Before changing the parental control level, you must enter the preset password (4- digit code) to unlock this function. If the entered password is incorrect, you will not be able to change the level. • The lower the level is set, the more strict the limitation. -
Page 21: Tuner Features
TUNER FEATURES IMPORTANT! Make sure FM and AM antennas are connected. Tuning to Radio Stations 1. Press SOURCE button to switch to tuner mode: “FM” or “AM”. 2. Press and hold (TUNING -) or (TUN- ING +) until the frequency indication starts to change, then release. -
Page 22: Special Features
SPECIAL FEATURES Playing a Title 1. Press RETURN/TITLE while playing a DVD disc. The “TITLE MENU” will be displayed on the TV screen for a moment, and then the title menu appears. The contents of the menu vary from disc to disc. 2. -
Page 23: Move To Another Chapter/Title
SPECIAL FEATURES Move to another chapter/title Some disc may contain more than one title or chapter. If the disc has a title or chapter menu recorded on it, you can start playback from a desired point. When playing DVD discs. 1. -
Page 24: Selecting Surround Mode
SPECIAL FEATURES Selecting Surround Sound 1. Press SURROUND button to select: Playing a DVD disc – For a DVD disc with Dolby Digital signal, you can select: Stereo – For a DVD disc with DTS 5.1 signal, you can select: Stereo –... -
Page 25: Selecting The Subtitle Language
SPECIAL FEATURES Selecting the Subtitle Language This function can only be used for DVDs re- corded with multiple subtitle languages. – Press SUBTITLE repeatedly to select a desired subtitle languages. Notes: • The maximum number of subtitle languages stipulated by the manufacturer is 32. Audio Language and Channel Selection 1. -
Page 26: Setting The Sleep Timer
SPECIAL FEATURES Setting the Sleep timer The sleep timer enables the system to switch to standby mode automatically at a preset time. 1. Press the SLEEP button on the remote control repeatedly until it reaches the de- sired preset turn-off time. –... -
Page 27: Care And Maintenance
Care and Maintenance Caution ! The device is powered by dangerous voltage. The device must therefore be opened by authorized specialists only. All maintenance and service work must be carried out by autho- rized companies only. Unauthorized repair work may endanger the operator’s life. Any work on the device attempted by unauthorized persons voids the product's warranty. -
Page 28: Troubleshooting
TROUBLE SHOOTING If you experience any of the following diffi- culties while using the system, use this troubleshooting guide to help you remedy the problem. Should any problem persist, consult an authorized service center. No power • Check to make sure the power cord is firmly plugged into the power outlet. -
Page 29: Amplifier Section
Electrical Specifications AMPLIFIER SECTION Output power ... 600 W Total power - Front Left ... 80 W - Front Right ... 80 W - Center ... 80 W - Rear Left ... 80 W - Rear Right ... 80 W - Subwoofer ... -
Page 30: Main Unit
Electrical Specifications MAIN UNIT Power Supply Rating ... 120V / 60Hz Power Consumption ... 180W Dimensions (w x d x h) ... W430 x D350 x H48 (mm) Weight ... 5.58 kg SPEAKERS (front speakers/rear speakers) Rate impedance ... 4 ohm Speaker drivers ... -
Page 31: Limited Warranty
2. The warranty on a replacement player is the remainder of the warranty period on the original player. 3. If the original consumer purchaser discovers a defect, Norcent Technology will, at its option, repair the Home theater systems at no charge to the consumer, provided it is returned during the warranty period, with transportation charges prepaid, to Norcent Technology, Inc.
Need help?
Do you have a question about the DP5000 and is the answer not in the manual?
Questions and answers