Table of Contents
Advertisement
Quick Links
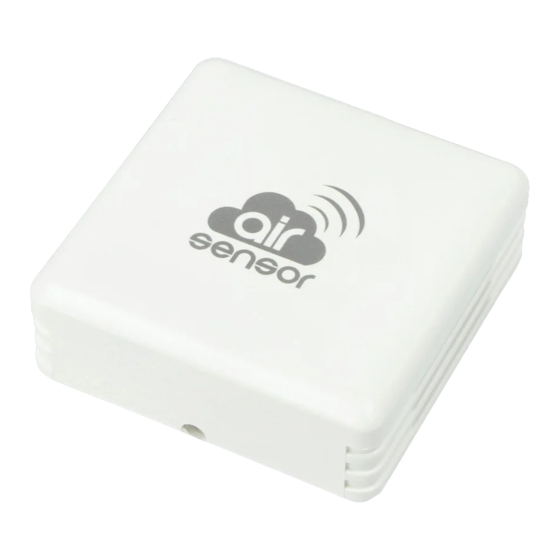
airsensor
air quality sensor with μWiFi technology
AIR QUALITY INDICATOR
SAFETY RULES
Improper connections may be dangerous, it can damage the
controller and loss of the warranty.
DANGER! Risk of electric shock! Even with the device turned off,
the outputs may be live. All assembly work should be ALWAYS
performed with the disconnected power circuit.
The installation of the device to a power mains that does not meet
the quality requirements defi ned by EN 50081-1, EN 50082-1,
UL508, EN 60950, will result in the loss of the warranty.
1
Disconnect supply voltage circuit before installing the controller. Remember
that any mounting works should be carried out when the main voltage is
disconnected (switch off the mains fuse or disconnect the power supply from
the socket).
The device should be mounted in a place protected from direct adverse
environmental conditions, in particular atmospheric precipitation. At the
same time, should be paid attention to ensuring a good air exchange around
the device. Remember that metallic elements (wires, housing parts) have a
negative influence on the range of the device, and consequently the comfort
of use. It is recommended that the device be mounted in a stable and fi
xed position, correctly oriented (according to the inscriptions on the casing),
fastened with screws, wall plugs or by means of a doublesided assembly
tape.
Remove the cover of the device by lifting it. Choose a power supply a 5V
USB connector located on the left side of the device or a 1224V AC / DC
mains adapter connected via wires to a plugin connector located in the right
part of the PCB (polarization is irrelevant). Connect the power wire to the
USB connector or plugin connector. Bringing in the power wire outside the
housing through the aperture in the inferior part, replace the housing.
WARNING!
Never connect at the same time power to the USB
connector and to the plugin connector. It may cause
damage to the device.
Turn on the device by switching on the power supply voltage (switching on
the main power supply circuit fuse or connecting the power supply to the
socket). The device will turn on the LEDs on white color for a few seconds
and then will change into a color depending on the air quality. Continuous
lighting in white color indicates the sensor error, which is also signaled by the
red status visible in the wBox application (more information about the wBox
application later in the manual). In this case, check the wire connected to the
sensor circuit board.
2
Download the free wBox application. If you have an Android mobile device,
you will fi nd the application in the Play Store. For iOS devices the application
is in the App Store.
By using your mobile phone or tablet, connect it to the device wireless
network. To do this, enter to your smartphone or tablet settings, then go
to setting of the WiFi network and find the network named „airSensor
xxxxxxxxxx" where xxxxxxxxxx is the serial number of the device. Connect
to this network.
Open the wBox application. A device will appear at the top of the screen. To
add it to the application, click on "+" on the right side of the name. To pre
configure the controller, click on the default device name.
You can also set the con guration using the web browser
of your phone / tablet. After connecting to the wireless
network of the controller, turn on the browser and go
to: www.blebox.eu
INSTALLATION - BASICS
FIRST START
user manual
3
The main controller screen shows current information from the air quality
sensor. Air quality is determined based on the measurement of particulate
matter concentrations PM2.5 and PM10 and is shown the worst value of
both. The current state of air quality is displayed in the upper part of the
screen in a colored icon and also in word status, and is signaled by colored
LEDs built into the device and it shows in the following way:
very good (intense green color)
good (light green)
moderate (light yellow)
sufficient (orange color)
bad (bright red)
very bad (intensive red)
At the bottom of the screen there is a table with numerical values of
particulate matter concentrations. Fields with concentration values PM2.5
and PM10 change its color in relation to the degree of exceeding the
standard in the color scale presented before, moreover, the percentage value
in relation to the value of the standard is presented in brackets. For example,
a reading (50%) means that the current air pollution concentrations is only
half of the acceptable value, while the indication (300%) means a 3fold
exceedance of the standard. Next to the percentage, the change trend is
also calculated, compared to the average of the last hour of measurements.
The trend is indicated by an up, down arrow or a horizontal line in the case
that no changes have been registered, it is only displayed after the sensor's
working one hour.
At the very bottom of the screen is presented the status of measurements
on the device. ""Last measurement"" means that the device displays
a measurement taken within a time not exceeding 10 minutes.
The device automatically performs another measurement every 10
minutes and displays the last air pollution concentrations value. This
behavior is dictated by the care of the sensor's lifetime due to the fact the
air pollution slowly changes over the time. It is also possible to manually
force the measurement. To do this, press the ""Refresh"" icon (two arrows)
in the upper right part of the screen. Within the first 20 seconds shows
the status ""Measurement in progress"", which next will be change to
""Current measurement"" and the concentration values will be updated.
To switch the device into continuous measurement mode, in which
measurements are taken every 1 second, hold down the ""Refresh"" icon for
over 3 seconds. The icon background will turn gray and the device will start a
continuous measurement, the device will start the continuous measurement,
which will last until the moment it returns to the main screen of the
application or the browser page is closed. Leaving the device in continuous
measurement mode, should remember about the lifetime of the measuring
system, estimated at approx. 8000 hours.
Historical measurement data are only available for sensors mounted outside,
configured in remote access mode, with a correctly set location and they are
stored only on BleBox servers. They are available by clicking on the diagram
icon in the upper right corner of the screen.They are also presented on the
map available on blebox.eu
4
Go to „Settings" (icon in the upper right corner of the screen). In the "Main
settings" section, you can change the device name which is visible in the
wBox application. The option "Signal LED on" allows you to turn on the LEDs
built into the device.
In order to communicate with a device being out of the local WiFi network,
from anyplace in the World, via wBox applications, must be set to ""Yes"" the
option ""Enable remote access"". Setting this option to ""Yes"" also means
giving consent for the sending of the measurement data to a public map of
the air pollution available on the web page blebox.eu and the archiving of
this data together with its location. Setting the ""No"" option will result in the
lack of the access to the controller when it is out of the local network and
the lack of access to historical data only the current values will be visible.
Setting the "Enable event log" option to "Yes" will cause the device to record
events (e.g. sending the notification set in the "Actions" section) in the
BleBox cloud system. This allows the history of the events to be viewed later
also when the controller is offline.
MEASURING DATA
very good
good
moderate
sufficient
bad
very bad
OTHER DEVICE SETTINGS
Advertisement
Table of Contents

Related Manuals for BleBox airsensor


Summary of Contents for BleBox airsensor
- Page 1 (e.g. sending the notification set in the “Actions” section) in the network of the controller, turn on the browser and go BleBox cloud system. This allows the history of the events to be viewed later to: www.blebox.eu also when the controller is offline.
- Page 2 “Extended instructions for wBox devices”, while all the technical documentation API of the wBox controllers is available at: http:/ / effective range of the detection for PM2.5, 0500 μg/m³ technical.blebox.eu dimensions 71 x 71 x 27 mm NOTIFICATIONS from 20 to + 50°C protect of the...
- Page 3 The software version number, hardware version and device identifier can be read at the bottom of the settings screen. For more information visit our website www.blebox.eu Or send us an email to: info@blebox.eu Support is available at support@blebox.eu made in Europe...
Need help?
Do you have a question about the airsensor and is the answer not in the manual?
Questions and answers