Table of Contents
Advertisement
Advertisement
Table of Contents

Subscribe to Our Youtube Channel
Related Manuals for HATTAT 266 G


Summary of Contents for HATTAT 266 G
- Page 2 INDEX SERIAL NUMBER OF YOUR TRACTOR E.3.1. Gear levers A. TO THE USER E.3.1.1. Transmission (Main gear positions) B. SAFETY PRECAUTIONS E.3.1.2. Transmission (High and slow gear option) B.1. Safety rules E.3.2. Clutch pedal B.1.1. Protective structure in cases of rollovers E.3.3. Brake pedals B.1.1.1.Usage E.3.3.1. Driving brake B.1.1.2. Damaged ROPS E.3.3.2. Parking brake (Handbrake) B.1.2. Preventing leakages E.3.4. Differential lock lever B.1.3. Fuel safety E.3.5. IPTO lever B.1.4. Carrying reserve loads safely E.3.6. Hydraulic control levers B.1.5. To get on and off the tractor E.3.6.1. Draft control B.1.6. Using the safety chain E.3.6.2. Position control B.1.7. Canopy E.3.6.3. Draft control C. GENERAL DEFINITION E.3.6.4. Adjustable stabilizer (Restriction screw) C.1. View of tractor E.3.7. Hand throttle C.2. Maintenance E.3.8. Foot throttle C.2.1. Fee free maintenance E.3.9. Driver’s seat C.3. Engine E.4.0 Inside of cabin view C.4. Transmission E.4.1 Control panel C.4.1. Clutch ...
- Page 3 INDEX H.1.5. Filling water to rear tire H.3.0. Using of air conditioner H.1.6. Fuel cleaning and storage I. IMPLEMENT AND CONNECTORS H.1.7. Electrical equipment I. 1. Drawbar with oscillation H.1.7.1. Trailer socket I.2. Three point linkage system H.1.7.2. Headlamp adjustment I.2.1. Lifting lift H.1.7.3. Replacement of bulbs I.2.2. Lowering link H.1.7.3.1. Replacement of headlamp bulb I.2.3. Adjusted top link H.1.7.3.2. Replacement of plow headlight bulb I.2.4. Telescopic tension link H.1.7.3.3. Replacement of rear and front sign. bulb I.2.5. Drawbar with holey H.1.7.3.4. Bulb power I.3. Removing and fitting of implements of tractor H.2. Maintenance in the authorized service resp. I.3.1. Procedure of linking implement H.2.1. Fuel system I.3.2. Removing operation sequence of implement H.2.1.1. Fuel injectors I.4. Exterior hydraulic control valve (Spool valve) H.2.1.2. Fuel filter I.4.1. Description H.2.2. Biodiesel fuel use I.4.2. Usage of single‐acting cylinders H.2.3. Cooling system I.4.3. Usage of double‐acting cylinders H.2.3.1. Radiator I.4.4. Usage of hydraulic engine H.2.3.2. Coolant liquid I.4.5. Applications requiring high oil volume H.2.3.3. Antifreeze J. ROPS AND CANOPY H.2.3.4. Freezing ...
- Page 4 TRACT TOR CHASSIS S NUMBER BRAN D STICKER M MODEL STICK KER IDEND IFICATION P PLATE: It is t he aluminum m plate whic ch is riveted on HA T T A T KORUYUCU YAPI Tİ İPİ HATTAT HC105 KABiN SERİ NO KORUY YUCU YAPININ TAKILACAĞI the rig ht rear side f for cab mode els. TRAKT TÖR MARKA, TİP VE TİCARİ OECD ONAYI ‐‐‐ İSİMLERİ AT TİP ONAY NO HATTAT TRAKTÖR İMALATÇI FİRMA SANAYİ TİCARET A.Ş. Identif ication plate...
- Page 5 A. TO THE USER Thank you for choosing Hattat tractor. We hope that your selection will make you happy in your life. As your agriculture partner Hattat Traktör, we also try to provide you reliable service support and quality and efficiency. This manual is prepared especially for our users. The purpose is that the owner or driver of the tractor uses the vehicle safely. If the information given is followed, your tractor may be used for years as it is according to the traditional Hattat quality. Delivery of the tractor by the dealer gives the opportunity for ...
- Page 6 Delivering the tractor in operable conditions in the service and regularly making the maintenance will mainly prevent malfunctions. Nevertheless, if you face with any malfunction during the guarantee period: Immediately notify Hattat Traktör Authorized Dealer / Service and give the model and serial number of your tractor. Immediately notifying the malfunction is extremely important; if the malfunction is not ...
- Page 7 Hattat Traktör service which is closest to your new location are transferred to the new service. If you leave the region where the original service makes ...
-
Page 8: Safety Precautions
done by the service personnel authorized by When the tractor is designed, safety of the Hattat Traktör. operator is prioritized. Steps and handles are If equipment or balance weights are attached located for easing the getting on. The tractor has to the front part of the tractor, the rear axle various safety apparatus; e.g. belt and pulley ... - Page 9 B. SAFETY PRECAUTIONS always clean and operable. Note that areas. headlights should be correctly adjusted. Trailer load: the loads should be attached correctly and safely for the tractors with Carbon monoxide: Never operate the engine trailer. Besides it should not block the lamps, in a closed location for it may cause carbon driver's visibility and reflectors. Loads monoxide intoxication. ...
- Page 10 B. SAFETY PRECAUTIONS work area. There is a danger of tractor rolling hydraulic system should be grounded during over when the loader is lifted. The driver maintenance. should leave the front loader on ground position before getting off the tractor. Attaching the equipment: Care should be Besides ...
- Page 11 B. SAFETY PRECAUTIONS operation directives. Keep an eye on the recommended are applied to the indicator lamps on the dashboard. connections. Hydraulic connections: It is required that Don’t attach chain, ropes or cables for equipment connected to hydraulic system drawing purposes to ROPS. This causes that are grounded during attaching, removing the ...
- Page 12 B. SAFETY PRECAUTIONS B.1.3. Fuel safety The fuel should be filled carefully; it is very flammable. When refueling, don’t come close with cigarettes or open flames. Fill the fuel tank in open air. Before filling the fuel, stop the engine. Clean oils and fuels spilled on the machine. ...
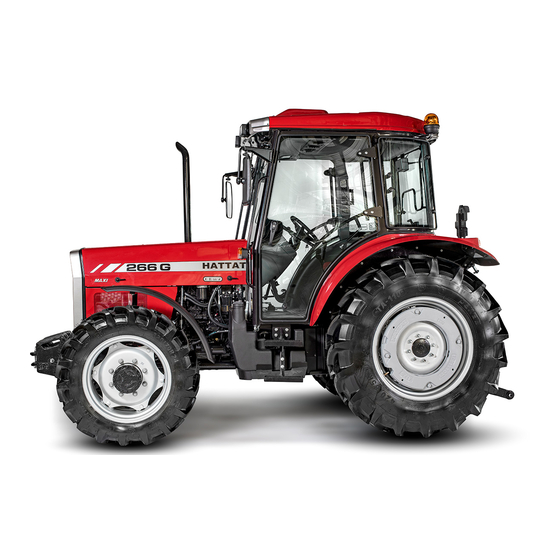
- Page 13 C. GEN NERAL DEFIN NITION C.1. View of Tracto Hattat 266G G / 275S / 2 285S / 295 / 305 / 398 8 ...
-
Page 14: General Definition
C. GENERAL DEFINITION Right Side View of Tractor 1 3 Exhaust Exhaust manifold Turbocharger Air filter Fuel cooler Condenser Intercooler Radiator 2 Hood fume AC Compressor Alternator Hydraulic and Steering Pump AC Pipes Exhaust insulation 14 13 12 11 10 ... - Page 15 C. GEN NERAL DEFIN NITION ear View of Hattat 266 6G / 275S / 285S Tracto ors 8 2 3 6 7 4 14 17 12 16 13 Cab Beacon Tool box Window‐m mirror Lowering link Stop lamp ps Lifting link Adjustable e top link Side tension lin k ...
- Page 16 C. GEN NERAL DEFIN NITION Rear View of Hattat 2 95 / 305 / 3 398 Tractor r s 3 4 5 6 7 9 10 11 12 ...
- Page 17 C. GENERAL DEFINITION Front View of Tractors 8 6 Front working light Exhaust Side mirrors Drawbar pin Front weights Support Mudguard Rear weight – 50kg. ...
- Page 18 C. GENERAL DEFINITION C.4. Transmission C.2. Maintenance The tractor should be maintained correctly to C.4.1 Clutch operate perfectly. The necessary daily lubrication and routine controls may be performed by the Clutch is a single‐stage in IPTO models. This type of driver. In situations where special adjustments and PTO is controlled mechanically repair procedures are required which are required C.4.2 Rear Axle and Transmission an expert service technician and usage of related ...
-
Page 19: Hydraulic System
Tractor has mono‐block, mobile valve with two sections. In order to quickly mounting and dismounting the hoses to the valve, 4 quick coupling connection sleeves are mounted to the valve block behind the tractor as a standard for Hattat 266G / 275S / 285S. For Hattat 295 / 305 / 398, there are 8 quick coupling connections. In Hattat 266G / 275S /285S; There are two pumps, one of them (tandem‐... - Page 20 D.TECHNICAL SPECIFICATIONS 266G/275S/285S MODEL 266G 275S 285S Engine Emission type Stage3A Engine Brand/Type Perkins/1103D-33TA Perkins/1104D-44TA Maximum Engine Power kW/BG/rpm(ISO14396) 50,0/68/2200 55,5/75/2200 60,5/82/2200 Maximum Engine Torque Nm/rpm 280/1400 294/1400 352/1400 Cylinder Volume(cm3)/Cylinder Number 3.300/3 4.400/4 Cylinder Diameter x Stroke(mm) 105/127 Air Filter Type Dry-type (Dual element) Aspiration Turbo charged and Intercooler...
-
Page 21: Hydraulic Levers
D.TECHNICAL SPECIFICATIONS 266G/275S/285S PTO Usage Independent power take‐off (IPTO) takes its movement from the engine. The engine must revolve 1890 rev/min to be revolved PTO with 540 rev/min. IPTO can be engaged or disengaged as hydraulic with only control lever. PTO shaft operates completely as Hydraulic Levers independent from clutch in IPTO tractors. There are no second Control system functions of hydraulic levers: clutch lining in clutch and second Draft ... - Page 22 D.TECHNICAL SPECIFICATIONS 266G/275S/285S Maximum rotation angle of wheel (if assembled): To right 50 degree 2WD 27 degree 4WD Tour number of steering wheel 2,2 tour 2WD 1,75 tour 4WD To left 48 degree 2WD 35 degree 4WD Tour number of steering wheel 2,2 tour 2WD 1,125 tour 4WD ...
- Page 23 D.TECHNICAL SPECIFICATIONS 295/305/398 MODEL Engine Emission type Stage3A Engine Brand/Type Perkins/1104D-44TA Maximum Engine Power kW/BG/rpm(ISO14396) 68/92/2200 74,9/102/2200 81/110/2200 Maximum Engine Torque Nm/rpm 393/1400 416/1400 430/1400 Cylinder Volume(cm3)/Cylinder Number 4.400/4 Cylinder Diameter x Stroke(mm) 105/127 Air Filter Type Dry-type (Dual element) Aspiration Turbocharged and Intercooler Differential Lock &...
- Page 24 D.TECHNICAL SPECIFICATIONS 295/305/398 PTO Usage Independent power take‐off (IPTO) takes its movement from the engine. The engine must revolve 1902 rev/min to be revolved PTO with 540 rev/min. IPTO can be engaged or disengaged as hydraulic with only control lever. PTO shaft operates completely as Hydraulic Levers independent from clutch in IPTO tractors. There are no second Control system functions of hydraulic levers: clutch lining in clutch and second Draft ...
- Page 25 D.TECHNICAL SPECIFICATIONS 295/305/398 Maximum rotation angle of wheel (if assembled) To right 27 degree 4WD Tour number of steering wheel 1,75 tour 4WD To left 35 degree 4WD Tour number of steering wheel 1,25 tour 4WD ...
-
Page 26: Starting And Operating
E. STARTING AND OPERATING E.1. Engine For Platform Models, Turn the ignition switch from A position E.1.1. General to B position (In this case, the charging and oil warning lights should illuminate.) If you want the engine to serve well for many years; Press the starter by turning the ignition ... - Page 27 Do not move tractor unless engine reaches While your tractor is between the first 25 and normal operating temperature while engine 50 operating hours, make sure the first is cold. maintenance by going to the nearest Hattat Change the oil filter at each engine oil Traktör authorized service. changing. ...
-
Page 28: Instrument Panel
E. STARTING AND OPERATING E.2. Instrument Panel Figure 16 1. Slow – fast gear lever 2. switch Headlight and horn In rainy weather, using of protective 3. Instrument panel cover over the instrument panel and in 4. cases where the tractor is parked for an Manometer ... - Page 29 E. STARTING AND OPERATING E.2.2. Instrument Panel Figure 18 1. Digital display framework 2. Fuel level indicator: It shows amount of remaining fuel in the fuel tank. 3. Tachometer: It shows the speed of the engine. 4. Temperature gauge: Black lines indicate the limits for the normal operating temperature. If the needle exceeds the red line, stop the tractor, continue to run the engine at idle and wait for the temperature to fall to the black line. 5. Park –lighting lamp: This warning lamp illuminates when the parking lights are on. 6. Trailer signal lamp: If the trailer is connected to tractor with plug, the lights illuminate when the signal is given for turning. Also, this warning illuminates while hazard is on. 7. Right and left signal lamp: When the signal is given and the hazard is on, it illuminates. 8. Warning lamp: 9. Main beam: While highlights are turned on, this warning light illuminates. 10. Differential lock light: It indicates whether the differential lock is activated. 11. 4x4 lamp: It indicates whether the four‐wheel drive is activated. 12. Park brake lamp: When the hand brake is pulled up, the warning lamp lights up. 13. Engine oil pressure light: In cases where the engine oil pressure is low, this warning light illuminates. Normally the light should illuminate a short time then when the engine is running, the light should be off. 14. Heater plug light: This warning light illuminates to whether heater plug is activated in cold weather or while the engine is cold. 15.
- Page 30 E. START TING AN ND OPE ERATIN The key on the left side o f the dashb board 2.3. Signal L Light (figur re 21) functi ons are as fo ollows: Right t turn: 1. location: P ark lights 2. location: D Dipped beam headlight 3. location: T he high beam m headlight Over rhead press: ...
- Page 31 E. START TING AN ND OPE ERATIN E.3.1 1.2. Transmis sion (High an d Slow Gear O Option) When n working w with your tra actor depen nding on Locking the so oil structure, , it is recom mended to u use slow gear ( (1), in the fie eld and high g gear (2) in th he way. Select tor positions s(Figure 23) 1: Slow ...
- Page 32 E. START TING AN ND OPE ERATIN 3.5. IPTO Ha andle IPTO (Ind dependent P Power Take‐O Off) Lock D Disengagem ment IPTO pro ovides driver r to engage or disengage e the 1. W When you ge t rid of spin ning, press t the lever clutch pe edal and PTO O which is in ndependent from or once to do ownwards w which is show wn by the transmis ssion accord ingly. ...
- Page 33 E. START TING AN ND OPE ERATIN N G E.3.6. Hy ydraulic Con ntrol Levers Make s sure that no one around the tractor r before starting any hydraulic control. Figure33 Figure 30 Figure34 Figure3 31 ...
-
Page 34: Draft Control
E. STARTING AND OPERATING E.3.6.1. Draft Control E.3.6.2. Position Control DRAFT CONTROL (Outer lever):(Figure30/1) (Figure 30/2) Position control is adjusted by Operates in the Yellow (Draft) range of the moving on the control mechanism (position and quadrant and is used to control the working transport) and constant pumping strip. depth of soil‐engaging implements. The further Ground ... - Page 35 E. STARTING AND OPERATING E.3.6.3. Draft Control E.3.9. Driver’s Seat (Figure 31) It is used to adjust velocity of fall of For Cab Models three‐point linkage. If the lever is rotated clockwise, fast motion happens. The opposite direction is slow motion. The control is very sensitive NOTE therefore turn it so slowly. E.3.6.4. Adjustable Stabilizer (Restriction Screw) Hand knobs (3, figure 30, 32, 33) are used to set ...
- Page 36 E. START TING AN ND OPE ERATIN 4.0 Inside o of Cabin Vie 4.1 Control Panel E.4.2 Contr ols on the R Right Pillar Front t panel sectio on of cabin i nside as sho wn in the figure e above. 1 4 5 6 5 ...
- Page 37 E. STARTING AND OPERATING E.4.1 – E.4.2 Usage of Controllers in Cabin (1)Hand Throttle: Full throttle (arrow direction) Headlight dipper: Main beam, when pushing the Null position (reverse of arrow direction) lever to the outermost position away from the (2) Flasher: This switch has two position, pressing driver. the side without a figure means that is disabled; Dipped beam: When pulling the lever into the pressing to the side with triangle figure, that front ...
- Page 38 E. START TING AN ND OPE ERATIN E.4.3 Con ntrols on th he Left Side .4.4 Contro ols on the R ight Side 266G G – 275S – 285 5S 1 3 1: Ha and brake 2: 4x4 4 (Engageme ent‐Disengag gement) 3: IPT TO lever‐eng gagement/di isengageme nt PTO 95 – 305 ‐ 398 4: IPT TO 540 – 540 0E (266G‐275 5S‐285S mod dels) ...
- Page 39 E. START TING AN ND OPE ERATIN 4.3 – E.4.4 U Usage in Ca 1) Hand Bra ake: To app ply the parki ing brake, pull the lever upw wards. The brake is released by pushing g the butto on at the ...
- Page 40 E. START TING AN ND OPE ERATIN 4.5 Roof Co nsole E.4.6 Driv ver Seat of Cabin 5 1 2 3 1: Ve ntilation hos ses (extra eq quipment, ro of 3 heati ng fan) 2: Fo r raising the sun visor 1: Setting g, forward a nd rearward d 3: Fo r decreasing the sun viso or. ...
- Page 41 (2) to maintain a comfortable temperature. 4. Reduce the fan (1) speed to obtain a comfortable temperature. E.4.8 Noise Level Note: The efficiency of the air conditioning can be increased by keeping the recirculation Hattat 266G – 275S – 285S 85,4 dB control knob (3) in position. Hattat 295 – 305 ‐ 398 85,9 dB ...
- Page 42 Attac ch the nega tive termina al from the s starter In ou ur Hattat mo odels and in some of ou ur models, engi ne to the negative (‐) ) terminal o of the the c ircuit breake...
-
Page 43: Periodical Maintenance
F. PERIODICAL MAINTENANCE PERIODIC PERIODIC MAINTENANCE IN THE PERIODIC MAINTENANCE MAINTENANCE IN THE SERVICE RESPONSIBILITY (HOURS) USER’S RESPONSIBILITY 250 750 Hours 500 1.000 Each 10 Each 50 1.250 ORDER 100 1.500 2.000 Hours Hours 1.750 2.500 3.000 MAINTENANCE 2.250 (Figure 38) 2.750 Check the engine oil level. Fill it if 1 ... - Page 44 F. PERIODICAL MAINTENANCE PERIODIC PERIODIC MAINTENANCE IN THE PERIODIC MAINTENANCE MAINTENANCE IN THE SERVICE RESPONSIBILITY (HOURS) USER’S RESPONSIBILITY 250 750 Hours 500 1.000 Each 10 Each 50 1.250 ORDER 100 1.500 2.000 Hours Hours 1.750 2.500 3.000 MAINTENANCE 2.250 2.750 Check the PTO clutch travel. If required, 18 ...
- Page 45 F. PERIODICAL MAINTENANCE PERIODIC PERIODIC MAINTENANCE IN THE PERIODIC MAINTENANCE MAINTENANCE IN THE SERVICE RESPONSIBILITY (HOURS) USER’S RESPONSIBILITY 250 750 Hours 500 1.000 Each 10 Each 50 1.250 ORDER 100 1.500 2.000 Hours Hours 1.750 2.500 3.000 MAINTENANCE 2.250 2.750 36 Check chassis bolts and nuts. Checking the clearance settings of the 37 ...
-
Page 46: Lubrication Table
G. LUBRICATION TABLE SIRA LUBRICATION POINTS and GREASE FITTINGS (Figure 39) LUBRICATION FREQUENCY 1 Greasing of 4WD centre housing. Every 50 hours 2 Every 50 hours Greasing of right and left lifting link. Right (1) – Left (1) – 266G ‐ 275S ‐ 285S Every 50 hours Greasing of right and left lifting link. Right (2) – Left (2) – 295 – 305 – 398 3 Every 500 hours Greasing of gearshift joints. 4 Every 50 hours Greasing of bearing on the housing of the clutch and brake pedals. Table 6 RECOMMENDED OILS OPERATING PLACE OF USE SPECIFICATION AMOUNT RANGE Less than ‐5 °C Oils between 10W and 10W ‐ 30 Shell Rimula ENGINE ‐4 °C / +27 °C Oils between 10W ‐ 30 and 20W ‐ 50 8 liter 15W 40 +18 °C above ... - Page 47 G. LUBRICATION TABLE ...
-
Page 48: Maintenance And Adjustments
H. MAINTENANCE AND ADJUSTMENTS H.1. Maintenance in the User’s Responsibility H.1.1.Daily Maintenance By parking the tractor, wait 15 minutes after stopping the engine. Check the dipstick (2) as it is shown in figure 40. The oil level must be between the markings on the level control bar. If missing, fill with appropriate oil from oil filler tube (1). Do not fill the radiator with radiator water till the end. The water level must be (2‐2,5 cm) below from the top tank surface of the Figure 41 ... -
Page 49: Air Filter
H. MAINTENANCE AND ADJUSTMENTS 5. Check the battery electrolyte level. Fill it with Replace the air filter outer element (the pure water, if missing. The filling level must service filter) (Figure 44/1) with the new one be about 1 cm above on the plate. Never fill after cleaning 3 times. If it is damaged, replace up to the end. (Figure 47) with the new one. ... - Page 50 H. MAINTENANCE AND ADJUSTMENTS Figure 45 Figure 48 H.1.3. Air Discharge from the Fuel System Fuel tank of tractor is produced to discharge the air that is inside, even in cases where fuel reduces and tractor works in sloping field. While tractor is running, there is continuous fuel flow from filters to tank. This flow provides existing air to discharge from tank cap. In cases where air getting trapped in the tank due to the end of the fuel tank of the fuel system; ...
- Page 51 H. MAINTENANCE AND ADJUSTMENTS Basınç Basınç Ön lastik Arka lastik The same type and brand tires (bar) (bar) must be used on both sides. Do not use radial tire and cross ply 340/85R24 1.6 420/85R34 tire at the same time. 320/85R28 1.6 380/85R38 ...
- Page 52 H. MAINTENANCE AND ADJUSTMENTS H.1.6. Fuel Cleaning and Storage Provide to discharge rest of the water by compressing air from union. Fuel used must be very clean by reason of being precise structure of the fuel circuit. When the Inflate the tire with usual air pressure by foreign matter that is inside the fuel do not rest, disassembling union and assembling the valve they do not subside. nipple. It is necessary to rest the fuel at least one week Filling Antifreeze Water to Tire: ...
-
Page 53: Headlamp Adjustment
H. MAINTENANCE AND ADJUSTMENTS H.1.7. Electrical Equipment The points marked on the wall or curtain that will be center of beam, adjust each headlight H.1.7.1. Trailer Socket separately by closing (covering) the other light. Trailer socket is assembled in back of tractor in After the center of the light beam marks order to be used in necessary lightening and the boundaries of the beam horizontally and signal. vertically, this distance can be found by dividing 1. Left signal ... - Page 54 H. MAINTENANCE AND ADJUSTMENTS Do not keep the halogen bulb Replace the bulb and reassemble the with bare hands when the headlamp by doing reverse of the above halogen bulb is assembled to process. rear lamp otherwise the bulb can be exploded. Check whether the light is on or off. H.1.7.3.3. Replacement of Rear and Front Signal Bulbs ...
- Page 55 H. MAINTENANCE AND ADJUSTMENTS H.2. Maintenance in the Authorized Replace the washer (7) which is placed on Service Responsibilities the cylinder head. H.2.1. Fuel System Replace the O‐ring seal (6) which is placed on the injector (1). H.2.1.1. Fuel Injectors Assemble the injector to the cylinder Be sure to test the fuel injectors every 1000 head after the clip is placed on the injector. hours, replace if required. ...
-
Page 56: Cooling System
H. MAINTENANCE AND ADJUSTMENTS H.2.2. Biodiesel Fuel Use Tighten the bolt by assembling. Activate the pump to fill the filter again. Bio‐diesel fuels are classified according to the European standard EN 14214. B5 with %5 herbal fuel ratio in the engine of your tractor is allowed to use bio‐diesel fuel. Not allowing to use biodiesel in cases where the herbal fuel ratio is higher than the others which are located outside of this range and also damages that may occur the related parts in the fuel system are excluded ... - Page 57 H. MAINTENANCE AND ADJUSTMENTS Always keep the antifreeze cap closed and Clean the back of the radiator. Remove keep out of the reach of children. the side panels to come out dirties completely. Avoid skin and eye contact with antifreeze. Press down the radiator cap to remove and turn it counterclockwise slowly to discharge Wear suitable protective clothing and gloves. the pressure before removing the cap. This ...
-
Page 58: Engine Oil Level
H. MAINTENANCE AND ADJUSTMENTS H.2.4. Engine Oil Wait the all old oil to drain, H.2.4.1. Engine Oil Level Tighten the drain plug by assembling, Check the oil level before running the engine and Change the engine oil filter, starting work each day (Figure 64). Stop the engine, if it is running and wait the flow of oil to Fill up with the appropriate oil from the sump. oil filler tube until the oil reaches the level ... -
Page 59: Steering System
H. MAINTENANCE AND ADJUSTMENTS Assemble the new filter element (1) and fix it manually. Do not use deforming tools like Number 1 cylinder is located in NOTE wrench by doing this operation. front of the engine. Provide the engine to rotate with starter engine until the oil pressure light is off. If required, fill up it with oil by doing leakage and oil level control. ... - Page 60 H. MAINTENANCE AND ADJUSTMENTS H.2.8. Clutch H.2.8.2. IPTO Clutch Adjustment H.2.8.1. Drive Clutch Adjustment This adjustment is not necessary for IPTO and Check the drive clutch adjustment every 100 single‐stage clutch tractors. hours. (Figure 71) H.2.9. Connection Filter Pump The clutch pedal must be checked frequently during the first 50 hours of work, required Make the necessary maintenance by removing adjustments ...
- Page 61 H. MAINTENANCE AND ADJUSTMENTS wheel rods and connection rod or not. Set the wheels to go straight forward. Control: Make a mark lateral to the front edge line of both tires from the center of the tire tread at the same level with the tire hubs. Measure the distance between marks. Move the marks, this time; they are at the same level with again the tire ...
- Page 62 H. MAINTENANCE AND ADJUSTMENTS Raise the front end with a jack under the center When changing tire width or mounting a front loader, of the front axle. always ensure that the tires have the free movement that ‐ Loosen and remove the bolts of the front axle (1) IMPORTANT will be locked fully at both and tie rods (2) directions and the front axles and tires can be completely ‐ Pull out the axle until the desired track width is ...
- Page 63 H. MAINTENANCE AND ADJUSTMENTS Bring the wheel to the oil drainage position. H.2.20. Changing oil in the driven front axle (Down position of the plug indicated by no. 1) Remove the drainage plug, which is marked, and drain the oil to a suitable cap. Bring the wheel to the oil filling and control position. (Position of the plug indicated by no. 1) Fill with new oil up to the level of the control ...
- Page 64 H. MAINTENANCE AND ADJUSTMENTS Maintenance H.3.0. Using Of Air Conditioner To prevent locking of the compressor, use the air conditioning for a few minutes at least once a month with the engine stop control in the off position. Push the engine stop control knob in and allow the engine to idle for a few minutes. Do not attempt to disassemble any part of the IMPORTANT air conditioning system. ...
- Page 65 H. MAINTENANCE AND ADJUSTMENTS Check the condenser (1), the expander (2) or pressure side (2) will be hot and the low‐pressure hoses and couplings whether any sealing or not. side (3) cold. Also, check the cleanliness of the condensation water outlet pipe (3). A few bubbles appear intermittently, at intervals Avoid contact with the refrigerant. If of 1 to 2 seconds. INSUFFICIENT REFRIGERANT. refrigerant enters the eyes a doctor should ...
- Page 66 I. IMPLEMENT AND CONNECTORS I.1.Drawbar with Oscillation It can be used with many types of towed elements. It is assembled by 2 pieces pin to the flange that is connected to the differential housing with 4 pieces bolts. The end side is fork type to be connected the implements. (Figure 80) It ...
- Page 67 I. IMPLEMENT AND CONNECTORS I.2.4. Telescopic Tension Link Telescopic tension link prevents the implement to move much between rear wheels. It should be linked correctly. (Figure 86) Figure80 Top link (Hydraulic: 295‐305‐398 models) Top link (Mechanic: 266G‐275S‐285S) 2. Lifting lift Figure 86 3. Hydraulic auxiliary cylinder (295‐305‐398) There is no aux. cyl. (266G‐275S‐285S) I.2.5. Drawbar with Holey 4. Side tension links 5. Lowering link I.2.3. Adjusted Top Link If desired, drawbar mechanism with holey can be linked to the ends of the lower links. Parts of this Height of the top link with screw can be mechanism are not provided with the tractor. ...
- Page 68 I. IMPLEMENT AND CONNECTORS I.3.2. Removing Operation Sequence of Implement 1. By lowering the implement, put it to the suitable place that will provide the front end to keep constant. 2. Stop the engine. 3. Disconnect the top link from tractor. 4. Disconnect the lowering link on each side. Position control lever must be used by removing or linking the Figure 87 implement to tractor. This situation ...
- Page 69 I. IMPLEMENT AND CONNECTORS I.4. Exterior Hydraulic Control Valve According to the tractor, spool valve NOTE control lever and number may vary. (Spool Valve) I.4.2. Usage of Double‐Acting Cylinders I.4.1. Description For usage of double‐acting cylinders, assemble Your tractor is equipped with external hydraulic cylinder intake hose to one of the top output and control valves (spool valves). Spool valve is return hose to the bottom of the outlet. Pull or mounted to the rear of the seat, the right side of ...
- Page 70 J. ROLLBAR AND CANOPY J.1 Safety Framework Against Overturn (Roll bar) The roll bar is designed to protect the driver in case of overturning tractor. Also it is used by folding while carrying by the tractor. If the roll bar is in folded position, seat belt must not be kept and especially be careful. ...
- Page 71 J. ROLLBAR AND CANOPY J.2.2. Canopy Canopy is assembled to protect from sun in Hattat 266G ‐ 275S ‐ 285S models. It cannot protect the driver against bale or heavy loads that could fall from above. (Figure 94/2) J.3. For Safe Operation For the correct and safety use of the tractor, read and follow the written instructions in this guide. ‐ The tree fall occurs when the rear ...
- Page 72 K. ELECTRICITY WIRING – ROLLBAR MODELS (266G‐275S‐285S) K.1. Main Fuse Electricity Wiring – (266G – 275S – 285S) KISA DEVRE SİGORTA: SG01160002 X 1 10 KON: KN02080003 X 1 SİGORTA TER: TR01000060 X 2 TER: TR02000233 X 3 ÖNDEN GÖRÜNÜŞ KISA DEVRE: TR00000003 X 6 TER: TR02000008 X 4 KN02080003 11 KON: X 1 KON: KN02060001 X 22 10A‐B: KN02060001 X 2 TER: TR02000233 X 2 TER:TR02000007 X 2 TER: TR02000194 X 18 11A‐B: KN02060001 X 2 TER: TR02000199 X 4 TER:TR02000007 X 2 9 KON: KN02080003 X 1 SİGORTA KUT. LAS.: GR00000079 TER: ...
- Page 73 K. ELECTRICITY WIRING – ROLLBAR MODELS (266G‐275S‐285S) K.3. Engine Electricity Wiring ‐ 275S – 285S (4 Cylinder) 7 KON: KN02020004 X 1 SEAL: SE02 040 001 X 2 TER: TR020 000 69 X 2 MAZOT POMPA SENSÖRÜ 2 1 HARARET JİKLE 3 ‐5 KON: KN0102 0005 X 2 KİLİT: KN03000007 X 2 MÜŞİRİ TER: TR020000 26 X 4 KN02060001 8 KON: X 1 TER: TR02000007 X 1 MAZOT FİLTRE YAĞ MÜŞİRİ 1 2 1 2 MÜŞİRİ 2 TER: TR03000049 X 1 DAR: ...
-
Page 74: Cab Models
K. ELECTRICITY WIRING – CAB MODELS K.5. Main Fuse Electricity Wiring – Cab Models 11 KON: KN02080003 X 1 SİGO R TA‐R Ö LE B Ö L GESİ MALZEMELERİ TER: TR02000233 X 3 ÖNDEN GÖRÜNÜŞ DIŞ K UTU: SG0 00 00020 X 1 ARKAD AN TR02000008 TER: X 4 A YA KL AR I KUTUYA V İDAL AM AK İ Çİ N: C S01050002 X 2 BAKILMIŞTIR 11B: KN02060001 X 1 S1 20 GÖZLÜ M INI SİGO RTA MO DÜLÜ: SG01 200001 X 1... - Page 75 K. ELECTRICITY WIRING – CAB MODELS K.7. Cabin Electricity Wiring ‐ Cab Models 6 KON: KN02080003 X 1 7 KON: KN02080003 X 1 2 KON: KN02080003 X 1 3 KON: KN02080003 X 1 8 KON: KN02080003 X 1 9 KON: KN02080003 X 1 4 KON: KN02080003 X 1 5 KON: KN02080003 X 1 TR02000035 TR02000008 TER: TR02000233 X 4 TER: TR02000233 X 2 TER: X 2 TER: X 2 TER: ...
Need help?
Do you have a question about the 266 G and is the answer not in the manual?
Questions and answers