Table of Contents
Advertisement
Quick Links
HOME SECURITY
SYSTEM
OWNER'S
MANUAL
INSTALLATION AND OPERATION
________________________________________________________________
BEFORE INSTALLING OR
OPERATING THE SYSTEM,
PLEASE READ THIS MANUAL,
WA 110/ WA210/WA410/WA400
MODELS :
Distributed by:
Mansoor Electronics Ltd.
310 Alden Road, Markham
Ontario, Canada L3R 4C1
Tel: (905) 475-8444 Fax: (905) 475-3576
Toll Free: 1-800-268-9852
www.mansoorelectronics.com
Advertisement
Table of Contents

Related Manuals for Home Sentinel WA110

Summary of Contents for Home Sentinel WA110
- Page 1 HOME SECURITY SYSTEM OWNER’S MANUAL INSTALLATION AND OPERATION ________________________________________________________________ BEFORE INSTALLING OR OPERATING THE SYSTEM, PLEASE READ THIS MANUAL, Distributed by: Mansoor Electronics Ltd. 310 Alden Road, Markham Ontario, Canada L3R 4C1 WA 110/ WA210/WA410/WA400 MODELS : Tel: (905) 475-8444 Fax: (905) 475-3576 Toll Free: 1-800-268-9852 www.mansoorelectronics.com...
-
Page 2: Important Safety Instructions
Important Safety Instructions WARNING: TO REDUCE THE RISK OF FIRE OR ELECTRIC SHOCK, DO NOT EXPOSE THIS APPLIANCE OR POWER ADAPTER TO WATER OR MOISTURE • Read Instructions – All the safety and operating instructions should be read before operating this equipment. These instructions should be retained for future reference •... -
Page 3: Table Of Contents
Table of Contents ………………………………………………… Important Safety Instructions ……………………………………………………………… Introduction ……………………………..About the Home Sentinel ® Security Alarm System.. ……………………………………………………………. Out of the Box …………………………………………………..… Planning for Installation ………………………………………………..…. Choosing Locations …………………………………………………..… System ID Codes ………………………………..…… Setting & Changing System ID codes. -
Page 4: Introduction
Sentinel® security systems are industry leaders in quality, service, and affordability. About the Home Sentinel® Security Alarm System The Home Sentinel® alarm security system continues the tradition of other Home Sentinel® products. This alarm system is a complete security system that is designed to be simple and easy to install and maintain. -
Page 5: Planning For Installation
Planning for Installation The Home Sentinel® security system is designed to be as flexible as possible in order to meet your present needs, and also to adapt as your needs change. For this reason, we recommend that you read and consider the following information and plan your system... -
Page 6: Understanding Normal & Auto Modes
To set or change the system ID code follow these steps: 1. Locate the DIP switch panel on the device. It is normally near the battery housing inside the device. Remove the screw that is holding the battery cover. 2. Use a ball point pen, small screwdriver, or any fine object to move one or more switches. 3. -
Page 7: 24 Hour And Home-Away Functions
24 Hour and Home-Away Functions The Home Sentinel® security system can work for you 24 hours a day, 7 days a week. It features a 24 hour status capability which is important for use with some accessory sensors. If a smoke alarm, or gas detector are part of the system, those sensors can be kept active, even if the motion and contact sensors are disarmed. -
Page 8: Setting The Alarm Period
3 min ). Alarm Delay Time The Home Sentinel® security system provides two kinds of delay times. The 60 second exit delay when you arm the system allows you to leave the premises without activating the alarm or auto-dialer. This is the time between when the system is... -
Page 9: Setting The Alarm Zones
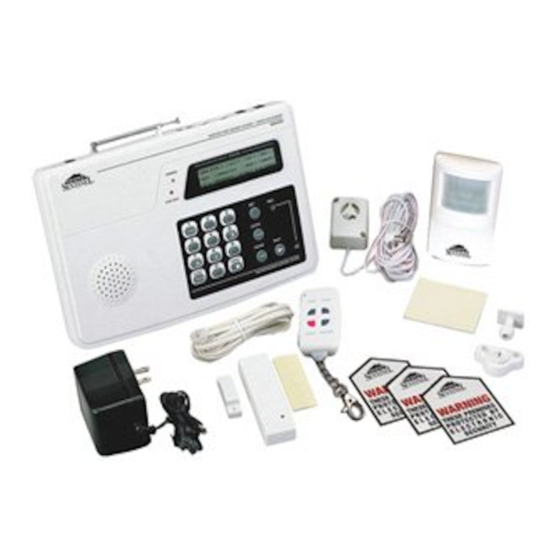
1251. Setting Alarm Zones The Home Sentinel® security system lets you designate particular areas within your home for protection by separate “zones” of the system. If zones are set and an alarm is triggered, the system will identify the area or zone that has been activated Alarm sensors installed with the system all have a four-key, two level DIP switch. - Page 10 Planning for Installation Legend A – Main Console Unit E – Smoke Detector B - Motion Sensor F - Gas/Propane Detector C - Door/Window Sensor G - CO Detector D - External Siren/Strobe Light H - Key Chain Remote Control Zone Construction Chart Use the following chart to help you understand and set zone areas.
-
Page 11: Setting The Zone Switch
Planning for Installation Setting the Zone Switch To access and change the zone DIP switch, follow these steps: Door/Window Sensor To change the zone setting on a door/window sensor, follow these steps: 1. Remove the battery compartment cover and battery. 2. -
Page 12: About The Main Console
OFF – Passive Infrared (PIR) is in the “OFF” status ON - PIR is in the regular mode with a 2 minute idle time TEST – PIR disables the 2 minute idle time, and works with a 5 –10 second interval ( Please note: Factory preset switch is in the “OFF”... -
Page 13: Installing The Main Console
LEGEND 1 – REC BUTTON 8 - FIRE BUTTON 15 – TEL.LINE JACK 2 - PLAY BUTTON 9 - BURGLARY BUTTON 16 - SPEAKER 3 - SET BUTTON 10 - ALERT/MODE BUTTON 17 – ARMED LED IND. 4 - CLEAR/AUTO BUTTON 11 - PANIC KEY 18 - MICROPHONE 5 - ENTER/ARM BUTTON... -
Page 14: About The Motion Sensor
About the Main Console Connecting the Telephone Connecting the Telephone LineC To connect the Main Console to the telephone line, follow these steps: 1. Locate the two phone jacks on the back edge of the console. These phone jacks are side by side and are marked “... -
Page 15: Installing The Motion Sensor
Notes on the Motion Sensor Motion sensors detect the movement of humans and animals within their range. In order to prevent false alarms we recommend that you do not install any motion sensor in the following areas: • Where there is a device that causes a rapid temperature change, or rapid heat transfer, for instance, near an air conditioner, fire place, heater, or any other intermittent heat sources. -
Page 16: About The Door/Window Sensor
2. Measure and drill as necessary, then apply the two wall anchors and screws included with the system to secure the bracket to the wall at 6 ½ feet above the floor. Note: Double sided adhesive is included in the package for your convenience. If you are installing the sensor in an area where it may be more convenient for you, secure the sensor using the adhesive. -
Page 17: Installing The Door/Window Sensor
Notes on the Door/Window Sensors • The LED on the sensor will flash once when the sensor is triggered • There can not be a gap greater than ¼ inch ( 5 mm) between the magnet sensor and the magnet, or the sensor will not work properly •... -
Page 18: About The External Siren
LCD display. About the External Siren The Home Sentinel® security system includes an external siren. The siren is an important deterrent to intruders. Choose a location inside your home where the siren will not be plainly visible but can be heard throughout the house. -
Page 19: Operating The System
Disarming with the Key Chain Remote 1. Press the Disarm key 2. The ARM LED light on the Main Console switches off and the ALERT display disappears Using the Panic Key Press the panic key to activate the alarm and automatic dialer immediately. The auto-dialer will operate even if the system is disarmed Operating the System About Passwords... -
Page 20: Arming The System Using The Main Console
Changing a Password To change a password follow these steps: 1. Think of your new four-digit code and keep it in mind. It is recommended that you select a number which is easy to remember, perhaps relating to important dates such as a birthday or anniversary. 2. -
Page 21: Disarming The System Using The Key Chain Remote Control
3. The siren will emit two short chirps to indicate that the system has been disarmed. Setting Telephone Numbers for the Auto-dialer The Home Sentinel® security system stores up to six telephone numbers in the Main Console. If an alarm is activated, the auto-dialer will call the programmed telephone numbers and play your pre- recorded distress message. - Page 22 The duration of the message is 22-25 seconds. When a call is answered the pre-recorded message is heard twice. The 2 playback occurs 3-5 seconds after the first. After the message is played twice the next preset number is dialed 12-15 seconds later. The first pre-recorded playback begins 3 seconds after pick-up of the handset.
-
Page 23: Recording An Emergency Message
Note: Remember to advise your friends and family of the pre-recorded message and auto-dialer. Discuss what you would like them to do if they were to receive your recorded emergency Message. You may program your own cell phone numbers into the dialer using the preset numbers 4-6 Also keep in mind that the last preset number that was inputed into your auto-dialer will remain on the LCD display ( this is normal ) -
Page 24: Changing Your Emergency Message
To record an emergency message, follow these steps: 1. Enter your password 2. Use a pen, or other narrow object to press the recessed REC button. The LCD display shows REC MESSAGE 3. Speak clearly into the microphone. You should be within 30 cm from the microphone in order to record properly. - Page 25 Activating the Silent Alarm The silent alarm feature allows you to appear as though you are disarming the system, when in fact the auto-dialer features continues to operate. The alarm siren is turned off, but the auto-dialer calls preset number 1. To activate the silent alarm, follow these steps: 1.
-
Page 26: Maintenance
Maintenance / Specifications The Home Sentinel ® security system requires little maintenance The battery that is included with each sensor has a certain shelf life. Once this time period has elapsed, it must be replaced with new batteries. . The batteries in all the sensors generally last between 6 and 9 months once new batteries are installed. -
Page 27: Power Requirements
Power Requirements Device Power Supply Type Battery Voltage Main Console 110 V Adapter 9.6V back-up optionalAccessory Motion Sensor Battery Door/Window Battery Sensor Key Chain Remote Battery External Siren Hardwire from Main Console Carbon Monoxide 110V Direct Plug-in Detector Gas Detector 110V Direct Plug-in Smoke Detector... -
Page 28: Warranty
Sentinel®, along with your dated sales slip or other proof of purchase which will establish your eligibility for warranty. Home Sentinel® will at its option, replace or repair the product free of charge and return the product to you postage prepaid. This warranty does not apply to the product which has been damaged, misused, altered or repaired by anyone than a Home Sentinel®...
Need help?
Do you have a question about the WA110 and is the answer not in the manual?
Questions and answers