
Summary of Contents for DC MONT DC-MPPT-MPK2-40A
- Page 1 MONT MPPT CONTROLLER USER MANUAL SKU: DC-MPPT-MPK2-40A / DC-MPPT-MPK2-60A / DC-MPPT-MPK2-100A PLEASE READ THIS MANUAL CAREFULLY BEFORE OPERATION AND MAINTENANCE, FOLLOW ALL PROVIDED WARNING & CAUTION, AND KEEP IT FOR FUTURE REFERENCE. V1.0...
-
Page 2: Safety Instructions
MONT SAFETY INSTRUCTIONS General Safety Information Read all of the instructions and cautions in the manual before beginning the installation. There are no serviceable parts for this controller. Do NOT disassemble or attempt to repair the controller. Do NOT allow water to enter the controller. Make sure all connections going into and from the controller are tight. -
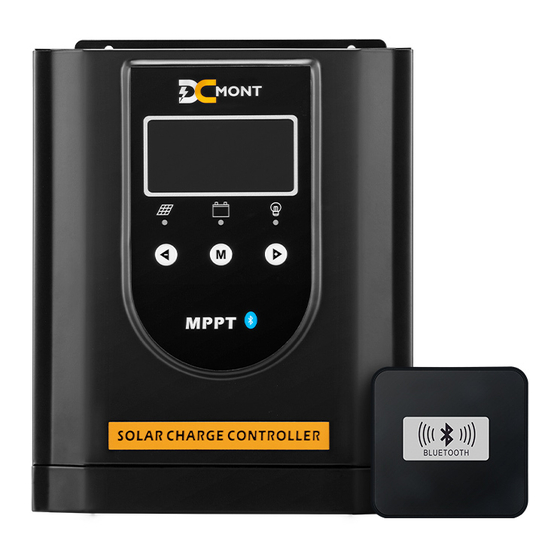
Page 3: Identification Of Parts
MONT IDENTIFICATION OF PARTS ⑩ ① ② ③ ⑨ ⑤ ⑥ ⑦ ④ ⑧ Temp Senser RS485 SOLAR PANEL BATTERY DC LOAD LCD Screen Indicators Buttons Remote Temperature Sensor Port Solar Panel Terminals Battery Terminals Load Terminals Communication Port Grounding Terminal Mounting Holes LED INDICATORS Blue indicator (left):... -
Page 4: Installation
MONT INSTALLATION Choose a mounting location on a vertical surface which should be protected from direct sunlight, high temperatures, and water. Make sure there is good ventilation. Verify that there is sufficient room to run wires, as well as clearance above and below the controller for ventilation. -
Page 5: Remote Temperature Sensor
MONT REMOTE TEMPERATURE SENSOR This sensor measures the temperature at the battery and uses this data for very accurate temperature compensation. Simply connect the cable of the sensor and adhere the sensor on top or the side of the battery to record ambient temperature around the battery. -
Page 6: Operation
MONT OPERATION Plug the Bluetooth module into Choose and click “BT18”, you can see real-time status of the RS485 port of the charger. solar panel, battery, load, power generation and electricity Enter the App interface and click consumption. “Bluetooth”. Click on the right top of the interface for battery setting, load setting, Chinese / English switching and reset. - Page 7 MONT 1. Battery Setting 2. Load Setting In this interface, you can choose battery type, In this interface, you can choose normal system voltage, and set up battery parameters working mode or other working modes. (absorption voltage, absorption duration, over Normal voltage disconnection voltage, etc.).
- Page 8 MONT (2) Dual time period control (3) Time period control As the interface shows, the load will be on for In this interface, you can set up load working 1 minute after sunset (solar panel voltage time period. decreases to 5V) and be on for 0 minute before sunrise (solar panel voltage reaches 6V).
-
Page 9: Operating The Controller
MONT OPERATING THE CONTROLLER LCD Display Interface Overview 1. Solar panel 1 2 3 4 5 6 2. Working status 3. System voltage level 4. Charging 5. Battery capacity 6. Discharging 7. Battery type 8. Load working mode&status 9. Unit 10. - Page 10 MONT Panel Voltage Display: On the main display, long press for over 5s to check PV voltage. Time and Date Setting: On the main display, press to enter the time interface. Then long press for over 5s to enter the setting interface. From left to right, it is date, month, hour, minute, year and day of week.
-
Page 11: Parameter Setting
MONT PARAMETER SETTING On the main display, long press to enter interfaces 01. Short press to enter the last / next interface. On each interface, short press and the character will flash. Short press decrease / increase the character. To confirm the setting, you can long press and it will go back to the main interface automatically, or short press and it will enter the next interface. - Page 12 MONT PARAMETER SETTING Interface 01: Battery Type Setting b00: lead-acid battery custom; b01: sealed battery; b02: flooded battery; b03: gel battery; b04: lithium battery custom; Note: For b04, CV (constant voltage charging) voltage and RCV (recovery charging voltage) should be set up manually. b05: 3.2V*4 series of LiFePO4;...
- Page 13 MONT Interface 13: Load Working Mode Setting L01: normal mode (load working for 24H per day) L02: light control mode (load working at day time) L03: anti-light control mode (load working at night) L04: dual time period control mode (light control with priority) L05: time period control mode (load working time period can be set) L06: charging mode (load off) Interface 26: Baud Rate Setting...
-
Page 14: Battery Charging Parameters
MONT PARAMETERS DC-MPPT-MPK2-40A DC-MPPT-MPK2-60A DC-MPPT-MPK2-100A Electrical System Voltage 12V/24V/36V/48V Auto Recognition Rated Battery Current 100A Rated Load Current Max. Battery Voltage 57.6V Max Solar Input Voltage 150V 12V / 520W, 12V / 650W, 12V / 1300W, 24V / 1040W, 24V / 1300W,... -
Page 15: Error Code Chart
MONT ERROR CODE CHART CODE ERROR DESCRIPTION & QUICK TROUBLESHOOT Battery over-discharged Battery voltage is too low. Load will be turned off until battery is recharged to recovery voltage. Battery over-voltage Battery voltage has exceeded controller limit. Check battery voltage for compatibility with controller and check battery voltage setting. - Page 16 In any case, DC MONT's entire liability under any provision of this warranty shall be limited to the amount actually paid by you for the product. Because some jurisdictions do not allow the exclusion of limitation of liability for consequential or incidental damages, the above limitation may not apply to you.
Need help?
Do you have a question about the DC-MPPT-MPK2-40A and is the answer not in the manual?
Questions and answers