
Summary of Contents for Ensenior 52-357
- Page 1 Ensenior User Manual of Ensenior 52’’ Ceiling Fan with Light Remote Control 5 Color Temps Model 52-357 52-338 52-428 Notice: This user manual is applied to the models above...
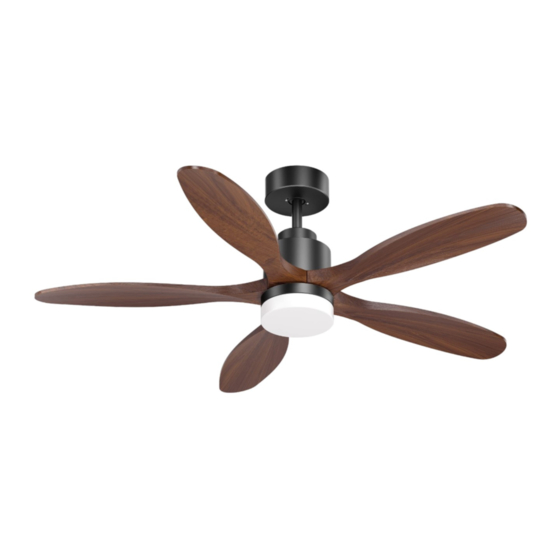
- Page 2 Ensenior Perfect Lighting Solution to Enhance Your Life...
-
Page 3: Table Of Contents
Problem and Solution..................How to Use the Balancing Kit................. PACKAGE CONTENTS..........4 AFTER SALES SERVICE............12 Customer Service....................Warranty......................PREPARATION............5 Contact Us......................PRODUCT INFORMATION Models:52-357-1 52-357-2 52-357-3 The LED Light The Whole Fixture The Fan Product Weight 12.26 lbs/5.56 KG Velocity/Speed 6 levels Brightness(Lumens) -
Page 4: Safety Instructions
To reduce the risk of fire, electrical shock, or motor damage, do not use a solid-state speed control with this fan. Use only Ensenior remote pack that comes with this ceiling fan. ONE Ensenior remote can only control ONE Ensenior ceiling fan. Only use parts provided with this fan. The use of parts other than those provided with this fan will void the warranty. - Page 5 If it fails to do so, please contact the at regular intervals. Do not use water or a Customer Service Team via service@ensenior.net damp cloth to clean the ceiling fan. When cleaning the fan, use soft brushes or cloths to prevent scratching. Cleaning products may damage the finishes.
-
Page 6: Package Contents
PACKAGE CONTENTS We recommend that you pull everything out of the box and lay it out before installation. We have grouped the components below with the hardware you'll need for those parts. Hanger Bracket Receiver Canopy Hanging Ball Downrod (5 Inches) Ring Washer (especially for 52-428 models) Decorative Yoke Cover... -
Page 7: Preparation
PREPARATION Before Installation If you are unfamiliar with wiring, consult a qualified electrician. 30 Inches Must be able to secure the 7.5 Feet fan to building support structure or fan-rated outlet box (suggested by Know your wiring Access location a qualified electrician) You may need a friend to help you. -
Page 8: Installation Instructions
Figure 2.2 Remove the downrod clip and downrod pin from the downrod. Then For models 52-357 and 52-338, thread all the wires from the top of the motor through the decorative yoke cover, canopy, and downrod in sequence. remove the set screws in the yoke at the top of the motor housing. -
Page 9: Wiring
Figure 2.5 Slide the downrod through the opening in hanger bracket. Align the hanging ball slot with the hanger bracket tab, installing the ball end of the downrod into the opening of hanger bracket. Make sure the top of the hanging ball is in a horizontal position. Warning: Failure to align the hanging ball slot with the hanger bracket tab may cause the fan to fall, which could result in injury or death. -
Page 10: Attaching The Fan Blades
Figure 3.3 Figure 3.4 Put the receiver on the top of the hanging ball in the hanger Loosen the two screws (Phillips round pan screws) on the hanger bracket. Make sure all the connections are secured. bracket. Raise canopy to hanger bracket, aligning the loosened screws with the keyhole slots in the canopy. -
Page 11: Remote Control Instructions
Figure 5.3 Figure 5.4 5.4 Finish assembling the fixture. Lift the shade and align the notches in the shade with tabs in the fitter plate. Attach the shade to the fitter plate by twisting it clockwise until it is installed into place and cannot be twisted anymore. Warning: Make sure the shade is installed securely, otherwise it may fall and cause injury. - Page 12 Reverse the Fan's Direction Turn Off the Whole Fixture Turn On/Off the Fan Change Speeds Security Mode Color Temperature - Color Temperature + Turn On/Off the Light Brightness - Brightness + Sleeping Mode Natural Wind Mode Timer Figure 6.4 6.4 If the light at the top of the remote blinks red when you press any button, that is an effective press. Press to change the direction of the running fan.
-
Page 13: Troubleshooting
Remember: Always contact a certified electrician to do any necessary repairs, especially when wiring is involved! Make sure everything is installed correctly and securely every time. If the problem still cannot be solved after troubleshooting, please contact Ensenior customer service: service@ensenior.net Problem and Solution A "new fan"... -
Page 14: How To Use The Balancing Kit
For 30 days after the date of purchase, We sincerely hope to solve the problem refer to the Troubleshooting page on the back. return your Ensenior product and receive a for you. If you still could not fix this, please contact us full refund for ANY reason. -
Page 15: Warranty
3. Other: One-Year Limited Warranty Except as otherwise indicated throughout this warranty, if any part of your Ensenior ceiling fan fails at any time within one year of the date of purchase due to a defect in material or workmanship, as determined solely by Ensenior, Ensenior will provide the replacement free of charge. - Page 16 Ensenior Perfect Lighting Solution to Enhance Your Life...
Need help?
Do you have a question about the 52-357 and is the answer not in the manual?
Questions and answers