
Summary of Contents for HIT HMS3350/NAS
- Page 1 _______HMS 3350/NAS + 3560/NAS Library User Manual http://www.hit-‐archive.com 1 of 54 ...
-
Page 2: Table Of Contents
Table o f C ontents Introduction ......................4 Your H IT l ibrary................................4 General i nformation ....................5 Contact i nformation..............................5 ASIA + C HINA ................................5 ... - Page 3 Content o f p ackage ...............................23 Magazine i nstallation ............................23 Connect t he l ibrary t o t he H OST c omputer ....................24 Direct a ttached l ibraries.............................24 ...
-
Page 4: Introduction
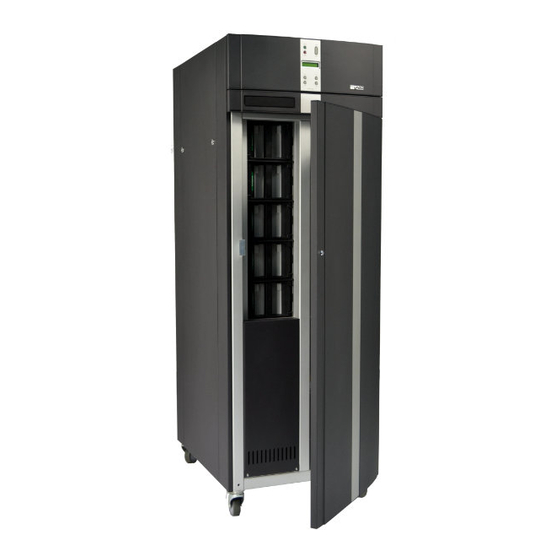
Introduction Your HIT library Thank you for purchasing a HIT product! Libraries provide high quality data handling and are manufactured to meet a wide range of Applications. Optical storage in NETZON media changer devices is one of the most effective methods for offline and near line storage. -
Page 5: General I Nformation
10910 Santa Teresa Drive Cupertino, CA 95014 Phone: 408 727 0620, Fax: 408 727 0630 e-mail: support@hit-archive.com - web: www.hit-archive.com Copyright All rights reserved. © 2010 Human Interactive Technologies GmbH. No part of this documentation may be reproduced in any form by any electronic or mechanical means without permission in writing from the publisher, except for reading and browsing via the World Wide Web. -
Page 6: Safety
Safety Important symbols and terms DANGER: Indicates a hazardous situation which, if not avoided, could result in death or serious injury. · WARNING: Indicates a hazardous situation which, if not avoided, could result in minor or moderate injury · serious damage to the unit ·... -
Page 7: User S Afety
CAUTION: To assure continuous compliance with those standards repairs must be carried out by qualified and authorized personal. Unauthorized repairs may void your warranty. HIT is not liable for any damage caused by unauthorized service. WARNING: Exclusively safety parts provided by the manufacturer or parts of the same type and quality must replace defective safety parts. -
Page 8: Data Security
Data security Environment Components connected to the Library can interfere with its function. Being a data- handling device, a functional error may lead to data loss. The Library environment consists of the place of location, the mains power provided, the host computer and cables. -
Page 9: Media
For the most current information regarding media compatibility, reliability and pricing please contact your HIT sales partner or the HIT office in your country. Maintenance HIT libraries are designed for use in office environments without excessive dust. In such environments HIT libraries have no need for scheduled maintenance. -
Page 10: Power Cable Connection
Power cable connection WARNING: · Make sure, the unit is switched off at its main power switch near the built in power plug (not just the standby switch on the front panel). · To prevent a diversion of potentials, the unit should be connected to the same power circuit as the host PC. -
Page 11: Product D Escription
Product d escription Type of unit General All NETZON libraries are standard SCSI media changer devices. The SCSI standard describes a set of standardized elements and commands for the operation of changer units. The mechanical main features are the ·... -
Page 12: Hms 3350 / 3560
HMS 3350 / 3560 HMS3350 – a 10 magazine library: 350 slots, up to 8 drives, NAS option HMS3560 – a 16 magazine library: 560 slots, up to 8 drives, NAS option Operation principles SCSI elements Netzon HMS media changers comply with the SCSI standard. The SCSI standard describes the standard elements of a media changer: SCSI standard element Library element... -
Page 13: Element Status
Element status CAUTION: This chapter is important to understand the function of your media changer system. There are three element status situations to consider: · the physical media status in the Library · the media status in the memory of the Library controller ·... -
Page 14: Application Range
HIT office. On customers demand new drives can be certified. HIT can adopt most standard form factor PC drives to their media changers. The drives must meet quality requirements regarding tray construction, interface type and reliability. NOTICE: Application range There are several main purposes for a HIT media changer system;... -
Page 15: Magazine
Magazine The magazine is a central element of HIT libraries; it integrates 35 slots of the library. Mounted in the library it provides direct media access for the media changer mechanism. It can be locked and removed from the library as a whole, providing safe storage of media in unchanged sort order. - Page 16 then is back in a position to allow vertical movement of the lift. The picture shows a magazine slot partly pulled out by the picker. With the slot open, the whole Picker unit including the catch mechanism is lowered, diving the catcher into the open medium center. The left picture shows the picker attached to the horizontal and vertical actuators, the right hand detail picture shows the picker with the catch holding a medium, The catch can pick/release a medium.
- Page 17 Steppermotor Picker with horizontal actuator mechanism Steppermotor The picture shows the vertical lift mechanism with the attached horizontal actuator and picker mechanism. 17 of 54 ...
-
Page 18: Drive Configuration
The only inevitable feature of these drives is the 120mm media form factor and the necessity of a tray that must comply with the usage of the HIT catch mechanism. HIT libraries ship with certified drives only. For integration of specific drives please contact your HIT sales office. -
Page 19: Device Data
Device data 19 of 54 ... -
Page 20: Technical F Eatures
For physical dimensions, power consumption and heat generation please see chapter ‘Device data’ Electrical specifications All HIT units use wide voltage range switch mode power supplies, the HMS3560 has a redundant power supply. The mains voltage range is from 110V to 240V. -
Page 21: Agency A Pprovals
Agency A pprovals Applied standards HIT p roducts c omply w ith t he f ollowing s tandards − − FCC declaration NOTICE: NOTE: This equipment has been tested and found to comply with the limits for a Class B digital device, pursuant to Part 15 of the FCC Rules. -
Page 22: Declaration Of Conformity
Declaration of conformity 22 of 54 ... -
Page 23: Setup
Setup Placing The unit should be placed in a moisture free, low-dust environment at living room temperatures. Content of package Item HMS3350/NAS HMS3560/NAS HMS library unit Magazines (not inserted) Front door keys Power cable Data cable 2x SAS 2x SAS... -
Page 24: Connect The Library To The Host Computer
Connect the library to the HOST computer The HMS3560 has 2 interface options: Direct attached libraries robotics interface is LAN, the connector type is RJ45 data interface is SAS, the connector type is MiniSAS SFF-8088 The recommended host bus adapters are: PCI-E: LSISAS3801e-pb (manufacturer: LSI) PCI-X: LSISAS3801x-pb (manufacturer: LSI) The HBA connector is MiniSAS SFF-8088... -
Page 25: Operation
Operation Power on Power up the jukebox before you power up the PC. You find the mains power switches at the back of the box. For a safe operation the back panel switches should not be used as the standard switch. Please switch it on and leave it on, as long as the jukebox is in regular use. -
Page 26: User Interface
After pressing <SEL> and <EXIT> you enter the service menu. With up/down scroll to: User Interface Main - Security Press <SEL> to enter the SECURITY menu and scroll up / down within the selected menu Main – Security, available menu items: Access permission menu Press <SEL>, scroll up / down: User: no PW... - Page 27 Press <SEL> and scroll <up/down> to CONFIG IP ADDRESS: Press <SEL> Enter the desired IP address (single digit) with the <UP> key and confirm with the <DOWN> key. After confirmation with the <DOWN> key the cursor jumps to the next digit.
-
Page 28: Service M Enu -- M Enu S Tructure
Access and execution of some menu items is password protected and requires technical training for the library, which is available through your local HIT office. The user manual describes only menus available to the standard user, the full menu structure is listed in the service manual. -
Page 29: Hms3560 M Enu T Ree
HMS3350 / 3560 menu tree 29 of 54 ... -
Page 30: Input Buttons
Input buttons Abbreviation in Symbol Function this manual “SELECT” has about the same function as the “enter” key at your computer. In most menus it is used to confirm the <SEL> entry to a chosen menu item or to pass the selected data to the units controller. -
Page 31: Display During Startup
Display during startup The Library has an internal main computing device, which controls the interfaces. It boots up the complete system and runs through several initialization steps and self tests after powering the unit on. The actual state is coarsely shown at the display. The boot sequence is initialized either by switching the unit on (mains switch close to the power chord must be “on”... - Page 32 SATA and SAS devices have point-to-point connections with their physical and virtual center point (initiator) not on the Library controller. They need a host PC for data and command transfer to the drives, no matter this host PC is installed in the Library, or external.
-
Page 33: Intermediate Messages Overview
Intermediate messages overview Besides regular menu items, the display shows messages in certain situations. The messages are visible for a short time only and may go along with an acoustic signal and/or signals of the red error LED above the standby switch. Here is a collection of the most important intermediate messages with explanations. - Page 34 On leaving an offline menu item the controller shows its return to normal operation. Host PC commands are accepted again. This message is shown, when you have insufficient user rights for the menu item you want to enter. ...
-
Page 35: Main M Enu
Main M enu Good initialization After startup the display shows the above message and does not react on any single buttons pressed. To enter the service menu structure, you have to press two buttons at once: EXIT < >... -
Page 36: Main - Import/Export
MAIN – IMPORT/EXPORT MAIN – IMPORT/EXPORT, available menu items This submenu allows the import/export of single media from the library user interface using the mail slot. In normal operation the medium import/export will be controlled through the library management software. It is recommended to import/export media using the library management software when the library is in regular use. -
Page 37: Main - System Info
MAIN – SYSTEM INFO Access to this menu is granted for the standard user, you don’t need to log in by using the security menu. System info gives you an overview of the libraries basic alterable data. The < > button takes you to the main media status menu. −... - Page 38 Note: The HIT service program ‘Lib_Test_1.x’ allows error log downloads with detailed error log entries. Please review the ‘Lib_Test_1.x’ section in this manual for more information <SEL>: displays cycle counts for specific library components: Catch, brake, lift, imp/exp <SEL>: displays the unit serial number <SEL>: displays the current library...
-
Page 39: Main - Security
MAIN - SECURITY Press <SEL> to enter the SECURITY menu and scroll up / down within the selected menu MAIN – SECURITY, available menu items: Access permission menu Press <SEL>, scroll up / down: User: no PW Service: PW “22” Admin: PW “33 The Admin permission setting is required to enter the Main Service menu. -
Page 40: Firmware Update
Firmware update There are two types of firmware for the HIT libraries with different functions, stored in different physical positions: · motor control board firmware · main controller board firmware Before updating the main controller board firmware you have to check if this firmware-release is compatible with the installed motor board firmware level. - Page 41 Execution of TFTP.exe will start the download process; the successful firmware download is confirmed on the display and a beep indication. NEVER switch off the unit during the firmware download. The firmware download will take several minutes For c md l ine e xecution: The file contains the tftp command with a switch, the standard IP (ver.4) address of the Library controller, the “put”...
-
Page 42: Main - Services
MAIN - SERVICES Trained service personnel should execute the SERVICE submenus only. The following submenus are available with the listed functions. To enter the listed section of the SERVICE sub menus press <SEL>, to move between items of the sub menu press <UP>... - Page 43 Execution of the Service 5 Picker Program function will move the picker (which pulls trays out/in) to the desired position. The picker catch function will execute a sequence of pull tray/pick medium off tray/put medium back on tray/push tray back to home position. To execute this the lift first has to be positioned in front of a tray (Service 3 function) Allows execution of lift movements: go to home position...
- Page 44 Reset all library settings to nominal values and clears error log. Execution of this function requires new adjustment settings for all library components! Allows to set the unit serial number Allows to initiate a auto-calibration by magazine or for a complete library. Note: An auto calibration is automatically performed on exchanged magazines <SEL>: scroll up / down to...
-
Page 45: Main - Test Program
MAIN - TEST PROGRAM MAIN – TEST PROGRAMS, available sub menus The MAIN - TEST PROGRAM has 3 sub menus: SENSORS sub menu: - overview screen for all sensors - separate screens to test individual sensors DRIVES sub menu: Execution of drive drawer open/close PROGRAMS sub menu:... -
Page 46: Test Mode 1 - Sensors
TEST MODE 1 – SENSORS Execution of the functions in this sub-menu requires successful completion of HIT technical training <SEL> opens the sub-menu with an overview for all sensors and their status. In this sub-menu you can execute sensor... - Page 47 Slot ‘open’ position sensor (slot position where medium is loaded) Mail slot ‘open’ sensor Mail slot ‘intermediate’ position sensor Mail slot in ‘robotic load position’ sensor Mail slot sensor for ‘medium presence’ Door ‘lock’ sensor Catch (= medium present) sensor Slot open sensor (slot not in home position) Drive open sensor...
- Page 48 Sensors – physical location PCB picker sensors PCB sensor board bottom Picker h ome Slot o pen sensor sensor position Catch s ensor Slot o pen (medium p resent) sensor ...
-
Page 49: Test Mode 2 - Drives
TEST MODE 2 – DRIVES Test Mode 2 – Drives sub menu Allows to check the drawer function of the drives: Press <SEL> Scroll up/down for other drives <SEL> to open the drive drawer <SEL> to close the drive drawer ... -
Page 50: Test Mode 3 - Programs
TEST MODE 3 – PROGRAMS Trained personnel should execute the following test programs only. Executing these test programs in a customer installation may result in a loss of the library inventory. A new library inventory must be taken with the library management software and may take several hours depending on the number of installed media. - Page 51 Execute robotics movements with random target position without media movement Display last test cycle This is helpful information if a unit fails during one of the ‘MOVE’ or ‘POSITION’ test programs. This program lists the last executed cycle. Test program definition Factory use only ...
-
Page 52: Administration T Ool L Ib_Test
Administration t ool L ib_Test The administration tool Lib_Test allows execution of service functions from the server, which manages the library. For Lib_Test installation load the Lib_Test to a desired directory or the desktop. On Lib_Test start up the Lib_Test User Interface is displayed: Please enter the library IP address + port number and select ‘CONNECT’... -
Page 53: Lib_Test Functions
Lib_Test functions LIB_TEST ‘button’ Function SEL_EXIT Enter the service menu UP_DOWN Not used Enter the selected option EXIT Return to the previous option Move up in the service menu DOWN Move down in the service menu Get Error Log Displays the error log Save Error Log Downloads the error log to the directory from which... -
Page 54: Troubleshooting
HIT office: mailto: support@hit-archive.com. Remote diagnostics The HIT diagnostic program ‘Lib_Test’ allows remote diagnostics through TCP/IP to the robotics interface of the library. This program is available on request from your HIT office: mailto: support@hit-archive.com. Correct drive assignment in your library management software If during installation media continue to be ‘not recognized’...
Need help?
Do you have a question about the HMS3350/NAS and is the answer not in the manual?
Questions and answers