Table of Contents
Advertisement
Quick Links
Advertisement
Chapters
Table of Contents
Troubleshooting

Related Manuals for Cosmo CFWME


Summary of Contents for Cosmo CFWME
- Page 1 INSTALLATION AND OPERATING MANUAL COSMO FRESH WATER MODUL CFWME/CFWMVEE...
-
Page 2: Table Of Contents
Troubleshooting ....................19 Decommissioning ................... 19 Maintenance ...................... 20 Cleaning the heat exchanger ................20 10 Replacement parts / accessories ..............21 11 COSMO hotline ....................21 12 EU Declaration of Conformity ................22 13 Warranty, availability guarantee, imprint ............23... -
Page 3: Scope Of Delivery
Designation Wilo PARA 15/7 iPWM2 Heating return with integrated Gravity brake Plate heat exchanger, copper-soldered Plate heat exchanger, solid stainless steel CFWME control system PT 1000 buffer supply Base plate Manual vent valve Heat insulating shell Huba- Sensore Typ 235 2-40 l/min... -
Page 4: Delivery And Transport
1.2 Delivery and transport Check to make sure the product is complete and undamaged immediately after receipt. Any damage or complaints must be reported immediately. Observe the labels on the packaging without fail! The fresh water modul should only be removed from its packaging at the place of installation. -
Page 5: Safety
S a f e t y 3.1 Safety instructions In addition to country-specific guidelines and local directives, the following technical regulations must also be taken into account: Important - risk of burning! As the system can reach temperatures > 60 °C, there is a risk of scalding and burning through contact with the components. -
Page 6: General Information Regarding The Installation And Operating Manual
This manual describes the installation, operation and maintenance of the COSMO-CFWME / CFWMVEE fresh water modul. -
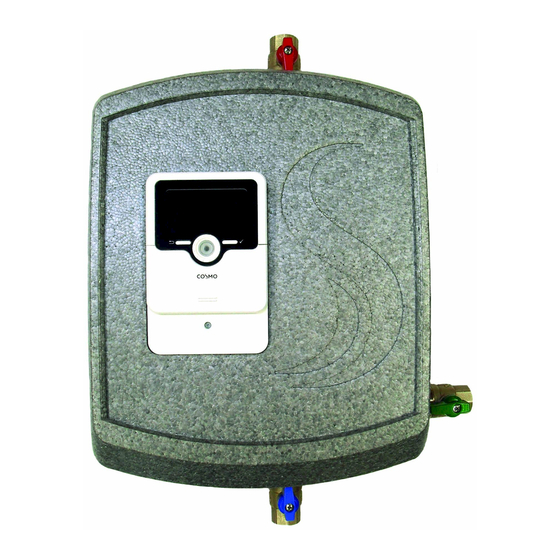
Page 7: Product Description
PWM signal. The COSMO CFWME / CFWMVEE fresh water module should only be used to heat drinking water in accordance with the Drinking Water Ordinance. The primary circuit must be filled with heating water according to VDI 2035. -
Page 8: Technical Specifications
T e c h n i c a l s p e c i f i c a t i o n s 6.1 General instructions Designation/type COSMO CFWME / CFWMVEE Nominal output at 10-45/65°C (CW-HW/HF) 70 kW Tapping capacity at nominal output 28.7 l/min... -
Page 9: Dimensions / Required Space
6.2 Dimensions / required space Dimensions and minimum space required for assembly and maintenance work Optional accessories (CFWMEAS): Mount storage tank flow, storage tank return and HW ball valves with a flat seal Execute the HW connection according to DIN 1988. 6.3 Pressure loss / pump characteristic curve Specified pressure loss valid for heating side (primary) and drinking water side (secondary). -
Page 10: Corrosion Protection
6.4 Corrosion protection To prevent corrosion damage to plate heat exchangers, the following drinking water values must be observed: Copper-soldered Solid stainless steel Chloride < 250 mg/l at 50°C < 100 mg/l at 75°C < 10 mg/l at 90°C Sulphate <... -
Page 11: Calcification Protection
6.5 Calcification protection Limescale deposits from the water increase significantly at temperatures of >55°C. Set the temperature as low as possible for this reason. Observe hygiene regulations! In order to ensure the longest possible service life of the plate heat exchanger, the manufacturer recommends using water softeners if the water hardness level is >... -
Page 12: Assembly And Installation
A s s e m b l y a n d i n s t a l l a t i o n 7.1 Wall-mounted assembly Mark and drill two 10mm holes as per the adjacent illustration and insert expansion anchors. Locate the top screw and washer and tighten until the screw head protrudes approx. - Page 13 7.2.2 Installation requirements The COSMO CFWME / CFWMVEE can be attached directly to a buffer storage tank (with simultaneous piping on the heating side) by means of a connection set. The storage tank must have a 1 ½" internal thread so that the station can be connected.
-
Page 14: Hydraulic Connection With Accessories
7.3 Hydraulic connection with accessories COSMO fresh water module CFWME COSMO fresh water module CFWME With circulation and return stratification Designation Description Hot water Cold water Heating flow Heating return Circulation CFWMERES: Return stratification with 3-way switching valve and two PT1000 temperature... - Page 15 COSMO fresh water module CFWME with pre-mixing function COSMO fresh water module CFMWE with pre-mixing function and return stratification Flow mixing valve (CFWMEVMV): Flow mixing valve with thermal 3-way mixing valve, for pre- mixing at frequent high temperatures of >70°C in the buffer storage tank. Example illustrations with optional accessories.
- Page 16 The CFWMEZS circulation set with Wilo Yonos Para Z 15/7.0 130 RKC and PT1000 temperature sensor is an optional accessory for the CFWME system. The set consists of the circulation pump, 2 shut-off ball valves with a backflow preventer and a thermowell with PT1000 sensor.
-
Page 17: Electrical Connection
Protect the control unit and electrical components against excess voltage. The fresh water modul COSMO CFWME / CFWMVEE is pre-installed and wired ex works. Connect the power cable to commission. Please refer to the separate control unit instructions for more details. -
Page 18: Commissioning, Functional Test, Decommissioning
C o m m i s s i o n i n g , f u n c t i o n a l t e s t , D e c o m m i s s i o n i n g Complete installation of all hydraulic and electrical components is a precondition for commissioning. -
Page 19: Troubleshooting
Check and replace if applicable 8.3 Decommissioning If the COSMO CFWME is decommissioned for a prolonged period, the power supply must be disconnected. For final decommissioning of the COSMO CFWME the power supply for all of the corresponding system components must be disconnected; all of the relevant pipes and components must be completely drained. -
Page 20: Maintenance
M a i n t e n a n c e The manufacturer recommends having the system serviced annually by authorised, specialist personnel. 9.1 Cleaning the heat exchanger Regularly clean the unit if deposit build-up can be expected due to unfavourable water quality (e.g. -
Page 21: Replacement Parts / Accessories
R e p l a c e m e n t p a r t s / a c c e s s o r i e s Cosmo ET Designation Number YCO9080080 Fresh water controller incl. wiring harness 908.00.80.00.18... -
Page 22: Eu Declaration Of Conformity
Device: Fresh water module Type: CFWME and CFWMVEE We hereby declare that the design and construction of the products designated below, as well as the version we have introduced, comply with the relevant basic health and safety requirements of the EU Directive – in particular 4004/108/EC, 2006/95/EC, 2014/30/EU, 2014/35/EU, 2011/65/EU and 2009/125/EC. -
Page 23: Warranty, Availability Guarantee, Imprint
Claims relating to the model and product cannot be asserted. Within the framework of the current legal provisions of the Purchase Contract Law (BGB [Civil Code] with respect to warranty claims), COSMO has a limitation period of 5 years from the date of delivery. - Page 24 908.17.08.00...
- Page 25 ASSEMBLY AND OPERATING CONSTRUCTIONS CFWME...
-
Page 26: Safety Advice
SAFETY ADVICE Contents Safety advice Safety advice ..........44 Please pay attention to the following safety advice in order to avoid danger and damage to Technical data and overview of functions ..45 people and property. Installation ..........46 Danger of electric shock: 1.1 Mounting .......... -
Page 27: Technical Data And Overview Of Functions
TECHNICAL DATA AND OVERVIEW OF FUNCTIONS • Customised control for systems with or without circulation • Flexible circulation function for different user profi les, also available with thermal disinfection • Control of PWM pumps • Commissioning menu for easy confi guration •... -
Page 28: Installation
Make sure the device as well as the system are not exposed to strong electroma- gnetic fields. Normally, the CFWME DHW exchange controller is integrated in a DHW exchange module. The unit must only be located in dry interior rooms. -
Page 29: Data Communication / Bus
1. INSTALLATION 100 ... 240 V 50-60 Hz IP 20 R1-R3|1 (1) A 240 V~ PWM 1 10 11 12 9 10 11 12 13 14 15 16 17 18 19 20 21 22 23 24 NOTE: Connect the permanent phase of the line valve along with the power supply of the con- troller to L. -
Page 30: Overview Of Relay And Sensor Allocation
2. OVERVIEW OF RELAY AND SENSOR ALLOCATION Single station R1/PWM1 Connection terminal Single station S1 (1 / 2) Flow primary circuit S2 (3 / 4) Stratified return source S3 (5 / 6) Circulation S4 (7 / 8) Stratified return store R4 (19 / 20) Error relay VBus (21 / 22) - Page 31 2. OVERVIEW OF RELAY AND SENSOR ALLOCATION Cascade R2 (station2) S3 (station1) R2 (station1) S4 (station 1) S2 (station 1) Connection terminal Station 1 Station 2 Station 3 / 4 S1 (1 / 2) Flow primary circuit Flow primary circuit Flow primary circuit S2 (3 / 4) Stratified return source...
-
Page 32: Operation And Function
3. OPERATION AND FUNCTION Buttons and adjustment dial The controller is operated via 2 buttons and 1 adjustment dial (Lightwheel®) below the display: Left button ( escape button for changing into the previous menu Right button ( confirming / selecting Lightwheel ®... - Page 33 3. OPERATION AND FUNCTION Selecting menu points and adjusting values During normal operation of the controller, the display is in the main menu. If no button is pressed for 2 min, the display switches to standby mode. After further 10 s, the display illumination switches off.
- Page 34 3. OPERATION AND FUNCTION Adjusting the timer With the Timer time frames for the function can be adjusted. In the Day selection channel, the days of the week are available. If several days are selected, they will be merged into one combination for the following steps. The last menu item after the list of days is Continue.
- Page 35 3. OPERATION AND FUNCTION In order to save the time frame, select Save and confi rm the security enquiry with Yes. In order to add another time frame, repeat the previous steps. 6 time frames can be adjusted per day or combination. Press the left button ( ) in order to get back to the day selection.
- Page 36 3. OPERATION AND FUNCTION Copying a time frame: In order to copy time frames already adjusted into another day / other days, proceed as follows: Choose the days(s) into which the time frames are to be copied and select Copy from. A selection of days with time frames will appear.
- Page 37 3. OPERATION AND FUNCTION Removing a time frame: In order to delete a time frame, proceed as follows: Select the time frame that is to be deleted. Select Delete and confi rm the security enquiry with Yes. Resetting the timer: In order to reset time frames adjusted for a certain day, proceed as follows: Select the desired day.
- Page 38 3. OPERATION AND FUNCTION In order to reset the whole timer, proceed as follows: Select Reset and confi rm the security enquiry with Yes. All adjustments made for the timer are deleted. Adjusting optional functions In the Optional functions menu, optional functions can be selected and adjusted. In order to activate a function, select the desired function and confi...
-
Page 39: Commissioning
4. COMMISSIONING Operation When the hydraulic system is fi lled and ready for operation, connect the controller to the mains. ® The controller runs an initialisation phase in which the Lightwheel glows green. Adjustment mode When the controller is commissioned or when it is reset, it will run a commissioning menu after the initialisation phase. - Page 40 4. COMMISSIONING 5. Date: Adjust the date. First of all adjust the year, then the month and then the day. 6. Set hot water temperature Adjust the desired set hot water temperature. For further information, see page 68. 7. Circulation: Activate or deactivate the circulation.
- Page 41 4. COMMISSIONING Complete the offset by pressing the right button ( For more information about the offset, see page 71. 8. Disinfection: Activate or deactivate the disinfection. For more information about the Disinfection see page 73. 9. Stratifi ed return: Activate or deactivate the stratifi...
-
Page 42: Commissioning The Cascade
4. COMMISSIONING Commissioning the cascade 1. Language: Adjust the desired menu language. 2. System type: Adjust the system type Station 1, Station 2, Station 3 or Station 4. If Station 1 has been selected, enquiries for activating stations 2 to 4 will appear. Activate or deactivate further stations of the cascade. - Page 43 4. COMMISSIONING 6. Set hot water temperature Adjust the desired set hot water temperature. For further information, see page 68. 7. Circulation: Activate or deactivate the circulation. If the circulation is activated, further channels appear: Select the circulation type. NOTE For all circulation types, the circulation sensor S3 is required.
- Page 44 4. COMMISSIONING 8. Disinfection: Activate or deactivate the disinfection. For more information about the Disinfection see page 73. 9. Stratifi ed return: Activate or deactivate the stratifi ed return. For more information about the stratifi ed return see page 74. NOTE For the stratifi...
-
Page 45: Main Menu
5. MAIN MENU Main menu Single station In this menu, different menu areas can be selected. The following menus are available: Status Hot water Optional functions Basic setting SD card User code Manual mode NOTE: If no button is pressed for 2 min, the display switches to standby mode. After further 10 s the display illumination switches off. -
Page 46: Main Menu Station 1
5. MAIN MENU Menu structure Main menu Status Status Hot water Hot water Overview T-HW set Cascade* Cascade* Sliding set value Optional functions Optional functions Hot water Basic settings Comfort Circulation Circulation SD card Emergency operation Disinfection Disinfection User code Stratified return Stratified return Manual mode... -
Page 47: Status
6. STATUS In the status menu of the controller, the status messages for every menu area can be found. Overview of displayed values Display Description T-store Store temperature stratifi ed return Base / Centre Position of the valve stratifi ed return T-RE Return temperature primary circuit stratifi... -
Page 48: Status / Overview Cascade
6. STATUS Status / Overview Cascade In the Status / Overview menu, all current measured values of the stations are indicated in a clear system graphic. In order to show the values of the corresponding station, turn the Lightwheel ® clockwise. -
Page 49: Error Relay
6. STATUS Error relay The Status / Error relay menu indicates if the potential-free error relay is active or inactive. Messages In the Status/Messages menu, error and warning messages are indicated. During normal operation, the message Everything OK is indicated. A line break or short circuit in a sensor line is indicated as ! Sensor fault. -
Page 50: Hot Water
7. HOT WATER In this menu, all adjustments for the DHW heating can be made. The following parameters and functions are available: • Set hot water temperature • Sliding set value • Comfort mode • Emergency operation Set hot water temperature Main menu / Hot water / T-HW set Adjustment Adjustment range /... - Page 51 7. HOT WATER Comfort Main menu / Hot water / Comfort Adjustment Adjustment range / Description Factory setting channel selection Comfort function for the Comfort Yes, No plate heat exchanger Indication of the set tem- Set temp. perature of the plate heat exchanger Hysteresis when the set com- Hysteresis...
-
Page 52: Cascade
8. CASCADE The Cascade menu is only available if the System type Station 1 has been selected. Main menu / Cascade Adjustment Adjustment range / Description Factory setting channel selection Threshold for activating the Thresh. on 84 … 100 % 90 % next station of the cascade Threshold for deactivating the... -
Page 53: Circulation
9. OPTIONAL FUNCTIONS In this menu, optional functions can be selected and adjusted. Circulation Main menu / Opt. functions / Circulation Adjustment Adjustment range / Description Factory setting channel selection Circulation Activation of the function Yes, No Therm+Dem., Demand, Type Variant Duration Thermal, Duration, Off... -
Page 54: Circulation Pump Offset
9. OPTIONAL FUNCTIONS If one of the variants is selected, the corresponding adjustment channels will appear. Each variant has a timer by means of which time frames for the operation of the function can be adjusted. Within the adjusted time frames the variants work as follows: Thermal The temperature at the return sensor is monitored. -
Page 55: Disinfection
9. OPTIONAL FUNCTIONS Disinfection Main menu / Opt. functions / Disinfection Adjustment Adjustment range / Description Factory setting channel selection Disinfection Activation of the function Yes, No Start? Manual start of the disin- fection Set temp. Set temperature for the 60 …... -
Page 56: Stratified Return
9. OPTIONAL FUNCTIONS Stratifi ed return Main menu / Opt. functions / Stratifi ed return Adjustment Adjustment range / Description Factory setting channel selection Stratifi ed return Activation of the function Yes, No Switch-on temperature 0.5 … 20.0 K 5.0 K difference Switch-off temperature Toff... -
Page 57: Blocking Protection
9. OPTIONAL FUNCTIONS Blocking protection Main menu / Opt. functions / Blocking protection Adjustment Adjustment range / Description Factory setting channel selection Blocking protection Activation of the function Yes, No Start. time Starting time of the function 00:00 … 23:50 00:30 Blocking protection primary Primary pump... -
Page 58: Basic Settings
10. BASIC SETTINGS Main menu / Basic settings Adjustment Adjustment range / Description Factory setting channel selection Time Adjustment of the current 00:00 … 23:59 time Date Adjustment of the date 01.01.2001 … 31.12.2099 01.01.2010 Auto DST Automatic daylight saving Yes, No time adjustment Language... -
Page 59: Sd Card
The controller will only recognise a fi rmware update fi le if it is stored in a folder named COSMO\CFWME on the fi rst level of the SD card. Create a folder named COSMO on the SD card and extract the downloaded ZIP fi le into this folder. -
Page 60: User Code
11. SD CARD Loading controller adjustments To load controller adjustments from an SD card, select the menu item Load adjustments. The fi le selection window will appear. Select the desired .SET fi le. While the adjustments are being loaded, fi rst Please wait, then Done! will be indicated on the display. -
Page 61: Manual Mode
13. MANUAL MODE In the Manual mode menu, the operating mode of all relays used can be adjusted. Auto = Relay in automatic mode 0 … 100 % = Pump running at adjusted speed (manual mode) Centre / Base = Valve in adjusted position Open / Closed* = Valve open or closed Error / OK = Error relay in Error or OK mode... -
Page 62: Troubleshooting
14. TROUBLESHOOTING WARNING! Electric shock! Upon opening the housing, live parts are exposed! Always disconnect the device from power supply before opening the housing! The controller is protected by a fuse. The fuse holder (which also holds the spare fuse) becomes accessible when the cover is removed. - Page 63 14. TROUBLESHOOTING Pump noise can be heard, bubbling in the pipes. System vented? Vent the system. Draw-off amount is too small. Sufficient system pressure in the secondary circuit? Check system pressure in the secondary circuit; if necessary, increase pressure. Plate heat exchanger calcified? Clean the secondary side of the plate heat exchanger;...
-
Page 64: Index
15. INDEX Blocking protection ..........................77 Comfort mode ............................73 Commissioning menu ........................59 Controller adjustments ........................80 Data logging ............................79 Disinfection ............................75 Electrical connection ..........................48 Emergency speed ..........................71 Error relay ............................77 Firmware updates ..........................79 Fuse ..............................82 ® Lightwheel ............................52 Manual mode ............................81 Measured values ...........................67,68 Microbuttons ............................52 MicroSD card slot ..........................49 Mounting .............................48... -
Page 65: Eu Declaration Of Confirmity
Brandstücken 31 22549 Hamburg For the following product DHW exchange controller COSMO CFWME it is herewith confirmed that it complies with the standards, which are determined in Council Directives on the approximation of the laws of the Member states. For the evaluation of the product, the following directives and standards were used in the version current at the date of issue:... - Page 66 NOTE...
- Page 67 NOTE...
- Page 68 NOTE...
-
Page 69: Guarantee, Warranty, Availability Guarantee, Imprint
Model and product claims cannot be as- serted. Within the scope of the currently valid legal provisions of the purchase contract law (Ger- man Civil Code (BGB) in regard to warranty claims for defects), a limitation period of 5 years from delivery applies to COSMO. - Page 70 G U T E S K L I M A B E S S E R L E B E N C O S M O GMBH Brandstücken 31 · 22549 Hamburg i n f o @ c o s m o - i n f o . d e w w w .
Need help?
Do you have a question about the CFWME and is the answer not in the manual?
Questions and answers