
Related Manuals for Casa Systems CFW-2591

Summary of Contents for Casa Systems CFW-2591
- Page 1 Installation Guide 5G High Power mmWave Outdoor CPE Doc No. IG01319 5G High Power mmWave Outdoor CPE – Installation Guide IG01319 v0.95 December 06, 2021...
- Page 2 Casa Systems accepts no responsibility for any loss or damage resulting from errors or delays in transmission or reception, or the failure of the Casa Systems 5G High Power mmWave Outdoor CPE to transmit or receive such data.
-
Page 3: Table Of Contents
3 of 26 Contents Overview ......................................4 Introduction ........................................4 Target audience ....................................... 4 Prerequisites ........................................4 Product introduction ..................................5 Product overview ......................................5 Package contents ......................................5 Physical dimensions and interfaces .............................6 Physical dimensions ......................................6 Interfaces ........................................... 7 Site assessment pre-screen ................................8 Preparation before attending customer premises ........................8 At the customer premises ................................8 Installation site inspection ..................................... -
Page 4: Overview
4 of 26 Overview Introduction This document provides a detailed guide to installing the Casa Systems CFW-2591 5G High Power mmWave Outdoor CPE, hereon simply referred to as the AurusAI. Target audience This document is intended for experienced hardware installers who understand telecommunications terminology and concepts. -
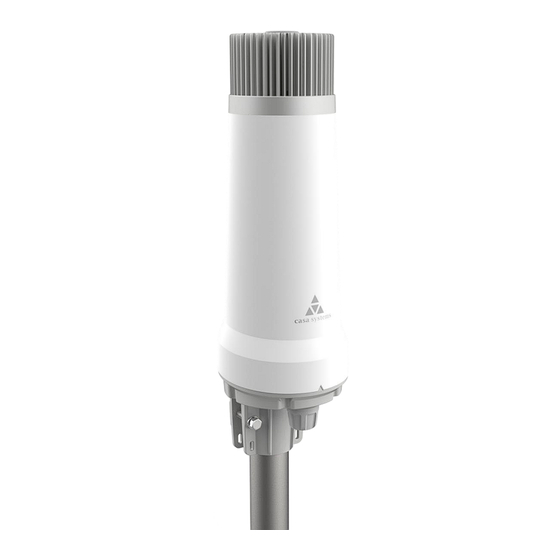
Page 5: Product Introduction
5G broadband connectivity to wired and wireless clients in the property via an indoor router. Package contents The CFW-2591 in-box contents include: 1 x 5G High Power mmWave Outdoor CPE (CFW-2591) ⚫ 1 x Assembled mount bracket. ⚫... -
Page 6: Physical Dimensions And Interfaces
Physical dimensions and interfaces Physical dimensions Below is a list of the physical dimensions of the CFW-2591. Figure 1 – 5G High Power mmWave Outdoor CPE Dimensions C F W - 2 5 9 1 D i m e n s i o n s Width 159.9mm... -
Page 7: Interfaces
7 of 26 Interfaces SIM card retaining clip SIM card slot Antenna Power Supply port (PoE) Figure 2 – Interfaces I t e m D e s c r i p t i o n SIM card slot Push the SIM card in here to lock it in place. The SIM card is held in place by a retaining clip. -
Page 8: Site Assessment Pre-Screen
8 of 26 Site assessment pre-screen At the distribution centre, the telecommunications provider should check site and local area coverage/tower locations to determine suitable site install locations. This can be done through the telco’s tower database, modelling data, and satellite maps. The operator may provide data from the pre-qualification system, but this is a guide only as to possible best sides of the property to install the device. -
Page 9: Ethernet / Sim Cover Assembly And Sim Card Insertion
9 of 26 Ethernet / SIM cover assembly and SIM card insertion The AurusAI Ethernet / SIM cover must be properly attached to prevent dust and water from entering the AurusAI’s housing. The steps to follow will depend on whether the unit you have received has had the SIM card pre-inserted at the distribution centre. - Page 10 10 of 26 Figure 4 - Ethernet cable strain relief loop When you have mounted the unit and are finalizing the installation, hand tighten the Ethernet locking nut to avoid dust/water ingress. Figure 5 - Ethernet cable gland tightened 5G High Power mmWave Outdoor CPE – Installation Guide IG01319 v0.95 December 06, 2021...
- Page 11 11 of 26 6.2.2 Preparing a unit requiring SIM insertion Units shipped from the factory without a SIM card pre-inserted require the installer to remove the Ethernet / SIM card cover and insert the SIM card. The Ethernet cable gland comes shipped in a separate bag and must be assembled at the end of the installation.
- Page 12 12 of 26 Push the SIM card in until it locks into place. You will hear a click when the SIM card is locked in place. You may need to use tweezers or something similar to assist in pushing the SIM card all the way in. Replace the SIM card retaining clip and Ethernet / SIM card cover then re-tighten the screws.
- Page 13 13 of 26 Assemble the Ethernet cable gland as shown below. Figure 10 – Ethernet cable gland assembly 5G High Power mmWave Outdoor CPE – Installation Guide IG01319 v0.95 December 06, 2021...
- Page 14 14 of 26 Note that the rubber seal has a split down the middle allowing you to slide it over the Ethernet cable. Figure 11 - Rubber seal split To finalize the installation, hand tighten the Ethernet locking nut to prevent water/dust ingress. 5G High Power mmWave Outdoor CPE –...
-
Page 15: Installation Considerations
15 of 26 Installation considerations As the 5G High Power mmWave Outdoor CPE is aligned specifically for each individual property, please take note of the following when installing the equipment: After alignment, do not move, place anything in front of, or adjust the position of the 5G High Power ⚫... -
Page 16: Site Survey
On the smartphone that you will use for the installation, open the Aurora Pro installation app. When the app opens, the Casa Systems splash screen is displayed and then the Let’s get started page. 5G High Power mmWave Outdoor CPE – Installation Guide... - Page 17 17 of 26 Casa Systems splash screen Select New Device button To commence the site survey for a new customer, tap on the New Device button. For further instructions on how to perform the site survey using the app, refer to the Aurora Installation App User Guide (document UG01271).
- Page 18 18 of 26 8.2.4 Performing the site survey When you have the Aurora app at the point where it is ready for you to perform the site survey, you should walk around the installation site holding the AurusAI on the survey pole along with the Installation Assistant and smartphone and find the location with the best signal.
-
Page 19: Mounting The Aurusai
19 of 26 Mounting the AurusAI Removing the locking pin Before proceeding any further, you must remove the locking pin from the unit. You can perform this task while on the ground to reduce time spent on the roof/ladder. Locking pin Figure 14 - Locking pin location 5G High Power mmWave Outdoor CPE –... - Page 20 20 of 26 Turn the locking pin anti-clockwise until it can be pulled out from the AurusAI. Remove the warning label from the locking pin. Figure 15 - Locking pin removal Break the pin at the narrow point just below the bottom of the screw cap. Figure 16 - Breaking the locking pin Replace the locking pin screw cap to the bottom of the AurusAI, turning it clockwise so that it is secured tightly to ensure that there is no water or dust ingress.
- Page 21 21 of 26 Figure 17 - Replacing the locking pin cap 5G High Power mmWave Outdoor CPE – Installation Guide IG01319 v0.95 December 06, 2021...
-
Page 22: Prepare Your Chosen Mounting Solution
+ M8 Washer + M8 Spring one of these points using a lock washer cable tie Pole Figure 18 - CFW-2591 mounting bracket and bolts 5G High Power mmWave Outdoor CPE – Installation Guide IG01319 v0.95 December 06, 2021... -
Page 23: Perform Alignment Of Customer Device
23 of 26 Notes on mounting: Use a standard 13mm socket wrench ⚫ Tighten the bracket bolts to 7 Nm / 65 in-lbs ⚫ Do not over tighten bolts ⚫ Perform alignment of customer device Connect the survey cable between the customer device and the Installation Assistant. On the smartphone, go back to the Aurora app again. -
Page 24: Power Over Ethernet Installation
24 of 26 Power over Ethernet installation Discuss with the customer about a suitable indoor location for the PoE injector. When a suitable location has been found, crimp RJ45 connectors to a cable long enough to run from the power port of the AurusAI to a wall socket or directly to the PoE injector inside the property. -
Page 25: Appendix A - Safety And Compliance
25 of 26 Appendix A – Safety and compliance RF Exposure Your device contains a transmitter and a receiver. When it is on, it receives and transmits RF energy. When you communicate with your device, the system handling your connection controls the power level at which your device transmits. -
Page 26: Operating Temperature
⚫ Company details Casa Systems, Inc. 100 Old River Road, Andover, Massachusetts 01810 https://www.casa-systems.com/contact-us/ Product details Product: 5G High Power mmWave Outdoor CPE Model No: CFW-2591 5G High Power mmWave Outdoor CPE – Installation Guide IG01319 v0.95 December 06, 2021...
Need help?
Do you have a question about the CFW-2591 and is the answer not in the manual?
Questions and answers