
Related Manuals for TDW PIG-SIG IV

Summary of Contents for TDW PIG-SIG IV
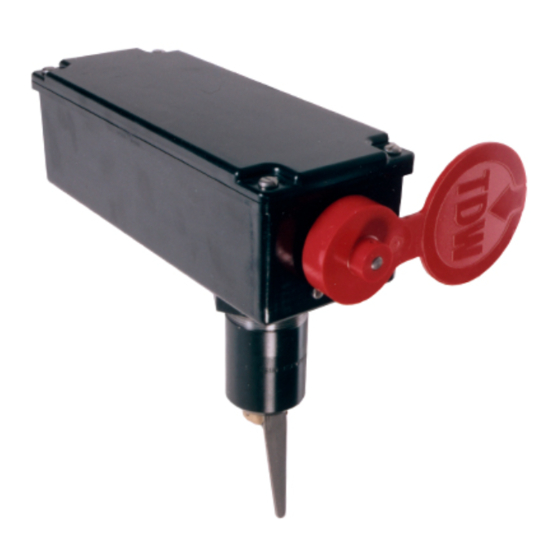
- Page 1 PIG-SIG IV ® Scraper Passage Indicator Operating and Maintenance Instructions 00-3795-0153 June 2019...
- Page 2 Phone (918) 447-5100 Fax (918) 446-6327 E-mail: info@tdwilliamson.com Explore the TDW Web site at www.tdwilliamson.com. ™ Trademark of T.D. Williamson in the United States and foreign countries. ® Registered trademark of T.D. Williamson in the United States and foreign country.
- Page 3 Document Version History The list below shows the complete revision history of this document Date Version 06/2019 Remove T-101a, update measurements, update photos © 2019 All rights reserved T.D. Williamson...
-
Page 4: Table Of Contents
Table of Contents Section 1: Safety 1.0 Safety ..............1 Section 2: Introduction & Installation 1.0 Purpose ............. 3 2.0 Description ............3 Section 3: Installation 1.0 Nipple Installation ..........9 2.0 Plug Installation ..........12 3.0 Indicator Installation ........16 4.0 Extended Indicator Installation ....... - Page 5 This page intentionally left blank. © 2019 All rights reserved T.D. Williamson...
-
Page 6: Safety
Section I – Safety 1.0 Safety 1.0 SAFETY Throughout this publication, “Dangers,” “Warnings” and “Cautions” (accompanied by the International ⚠) are used to alert the customer to special instructions concerning a particular service or operation that may be hazardous if performed incorrectly or carelessly. OBSERVE THEM CAREFULLY! ⚠... - Page 7 Section I – Safety This page intentionally left blank.
-
Page 8: Purpose
The PIG-SIG IV has a trigger that requirements, including: extends into the pipeline through • Flag Indicator with Manual a welded fitting that has been Reset flag tapped. - Page 9 The "Build your own PIG-SIG" charts at the end of this manual show all the variations available. The PIG-SIG IV also can be installed on a line under pressure, without taking the line out of service, using the TDW T-101 or T-101b Drilling Machines.
- Page 10 2.2.1 Specifications A. THREAD-O-RING Nipple Material THREAD-O-RING Nipple Material Specification: Size & Grade: 2 NPS XXS, ASTM A 333 Grade 6 seamless steel pipe. Tensile Requirements: 35,000 psi SMYS – 60,000 psi SMTS Impact Requirements: 13 ft-lbf min Avg 3 Specimens 10 ft-lbf min One Specimen Only Impact Temperature: -50 º...
- Page 11 2.2.2 Pressure-Temperature Ratings PRESSURE-TEMPERATURE RATINGS FOR PIG-SIG IV SCRAPER PASSAGE INDICATOR THREAD O-RING NIPPLE (Does not include allowance for corrosion.) Pressures are in pounds per square inch, gauge (psig) Piping Code B31.3 B31.4 B31.8 Temp. F=.72 F=.72 F=.60 F=.50 F=.40 °F...
- Page 12 1,3, 4, 4X, 6, 7, 9 and 13 and IP67 as defined in IEC 529. The switch enclosure meets the European Hazardous Locations Designation: EExd IIC T6 category II 2 GD, SIRA 00ATEX 1037X. The switch complies with the European Directive on Equipment and Protective Systems Intended for Use in Potentially Explosive Atmospheres (94/9/EC) commonly referred to as the ATEX Directive.
- Page 13 C. Reference Standards Non-Hazardous Locations Type I enclosures are intended for indoor use primarily to provide a degree of protection against contact with the enclosed equipment. Type 3 enclosures are intended for outdoor use primarily to provide a degree of protection against windblown dust, rain, sleet, and external ice formation.
-
Page 14: Nipple Installation
1-7/16- to AWS-E-XX18 1/2-inch diameter through the recommended for use with pipe wall, and the bore of the TDW fittings. The use of nipple must be coaxial with the low-hydrogen electrodes is hole cut in the pipe to within specifically recommended by 1/32-inch. - Page 15 INSIDE of the nipple and be and use. careful to prevent excessive C. Clean weld edges weld penetration inside the thoroughly. Remove all paint, nipple to help avoid tapping dirt, rust, oil, etc., from the problems. The length of the weld areas.
- Page 16 Figure 2. Check Nipple for Swaging through bore of 2-1/16-inch to C. When taking tapping permit passage of the TDW measurements, as prescribed PIG-SIG plug assembly. drilling machine manual, another measurement CAUTION: Do not overtighten the valve.
-
Page 17: Plug Installation
assembly on a plug assembly already installed in a line, begin with paragraph 4.3. 3.2.1 Preparation for Setting the Plug A. Extend drilling machine boring bar until retainer ring is exposed. B. Insert plug holder into boring bar and install retainer spring. See Figure 4. - Page 18 install threaded valve adapter drilling machine. Figure 7. F. Fully retract plug assembly into the adapter. Make sure zero is visible on the body tube. See Figure 8. Figure 5 Align Plug Assembly Arrow Figure 8. Retract Plug Assembly 3.2.2 Compute Plug Setting Distance It is important that the distance required to completely set the...
- Page 19 Figure 9. Measurement G C. Measurement “J” (see Figure 3), the distance from the valve face to the top of the tapping fitting, was taken prior to making the tap. D. Measurement “K”, a constant 1-7/8-inches for all PIG-SIG Figure 10. Plug Setting Measurements models, is the distance from CAUTION: Measurements must not the top of the tapping fitting to...
- Page 20 Figure 13. Lower the Plug F. Attach handle to ¾ in. hex drive. Do not use air motor for completion plug setting operations. See Figure 13. Figure 11. Install Bleeder Valve G. Rotate handle clockwise until WARNING: Vent pressure bleeder valve away from work mark is reached on body tube area and personnel.
-
Page 21: Indicator Installation
valve retract plug, following instructions paragraph 4.5. Remove and check O-ring. K. Fully retract boring bar by turning feed tube counterclockwise. See Figure 14. Do not permit boring bar to turn, or plug will unthread. Figure 15. Check Plug Alignment Note: Make sure the top of the plug is below the top of the nipple. - Page 22 E. Loosen screws securing spring retainer and upper torsion spring to shaft. See Figure 19. F. Remove spring retainer and upper torsion spring from shaft. See Figure 20. Figure 17. Install Drive Sleeve Figure 20. Remove Spring Retainer and Upper Torsion Spring G.
- Page 23 as follows: 1. If unidirectional, turn shaft counterclockwise to a firm stop with a screwdriver. The trigger is positioned. 2. If bi-directional, turn the shaft fully counterclock- wise. Mark this position of the slot in the Figure 21. Cock Lower Torsion shaft on the top of the Spring cam.
- Page 24 Figure 25. Adjust the Microswitch Lever Figure 27. Install Spring Retainer L. If an electrical PIG-SIG is Note: If pipeline pressure is less being set, adjust than 1,500 psi, only one (1) microswitch lever up or down torsion spring on cam is as necessary so that roller necessary.
- Page 25 Figure 29. Install Drive Sleeve Figure 28 Electrical Connections P. If an electrical model, remove cover to microswitch, and make electrical connections. See Figure 28. 1. Run three conductor cables into box. Connect ground wire to green post. 2. Connect wires following Figure 30.
- Page 26 C. For unidirectional trigger, turn threaded shaft and spacer counterclockwise until a firm stop is reached. The trigger will be in the down position. D. For bi-directional trigger, turn threaded shaft and spacer clockwise to a firm stop. Place a mark on the pipe cap where Figure 33.
-
Page 27: Extended Indicator Installation
Note: A rotary cap indicator must be reset manually. When the rotary turned counterclockwise until stops, a unidirectional trigger is in the down or "reset" position. When it is turned clockwise until it stops, a unidirectional trigger is in the up, or "pig passed"... -
Page 28: Recovering The Plug
E. Remove the shaft from the Cap Indicator, the pipe cap. If cap/housing assembly. the latter, proceed to step G. Remove from the bottom. This B. Disconnect electrical wiring shaft can be discarded. Retain from microswitch white Teflon O-ring in bottom electrical model. - Page 29 D. Remove cam, lower torsion 3.5.2 Take Required spring, spacer and washer, if Measurements installed on extension. May A. With boring bar fully retracted need to file shaft for easier and feed tube at zero mark on removal. body tube, calculate distance Unthread housing/cap plug holder travels to contact...
- Page 30 Figure 41. Measurement M Figure 43. Open Bleeder Valve. E. The sum of Measurements D. With locking cap removed, “M” and “N” should be the body rotate feed tube clockwise to tube reading when the plug holder extend boring bar until plug contacts the bottom of the recess holder contacts bottom of hole plug.
-
Page 31: Maintenance
1. Is flag positioned (flapper) positioned properly? – When looking at properly? the TDW flag, the flag should i. For uni-directional be turned down ¼ turn plugs, turn the shaft clockwise. This is the proper counterclockwise until position before Pig passage. - Page 32 the trigger after the Pig passes. 5. Is the plug aligned with the ii. For a bi-directional pipeline axis? plug, turn the shaft a. The arrows stamped on counter-clockwise until top of the plug should it comes to a stop. align with the pipeline.
- Page 33 Hex Keys (Allen Wrenches) Reference List Size TDW Part Where Used Number 3/32 00-0175-0002-00 Set screw in plug, cam and spring retainer. 00-0175-0003-00 Screws in flag pin guide.
- Page 34 This Warranty applies only to products shipped after June 30, 2000. If TDW accepts any claim made under this Warranty, TDW’s liability, if any, shall be limited to, at TDW’s sole option, repair or replacement of the failed part or product, or a refund of the purchase price, less an allowance for services rendered for the product prior to the Warranty claim.
- Page 35 PIG-SIG V Scraper Passage Indicator Operating and Maintenance Instructions tdwilliamson.com TDW Pub. No. 00-3795-0153 | © 2019 All rights reserved. T.D. Williamson | Printed in the U.S.A. | Revised June 2019...
Need help?
Do you have a question about the PIG-SIG IV and is the answer not in the manual?
Questions and answers