Table of Contents
Advertisement
Quick Links
Advertisement
Table of Contents

Related Manuals for FezzAudio Titania PA Evolution

Summary of Contents for FezzAudio Titania PA Evolution
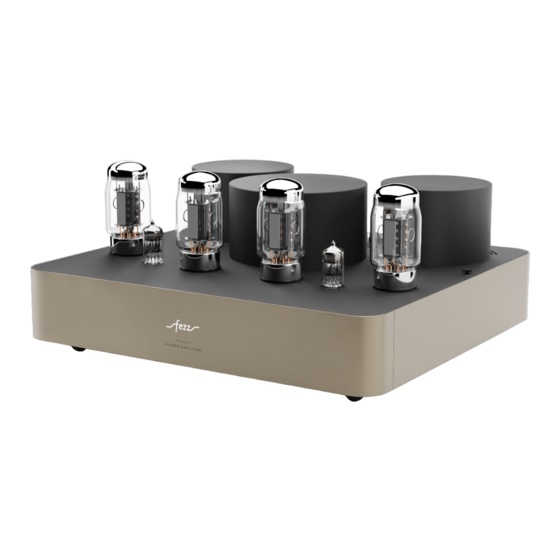
- Page 1 USER`S MANUAL TITANIA POWER AMPLIFIER WWW.FEZZAUDIO.COM...
-
Page 2: Table Of Contents
TA B L E O F C O N T E N T S Technical data – 2 Safety tips – 3 Introduction – 3 Installation of the device – 3 Unpacking – 3 Content of package – 3 Vacuum tubes installation – 4 Where to place the amplifier –... -
Page 3: Safety Tips
SAFET Y TI PS In order to obtain the highest possible sound reproduction quality and for the sake of your own safety, please kindly refer to the following. - Never turn on the amplifeir without installed tubes and without hooked-up spekers. - Never place the Fezz Audio Titania power amplifier near heat sources, such as radiators, heaters or direct sunlight. -
Page 4: Vacuum Tubes Installation
VAC U U M T U B E S I N S TA L L AT I O N Place the amplifier on a stable surface. Carefully remove the vacuum tubes from their packaging and install them in the appropriate sockets, as show below, and adhering to the numbering scheme as identified on the packaging. The pins in the base of each of the vacuum tubes are “coded”, and this has the result that the insertion of the vacuum tube into the socket is possible only in one correct and appropriate orientation. -
Page 5: Interconnections
I NTERCO N N ECTI O N S Preamp signal input Mono/Stereo switch Speaker terminals for the right channel Speakers terminals for the left channel Signal ground on/off switch IEC power supply cord socket Mains switch Terminal jumpers The figure above shows the rear panel view of the power amplifier, together with a description of the inputs and outputs allowing for connection of the other elements of your audio system. -
Page 6: Buring-In Process
S T E P 3 P OW E R C O R D C O N N ECT I O N Make sure that the power amplifier is switched off. Connect the power cord to the IEC socket on the rear panel of the power amplifier. -
Page 7: Trouble-Shooting Guide
TROU B LE-S H OOTI N G GU I D E If your amplifier does not work as it is supposed to, it is fairly easy to diagnose and remedy some of the common malfunctions, by following procedures as outlined in this following. T H E P R O B L E M P R O B A B L E R E A S O N S O LU T I O N... - Page 8 WWW.FEZZAUDIO.COM...
Need help?
Do you have a question about the Titania PA Evolution and is the answer not in the manual?
Questions and answers