
Related Manuals for Premier AV TV-1108V-SD

Summary of Contents for Premier AV TV-1108V-SD
- Page 1 Premier AV TV-1108V-SD Mini Scart Freeview Receiver USER’S MANUAL (DIGITAL TERRESTRIAL RECEIVER) English...
-
Page 2: Table Of Contents
Index 1. INTRODUCTION................1 1.1. Features..................1 1.2. Safety Information..............1 2. PRODUCT OVERVIEW..............5 2.1. Main Unit.................5 2.2. Remote Control Unit..............6 3. SETTING UP...................7 3.1. Connecting to a TV..............7 3.2. DIGITAL TV Channels Initial Installation.........8 4. DVB-T BASIC OPERATION............8 4.1. Channel List................8 4.2. Favourite List................9 4.3. - Page 3 6.3.1. OSD................14 6.3.2. TV................14 6.3.3. System Setup..............15 6.3.4. Time................15 6.3.5. Wakeup Timer.............16 6.3.6. Parental Lock..............16 6.4. Software Upgrade..............16 6.5. Factory Default..............16 6.6. Version..................16 7. MOVIE, MUSIC AND PHOTO............16 8. GAMES..................17 9. RECORDING.................17 9.1. Timer Recording ..............17 9.2. Playback of Recorded Contents(MPEG-2)......18 10.
-
Page 4: Introduction
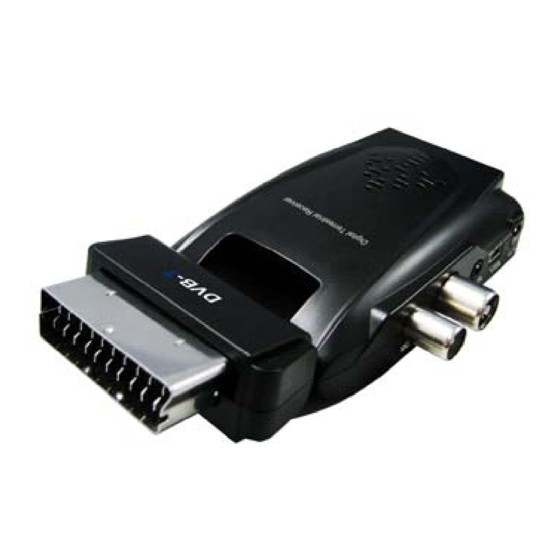
1. INTRODUCTION The Premier AV TV-1108V-SD is a Super Mini Set-top box being able to receive all Freeview DVB-T signals (over 100 TV and Radio channels). Plug a Scart shaped device to one of the scart ports of your TV and... - Page 5 WARNING: TO REDUCE THE RISK OF FIRE OR ELECTRIC SHOCK, DO NOT EXPOSE THIS APPLIANCE TO RAIN OR MOISTURE. CAUTION: Use of controls or adjustments or performance of procedures other than those specified herein may result in hazardous radiation exposure. Please, carefully study this manual and always keep it available.
- Page 6 (11) GROUNDING OR POLARIZATION: This product may be equipped with a polarized alternating-current line plug (a plug having one blade wider than the other).This plug will fit into the power outlet only one way. This is a safety feature .If you are unable to insert the plug fully into the outlet, try reversing the plug .If the plug should still fail to fit, contact your electrician to replace your obsolete outlet.
- Page 7 (16) POWER LINES: An outside antenna system should not be located in the vicinity of overhead power lines or other electric light or power circuits, or where it can fall into such power lines or circuits. When installing an outside antenna system, extreme care should be taken to keep from touching such power lines or circuits as contact with them might be fatal.
-
Page 8: Product Overview
2. PRODUCT OVERVIEW 2.1. Main Unit ANT IN: CONNECT TO ANTENNA CONNECT TO THE POWER SUPPLY CONNECT TO USB CONNECT TO INFRARED RECEIVER(REMOTE ACTIVATION) ANT OUT: CONNECT TO ANTENNA PORT OF TV ● All connections required ANT OUT: CONNECT TO ANTENNA PORT OF TV Note : The head of the unit to be plugged into a scart port of TV... -
Page 9: Remote Control Unit
Note : IR Receiver is to be connected as in the above for remote activation 2.2. Remote Control Unit function function Display EPG (Electronic Stand-by/Power On Program Guide) INFO Mute audio output Display channel info AUDIO Numerical key pad Changing the audio mode... -
Page 10: Setting Up
Switch to TV or Radio TV/RADIO Switch to Teletext mode channels SUBTITLE Go to previous program Display subtitles MENU Display Main Menu Display Favourite list Enter the mode of sample EXIT Exit Current Menu images on the screen . Changing the channel up/ Press once to pause. -
Page 11: Digital Tv Channels Initial Installation
3.2 DVB-T Channels Initial Installation Initial Install screen displays when the unit is initially connected to Aerial and power-plugged on. . Once OSD language and Area are selected, press OK/LIST button and select YES on the pop-up window to start scanning DVB-T channels. When completing the channels scanning, DVB-T channels will be scanned. -
Page 12: Favourite List
Press INFO to enter the operation guide menu while the channels list is displayed. 4.2. Favourite List You can organise your own favourite channels lists. (see chapter 6.1. Channel Manager). Press FAV to display the favourite list. Press PR+ or PR- to move and select a channel, and Press OK/LIST to display it. Press TV/RADIO to switch to between TV and radio channels. -
Page 13: Soundtrack And Subtitles Selection
4.4. Soundtrack and Subtitles Selection Press AUDIO to select the audio modes between STEREO, LEFT MONO and RIGHT MONO. Press SUBTITLE to access Subtitle option. 4.5. Displaying Program Information Press INFO to display the current program information and Press the same button again to show frequency, bandwidth, signal and quality levels of the channel. -
Page 14: Dvb-T
6. DIGITAL TV 6.1. Channel Manager Go to Digital TV, select Channel Manager and press OK/LIST to enter. Then you will find the following sub-menus: 6.1.1. Channel Organizer You can organise the Digital TV channels tuned-in. Press PR+ or PR- to select channels. -
Page 15: Channel Sorting
Select a channel and press - + to rename channels. Use the numerical key pad and the coloured buttons to enter new name and press OK/LIST button to confirm and exit. Keep pressing EXIT button until Menu windows are all closed and then the unit is updated with the message “Successfully updated”. -
Page 16: Delete All
6.1.5. Delete All You can delete all channels lists. Enter the password allocated on the parental lock and then choose to delete TV or Radio channels. (Default password : 0000) 6.2. Installation Go to Digital TV, select Installation and press OK/LIST to enter. Then you will find the following sub-menus: 6.2.1. -
Page 17: Configuration
6.3. Configuration Go to Digital TV, select Configuration and press OK/LIST to enter. Then you will find the following sub-menus: 6.3.1. OSD Select OSD and press OK/LIST to enter the following setting options. OSD: Use the button - + to select color shade of the OSD screen Time on OSD: : Use the button - + to activate or deactivate the Time Display function (Time will display on the top- right hand corner of the screen on... -
Page 18: System Setup
Display Mode: Use the button - + to select Video System. Aspect Ratio: Select Screen Aspect Ratio Video Output: Select Video Ouputs (CVBS, RGB outputs). Brightness, Contrast, Hue and Saturation 6.3.3. System Setup Select System setup and press OK/LIST to enter the general settings options. EQ Setup: Adjust the audio equalizer settings. -
Page 19: Wakeup Timer
6.3.5. Wakeup Timer Select Wakeup Timer and press OK/LIST to enter the scheduler settings Options. ( See chapter 9.1. Timer Recording Function ) 6.3.6. Parental Lock Select parantal Lock and press OK/LIST to enter the channels lock settings options. In this submenu you can set up your own password for channels locking. The password of the Parental Lock is 0000 by default. -
Page 20: Games
8. GAMES Go to Main Menu by pressing “MENU” button and select the Games to access available games. Select one you wish to play and press OK/LIST to enter. 9. RECORDING NOTE : -A new USB Flash Storage Disk (Stick type) that has not been used with the unit to be made compatible with the unit before Recording Insert a USB Flash Storage Disk (Stick type) into a USB port lead of the device and Go to Main Menu/partition-Format/then “0001/dev/sda/1”...
Need help?
Do you have a question about the AV TV-1108V-SD and is the answer not in the manual?
Questions and answers