Advertisement
Before you begin
Refer to the Clock section for instructions on properly setting the Clock.
Battery back-up operation
- This clock is equipped with a time back-up system that is powered by 2 AAA batteries (not included). The power failure protection circuit will not operate unless batteries are installed.
- When normal household power is interrupted, or AC line cord is unplugged, the battery backup will power the clock to keep track of time and alarm settings programmed into memory.
- Normal operation will resume after AC power is restored so you will not have to reset the time or the alarm.

Note: It is recommended to replace the batteries at least once per year even if no power failures have occurred.
To install the batteries:
- Open the battery compartment on the back of the clock by pressing on the tab and removing the cover.

- Insert 2 AAA batteries (not included). Make sure to match the battery polarity marked in the battery compartment.
- Put the cover back on the compartment and click it into place.

Power failure indicator
If you have not installed batteries in the product, or the batteries run out while AC power is disconnected, the clock and alarm settings will be lost. After AC power is reconnected, the time 12:00 will be shown on the LCD screen to indicate that power was interrupted and you should readjust the time settings.
General controls
Front view
SNOOZE/LIGHT – Pauses the alarm for 8 minutes while it's going off. Turns on the display and projector for 5 seconds when using battery power.

PROJECTOR – Projects the time onto your ceiling or wall.
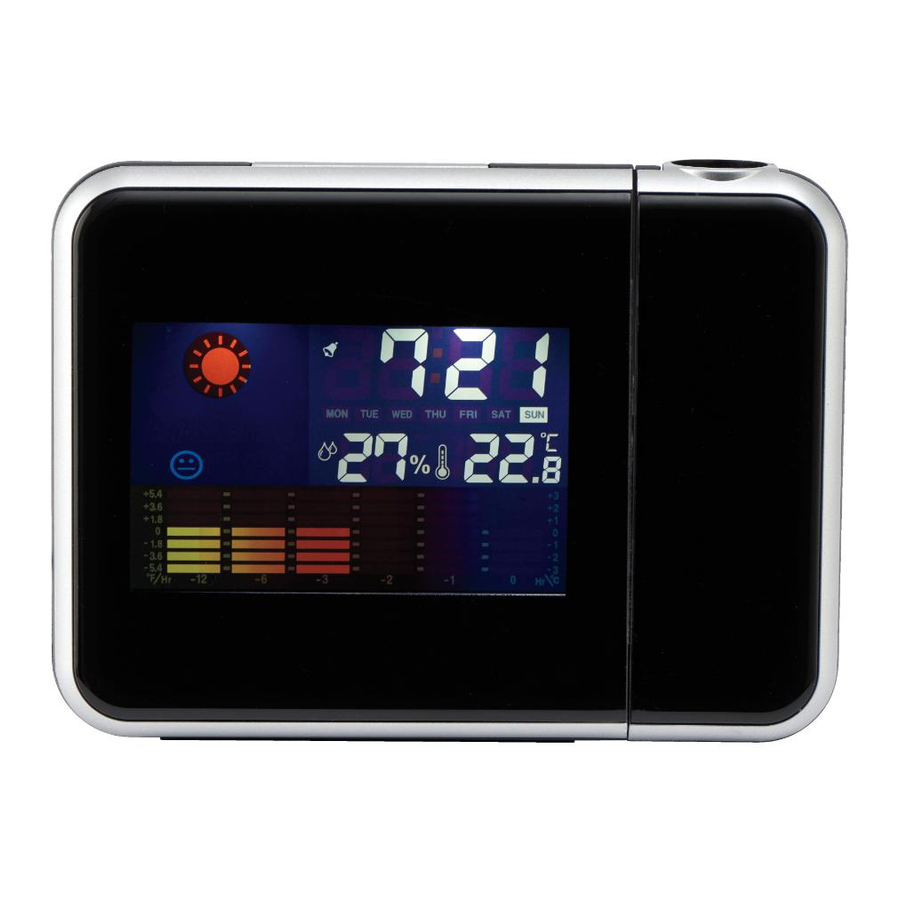
TIME/DATE – Shows the current time in 12- or 24-hour mode. Press the MODE button on the back of the clock to display the date.
DAY – Shows the day of the week.
WEATHER SYMBOL – Shows the clock's reading of the environmental conditions (humidity). Note that air conditioning or central heating will affect this weather symbol.
 Indicates that an alarm has been set and is active. – Shows the relative humidity (indoors).
 Shows the temperature (indoors). TEMPERATURE TREND LINE
 Shows the variation in temperature (indoor) over the last 12 hours.
TEMPERATURE TREND LINE – Shows the variation in temperature (indoor) over the last 12 hours.
Back view

MODE – Switches between time and date display. Press and hold to access time setting, calendar setting, and alarm setting modes.
UP – In time/calendar/alarm set modes, increases the hour, minute, or day by one. In normal time display mode, activates/deactivates the alarm (single press) or switches between 12- and 24-hour display (press and hold).
DOWN – In time/calendar/alarm set modes, decreases the hour, minute, or day by one. In normal time display mode, switches the temperature display between degrees Fahrenheit and Celsius.
MAX/MIN – Shows the maximum (press once) and minimum (press twice) humidity and temperature registered by the clock in the past 12 hours.
SNZ – Pauses the alarm for 8 minutes while it's going off.
Clock
Setting the time
- In normal time display mode, press and hold the MODE button on the back of the clock until the hour digits flash on the display.
- Press the UP and DOWN buttons to adjust the hour.
- Press the MODE button to confirm. The minutes digits flash.
- Press the UP and DOWN buttons to adjust the minutes.
- To save and exit the time setting mode, press MODE.
NOTE: By default, the time is displayed in 12-hour mode (AM/PM). If you'd like to switch to 24-hour mode, press and hold the UP button on the back of the clock until the time display switches.
Setting the calendar
- In normal time display mode, press the MODE button on the back of the clock once to enter calendar setting mode.
- Press and hold the MODE button on the back of the clock until the year digits flash on the display.
- Press the UP and DOWN buttons to adjust the year.
- Press the MODE button to confirm. The months digits flash.
- Press the UP and DOWN buttons to adjust the month.
- Press the MODE button to confirm. The date digits flash.
- Press the UP and DOWN buttons to adjust the date.
- To save and exit the calendar setting mode, press MODE.
Alarm function
Set alarm time
- In normal time display mode, press the MODE button twice to enter alarm set mode.
- Press and hold the MODE button until the hour digits start to flash.
- Press the UP and DOWN buttons to set the hour you want for the alarm.
![warning]()
NOTE: If you're using 12-hour mode time display, make sure you choose the correct AM/PM setting when you set the hour! - Press MODE to confirm. The minutes digits start to flash.
- Press the UP and DOWN buttons to set the minutes you want for the alarm.
- Press MODE to confirm and return to normal time display.
NOTE: If you go more than 10 seconds without pressing a button while setting the alarm, the clock returns to normal time display.
Turning the alarm on/off
- Press the UP button on the back of the clock to turn the alarm on or off. The alarm icon (
![]() ) appears on the display when the alarm is active.
) appears on the display when the alarm is active. - While the alarm is sounding, you can press any button on the back of the clock (except for SNZ) to deactivate the alarm.
 ) appears on the display when the alarm is active.
Using SNOOZE
- Press the SNOOZE/LIGHT button on the top of the clock. The alarm icon (
![]() ) on the display will flash and the alarm will sound again when the snooze period (8 minutes) is over.
) on the display will flash and the alarm will sound again when the snooze period (8 minutes) is over. - To deactivate SNOOZE, press any button on the back of the clock (except for SNZ).
Temperature and humidity
Showing maximum and minimum humidity/ temperature
- Press the MAX/MIN button on the back of the clock once to display the clock's maximum humidity and temperature readings on its display.
- Press the MAX/MIN button a second time to display the clock's minimum humidity and temperature readings on its display.
- Press the MAX/MIN button a third time to return to the current temperature and humidity readings.
Changing between Fahrenheit and Celsius
By default, this clock displays its temperature readings in degrees Fahrenheit.
- To switch to degrees Celsius, press the DOWN button on the back of the clock.
- To switch back to degrees Fahrenheit, press the DOWN button on the back of the clock again.
Clock projector
A time projector is located on the right side of the unit. Clock time can be projected onto ceilings or walls in a darkened environment for easy reference. The distance between the projector and the projected surface should be within 3 to 9 feet.
To use the projector: Aim the projector arm at the surface you want to project onto.

Rotate the FOCUS WHEEL to adjust the focus of the projected image.
Note: These directions are for using the projector while the clock is plugged in. To use the projector and display on battery power, press the SNOOZE/LIGHT button on top of the clock. The display and projector will illuminate for 5 seconds.

Documents / ResourcesDownload manual
Here you can download full pdf version of manual, it may contain additional safety instructions, warranty information, FCC rules, etc.
Advertisement

Need help?
Do you have a question about the RCPJ100A1 and is the answer not in the manual?
Questions and answers