Table of Contents
Advertisement
Available languages
Available languages
Quick Links
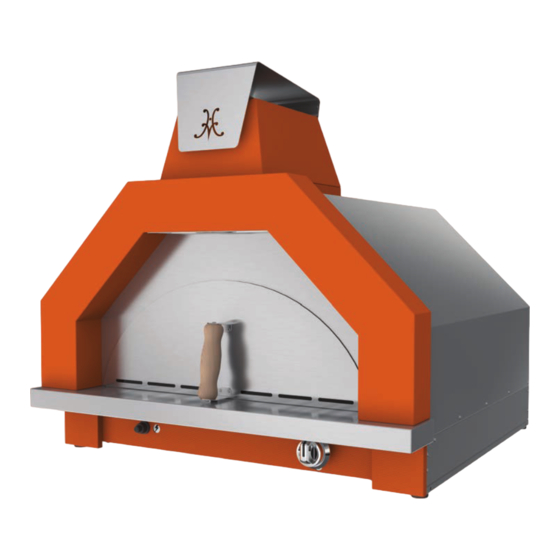
Installation Instructions - Campania Pizza Oven
KIT # AGCKPO-NG / AGCKPO-LP
This conversion kit shall be installed by a qualified service agency in accordance with the manu-
facturer's instructions and all applicable codes and requirements of the authority having jurisdiction.
If the information in these instructions is not followed exactly, a fire, explosion or production
of carbon monoxide may result causing property damage, personal injury or loss of life. The
qualified service agency is responsible for the proper installation of this kit. The installation is not
proper and complete until the operation of the converted appliance is checked as specified in the
manufacturer's instructions supplied with this kit.
IMPORTANT - READ ALL INSTRUCTIONS BEFORE YOU BEGIN
THE INSTRUCTIONS HEREIN SHOULD BE PERFORMED BY A QUALIFIED SERVICE TECHNICIAN.
THE PIZZA OVEN MUST BE COMPLETELY COOL AND THE PREVIOUS GAS SOURCE MUST BE
SHUT OFF OR REMOVED BEFORE ATTEMPTING GAS CONVERSION. SHUT OFF OR REMOVE GAS
SUPPLY TO THE APPLIANCE PRIOR TO DISCONNECTING THE ELECTRICAL POWER.
Some parts inside your pizza oven have sharp edges. Care must be taken when handling the various
components to avoid personal injury. Wear gloves when handling.
KIT CONTENTS:
Burner Manifold with pre-installed Orifices
Pilot Assembly
Instructions
Label
If you smell gas:
1.
Shut off gas to the appliance.
2.
Extinguish any open flame.
3.
Open lid.
4.
If odor continues, keep away from the
appliance and immediately call your gas
supplier or your fire department.
READ THIS MANUAL CAREFULLY AND COMPLETELY BEFORE USING YOUR PIZZA
OVEN TO REDUCE THE RISK OF FIRE, BURN HAZARD, OR OTHER INJURY. KEEP
THIS MANUAL FOR FUTURE REFERENCE.
GAS CONVERSION KIT
DANGER
Flammable Gas - disconnect all propane or natural gas supplies to this
unit before servicing.
Electrical Parts & Components – disconnect all power supplies and
batteries before servicing.
TOOLS REQUIRED:
Work gloves
Safety glasses
Phillips screwdriver
Torx screwdriver with T15 tip
Pipe wrench or large slip-joint pliers
10, 11 and 19mm, and 7/16" open end wrenches
Adjustable wrench
3/32 Allen wrench
DANGER
1.
Do not store or use gasoline or other
flammable liquids or vapors in the
vicinity of this or any other appliance.
2.
An LP cylinder not connected for use
shall not be stored in the vicinity of this
or any other appliance.
©2022 Hestan Commercial Corporation
TM
EN
EN
1
Advertisement
Table of Contents

Related Manuals for hestan Campania Pizza Oven AGCKPO-NG


Summary of Contents for hestan Campania Pizza Oven AGCKPO-NG
- Page 1 Electrical Parts & Components – disconnect all power supplies and batteries before servicing. READ THIS MANUAL CAREFULLY AND COMPLETELY BEFORE USING YOUR PIZZA OVEN TO REDUCE THE RISK OF FIRE, BURN HAZARD, OR OTHER INJURY. KEEP THIS MANUAL FOR FUTURE REFERENCE. ©2022 Hestan Commercial Corporation...
-
Page 2: Component Descriptions
The shield is held in place by the ceramic oven deck and should lift straight up. The knob will pull off the valve stem. BURNER SHIELD DOOR COVER KNOB ©2022 Hestan Commercial Corporation... - Page 3 THE DECORATIVE FRAME ASSEMBLY. USE CAUTION TO AVOID DAMAGING THE CORD. LANDING LEDGE REMOVE 2 THUMBSCREWS REMOVE 4 BOLTS USE 7/16” OR 10mm WRENCH DECORATIVE FRAME REMAINS IN PLACE STONE RETAINER PIZZA OVEN WITH LANDING LEDGE REMOVED ©2022 Hestan Commercial Corporation...
- Page 4 4. Carefully slide out the pizza stones and set aside. STONES EXPOSED SLIDE OUT CAREFULLY 5. Slide out this sheetmetal stone support and set aside. This assembly contains insulation materials inside. Use caution when handling. SLIDE OUT THE STONE SUPPORT ©2022 Hestan Commercial Corporation...
-
Page 5: Gas Inlet
This will allow the entire burner assembly and flame spreader to come away from the rear wall for removal from the oven. FLAME SPREADER BURNER REAR WALL ATTACHMENT COTTER PIN PILOT BOX ATTACHMENT SCREWS - PHILLIPS BURNER SIDE ATTACHMENT SCREW - TORX T15 ©2022 Hestan Commercial Corporation... - Page 6 10 and 11mm wrenches and even pressure to disconnect these lines. DO NOT disconnect the larger gas flex hoses on the valve. The old pilot assembly can now be removed from the oven. GAS VALVE PILOT THERMOCOUPLE PILOT GAS TUBE ©2022 Hestan Commercial Corporation...
- Page 7 3. Reassembly is the reverse process of disassembly. Use care when reconnecting the gas lines as mentioned above. Proceed to the next section (Converting the Regulator and Leak Testing) before you re-install the pizza stones and support structures. ©2022 Hestan Commercial Corporation...
- Page 8 The qualified service technician will fill in the Gas Type, Manifold Pressure, and BTU rate of the burner. The technician should sign and date the label as well. 3. Proceed to next section - LEAK TESTING. ©2022 Hestan Commercial Corporation...
-
Page 9: Leak Testing
Do not attempt to repair or replace the hose itself. Contact your Hestan dealer for genuine replacement regulator P/N 014309. Check all gas supply fittings for leaks before each use. It is handy to keep a spray bottle of soapy water near the shut-off valve of the gas supply line. - Page 10 THIS PAGE LEFT INTENTIONALLY BLANK CETTE PAGE LAISSÉE INTENTIONNELLEMENT VIERGE ©2022 Hestan Commercial Corporation...
-
Page 11: Contenu Du Kit
électriques de toute nature avant de procéder à une opération d’entretien. LIRE CE MANUEL ATTENTIVEMENT ET ENTIÈREMENT AVANT D’UTILISER LE FOUR À PIZZA POUR LIMITER LES RISQUES D’INCENDIE, DE BRÛLURES OU D’AUTRES BLESSURES. CONSERVER CE MANUEL À TITRE DE RÉFÉRENCE. ©2022 Hestan Commercial Corporation... -
Page 12: Description Des Composants
L’écran est maintenu en place par le pont du four en céramique et doit se soulever vers le haut. Le bouton retirera la tige de la robinet. ÉCRAN DE BRÛLEUR COUVERCLE DE PORTE BOUTON ©2022 Hestan Commercial Corporation... - Page 13 FAIRE ATTENTION POUR ÉVITER D'ENDOMMAGER LE CORDON. REBORD RETIRER 2 VIS MOLETÉE RETIRER 4 BOULONS UTILISER UNE CLÉ DE 7/16po OU 10mm CADRE DÉCORATIF RESTE EN PLACE RETENUE DE PIERRE FOUR À PIZZA AVEC REBORD RETIRÉE ©2022 Hestan Commercial Corporation...
- Page 14 GLISSEZ AVEC PRÉCAUTION 5. Faites glisser ce support de pierre en tôle et mettez-le de côté. Cet assemblage contient des matériaux d’isolation à l’intérieur. Soyez prudent lors de la manipulation. FAITES GLISSER LE SUPPORT DES PIERRES ©2022 Hestan Commercial Corporation...
- Page 15 être retirés du four. DIFFUSEUR DE FLAMME GOUPILLE DE FIXATION DU BRÛLEUR SUR LA PAROI ARRIÈRE VIS DE FIXATION DU COFFRET DE TYPE CRUCIFORME VIS DE FIXATION DU BRÛLEUR SUR LES CÔTÉS DE TYPE TORX T-15 ©2022 Hestan Commercial Corporation...
- Page 16 NE PAS débrancher les plus gros tuyaux flexibles de gaz sur la robinet. L’ancien assemblage de la pilote peut être retiré du four. ROBINET DE GAZ THERMOCOUPLE PILOTE TUBE DE GAZ PILOTE ©2022 Hestan Commercial Corporation...
- Page 17 3. Le remontage est le processus inverse du démontage. Soyez prudent lorsque vous reconnectez les conduites de gaz comme mentionné ci-dessus. Passez à la section suivante (Convertir le Détendeur et Test de Fuite) avant de réinstaller les pierres à pizza et les structures de support. ©2022 Hestan Commercial Corporation...
- Page 18 BTU du brûleur. Le technicien doit également signer et dater l’étiquette. 3. Passez à la section suivante - TEST DE FUITE. ©2022 Hestan Commercial Corporation...
-
Page 19: Test De Fuite
Four à Pizza. • N’utilisez pas le Four à Pizza tant que toutes les connexions n’ont pas été vérifiées et ne fuient pas. (CONTINUE SUR LA PAGE SUIVANTE) (CONTINUE SUR LA PAGE SUIVANTE) ©2022 Hestan Commercial Corporation... - Page 20 être remplacé avant d’utiliser l’appareil. Le tuyau et le détendeur sont fournis comme un ensemble complet et doivent être remplacés ensemble. N’essayez pas de réparer ou de remplacer le tuyau lui-même. Contactez votre revendeur Hestan pour obtenir un détendeur de remplacement d’origine N de pièce 014309.
Need help?
Do you have a question about the Campania Pizza Oven AGCKPO-NG and is the answer not in the manual?
Questions and answers